Whether you’re a design pro or a total newbie, you’ll find a great tool in this list that will take your website skills to the next level.
WORDPRESS
Internal Linking for SEO: The Ultimate Guide of Best Practices
Are you looking for the best practices to maximize the SEO benefits of internal links?
Internal links play an important role in search engine optimization (SEO). They help search engines discover your content and rank them higher in search results.
In this article, we’ll list the best practices to use for internal linking for SEO.
How Does Internal Linking Improve SEO in WordPress?
Internal links are links between posts on your own website. Having internal links is important for your WordPress SEO. They help search engines like Google crawl your website and discover new content to index and rank.
Generally, the more links a page has pointing to it, the more likely it is to rank higher in search results. That means that you can use internal links to point to important pages on your site as a way to increase their traffic.
Internal links also help your visitors easily find related articles and provide a better user experience overall. This can also help increase pageviews and reduce your bounce rate.
That being said, let’s take a look at the best practices for improving SEO by adding internal links in WordPress. Since this is a comprehensive guide, we have included a table of contents for easier navigation.
- Make Internal Linking a Habit
- Monitor Your Internal Link Performance in WordPress
- Improve Your WordPress Site’s Internal Linking With a Plugin
- Display a List of Your Most Popular Posts in WordPress
- Create List Posts That Roundup Other Articles in WordPress
- Get Google Sitelinks for Your WordPress Site
- Preload Links in WordPress for Faster Loading Speeds
- Find and Fix Broken Links in WordPress
- Update Internal Link URLs When Moving a Site to a New Domain
- Use MediaWiki Syntax to Quickly Add Internal Links in WordPress
- Track Which Internal Links Are Clicked in WordPress
- Enable Breadcrumbs in WordPress or WooCommerce
1. Make Internal Linking a Habit
We recommend that you make a habit of linking to your older articles from your new articles.
It’s a great way to develop a contextual relationship between your new and old posts. It also allows you to pass relevant link juice to your older articles.
Because internal links play such an important role in SEO, we have even made it part of our pre-publish blog post checklist for WPBeginner writers.
You can also edit your older articles to add links to your newer content whenever you publish. Many successful bloggers dedicate time to adding internal links that point to new articles on a weekly or monthly basis.
This will help you boost your pageviews, increase the time users spend on your site, and ultimately will improve the SEO score of your individual blog posts and pages.
WordPress makes it easy to search for your old posts right inside the post editor. Simply select the text you want to link and click on the link button in the toolbar that appears.
A text pop-up will appear below your highlighted words. Then, you can start typing to search for the older articles you want to link to.

To learn more, see our beginner’s guide on how to add a link in WordPress.
2. Monitor Your Internal Link Performance in WordPress
It’s helpful to see your website’s SEO performance in terms of links by using a tool such as the Links Report in Google Search Console. This is a helpful starting point for working out how to improve internal linking on your site.
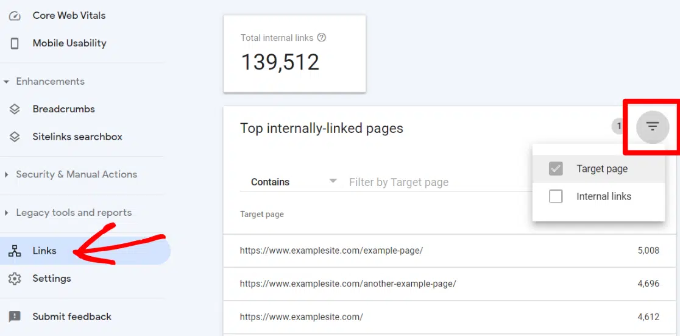
The Links Report will show you how many pages are linking to this page. You can compare it with other pages and see whether pages with more internal links are ranking higher than posts with many internal links.
If you find that posts with more links do rank higher, then you can go ahead and start adding internal links to pages that you want to rank higher. For the details, see our guide on using Google Search Console to effectively grow your website traffic.
Just make sure you are only linking to the article when it makes sense. Adding links where they don’t make sense creates a bad user experience.
Another way to monitor the impact of internal linking is to see which keywords are gaining or losing position. All in One SEO makes this extremely easy with the Search Statistics feature.
Once you connect the plugin with Google Search Console, All in One SEO will fetch your Google Search Console data and present it under All in One SEO » Search Statistics.
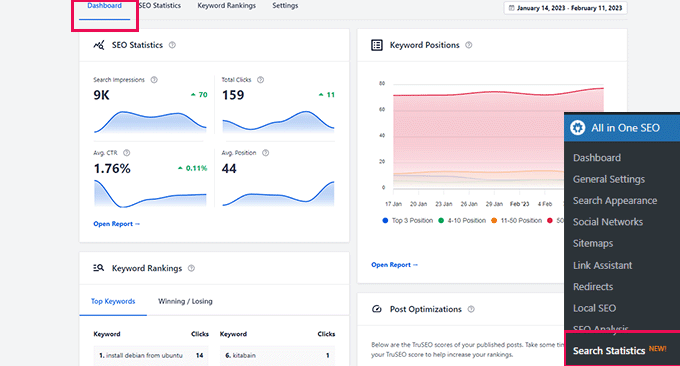
The keyword positions chart shows a graph of your site’s keyword positions.
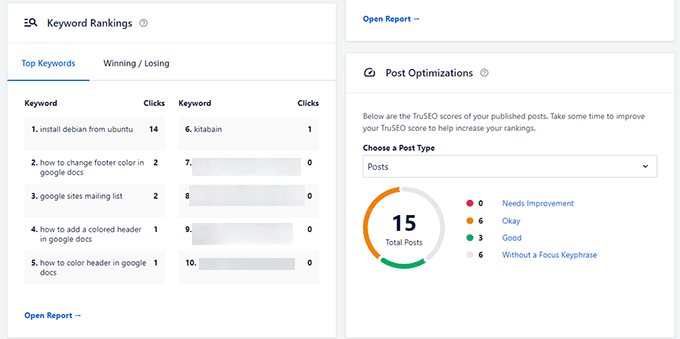
Below this, you’ll see the Keyword Rankings overview box. This shows your top 10 keywords, and if you use them for internal links they are very likely to be clicked.
3. Improve Your WordPress Site’s Internal Linking With a Plugin
If you’re not sure which posts you want to link to, then you will often find it faster to add internal links in WordPress using an internal linking plugin.
We recommend using All in One SEO. It includes a unique Link Assistant feature that lets you add links to your old and new content without having to open up the post. Plus, it provides link recommendations, detailed link reports, and much more.
To set up the plugin, see our guide on how to set up All in One SEO for WordPress correctly. After that, simply navigate to All in One SEO » Link Assistant in your WordPress dashboard.
Link Assistant will crawl every link on your website and then show a comprehensive list report.
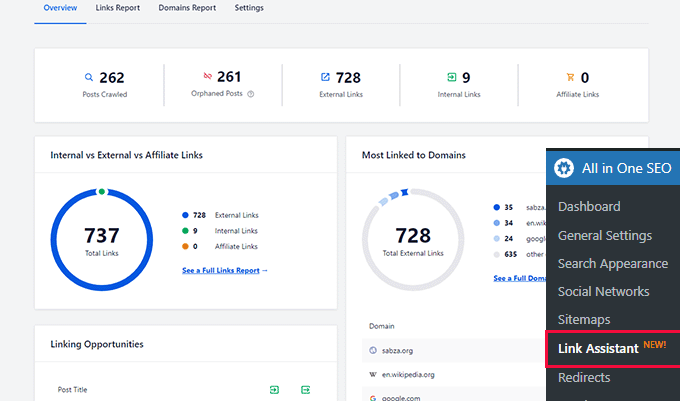
The report will show you an overview of the links with total counts for internal, external, and affiliate links. It will also show you the number of orphaned posts that have not yet been linked to from another post or page.
You can switch to the Links Report tab for detailed information on all your links. Here you’ll see a list of all your posts and pages with columns for internal, external, and affiliate links.
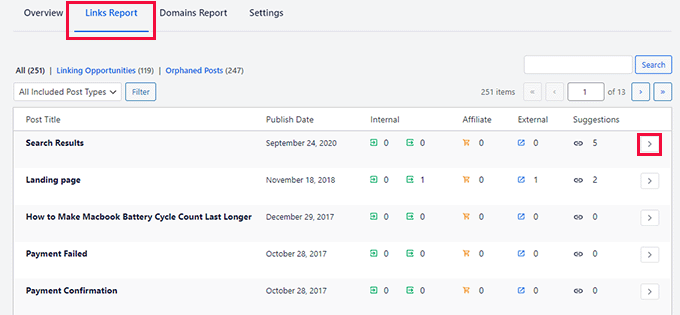
It will also show a number of suggestions where you can add links.
For more details, you can click on the right arrow button next to a post or page. This will show all links organized in different tabs. From the suggestions tab, you can quickly view link suggestions and add links without directly editing a post or page.
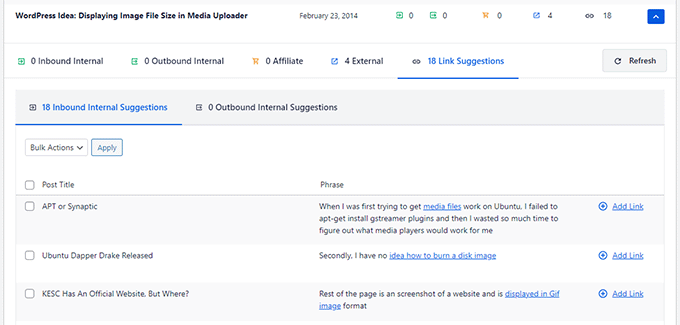
Link Assistant also helps you discover more internal linking opportunities.
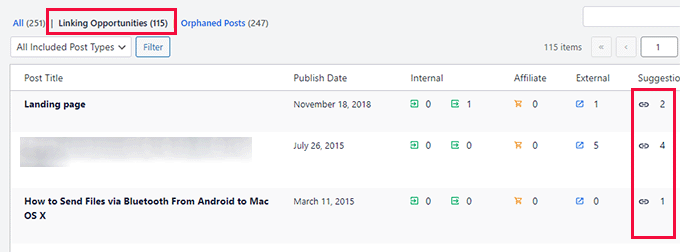
You can switch to the ‘Linking Opportunities’ tab to see suggestions about how to improve the internal linking on your website, and also see the list of orphaned posts so you can add links to them.
Another plugin useful for internal linking is Semrush SEO Writing Assistant because it can help you keep track of links inside your article.
For example, it lets you know when your article has too many or too few internal links and also suggests ways you can improve your links.
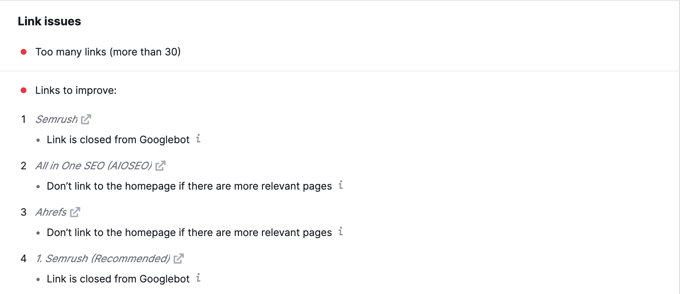
This tool also comes in handy if you have other authors working on articles. Editors can quickly see if the article includes internal links to other posts on your website.
We show you how to use this plugin step-by-step to improve your SEO in our guide on how to use the SEO Writing Assistant in WordPress.
4. Display a List of Your Most Popular Posts in WordPress
You can use a WordPress popular posts plugin to point users toward the articles that other users have already found helpful. These plugins automatically create a list of internal links to your most popular content.
Popular posts are usually your most successful content, which means they are more likely to increase user engagement, conversions, and sales. They are also a good opportunity for internal linking to your other less popular articles.
For example, MonsterInsights has a feature that allows you to show your popular articles anywhere on your WordPress site. You can use also use inline popular posts to show articles inside your content.

If you want to show articles in the sidebar or at the end of your content, then you can select the Popular Post Widget. MonsterInsights even lets you display your top-performing products anywhere on your eCommerce store.
You can learn more in our guide on how to display popular posts in WordPress.
5. Create List Posts That Roundup Other Articles in WordPress
Another way to increase the number of internal links on your WordPress blog is to create roundups of your existing content. You do this by creating a new post that mentions your best articles on a certain subject to give a detailed overview of the topic.
In fact, you’re reading a post like that now.
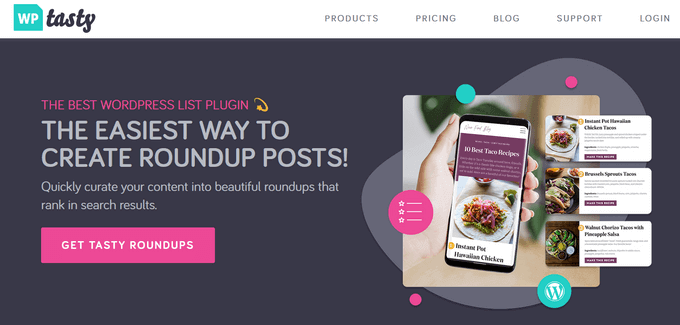
Luckily, there are some plugins that make this job easy. For example, WP Tasty Roundups allows you to quickly repurpose your existing content into beautiful roundup posts that rank in search results.
All you need to do is type one or two keywords into the built-in search functionality, and the plugin will automatically pull images, titles, descriptions, and links from relevant posts into your roundup list.
6. Get Google Sitelinks for Your WordPress Site
Sitelinks are a feature on Google search engine results pages (SERPs) where additional sub-pages appear under a website in the search results.
These are often internal links to the most popular pages of that website.
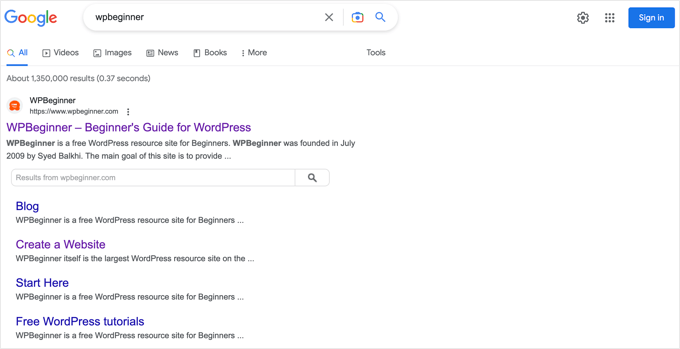
The top 3 spots on Google get the most clicks. When sitelinks are shown for a website, it takes up the same amount of space as three regular search listings.
Having this much screen space dedicated to your site significantly increases your overall click-through rate. Simply put, more visitors will visit your website from the keyword.
While there is no guaranteed way to get Google to show sitelinks for your website, it certainly helps to create lots of internal links to your most important posts and pages.
You can learn more in our guide on how to get Google sitelinks for your WordPress site.
7. Preload Links in WordPress for Faster Loading Speeds
Link preloading is a browser technology that will load links in the background before a site visitor clicks them. This makes your website seem faster, which can improve SEO.
Because loading speed is one of the top indicators for search engine rankings and user engagement, when your internal pages are preloaded, your visitors are more likely to stay on your website longer.
They are more likely to view more pages because they’re loading instantly.
The easiest way to preload links is by using the Flying Pages plugin. It simply adds intelligent preloading to make sure preloading won’t crash your site or even slow it down.

We show you how to set up the plugin step-by-step in our guide on how to preload links in WordPress for faster loading speeds.
8. Find and Fix Broken Links in WordPress
Broken links are bad for your website’s SEO. Search engine crawlers find new content on your website by following internal links, so a broken link can stop them from indexing a new post.
They also negatively impact user experience because broken links will return a 404 error. If a visitor clicks on a link and is unable to find a page they’re looking for, then they may leave.
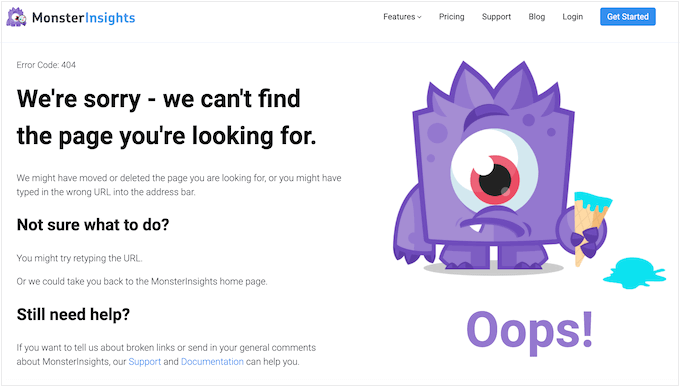
You can easily find and fix broken links on your WordPress website using All in One SEO.
AIOSEO offers a powerful redirection manager that helps track 404 errors on your website and lets you set up permanent 301 redirects to fix broken links.
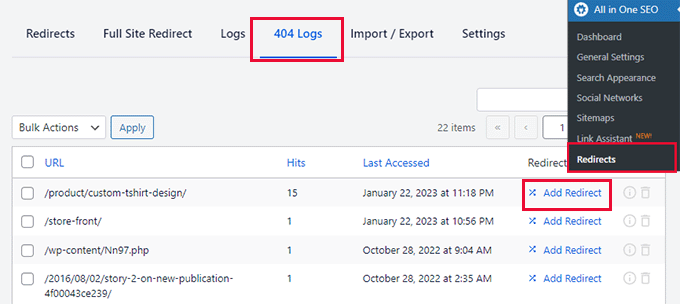
To learn more, see our detailed guide on how to find and fix broken links in WordPress.
9. Update Internal Link URLs When Moving a Site to a New Domain
If you ever move your WordPress site to a new domain name, then it is important to update all internal link URLs. Otherwise, you will have lots of broken links.
You should start by changing the WordPress address and site URL by visiting the Settings » General page from your WordPress dashboard.
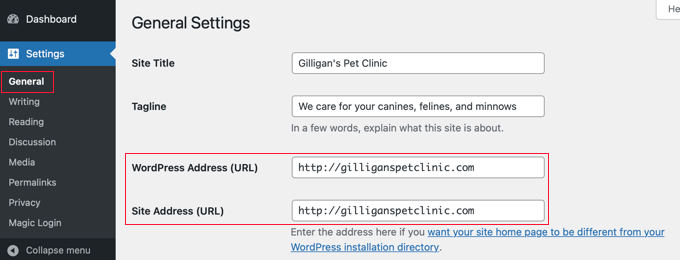
But you will also need to change the URLs of every internal link added to your posts and pages.
You’ll find the simplest way to do this in our step-by-step guide on how to easily update URLs when moving your WordPress site.
10. Use MediaWiki Syntax to Quickly Add Internal Links to WordPress
If you want to make internal linking a habit, then it helps to use the most efficient method. Since WordPress 6.0, WordPress has supported standard MediaWiki syntax to quickly add internal links when creating or editing a post.
You can now quickly add links by adding two square brackets followed by the post title. The animated gif below shows you how easy this feature is to use inside WordPress.

The link will automatically add the correct URL to the post, and use the post title as an anchor link.
If you know the title of a post (or even just part of it), then using the double square bracket method is the fastest way of creating an internal link.
11. Track Which Internal Links Are Clicked in WordPress
One of the best ways to uncover how users interact with your website is to track which internal links your visitors are clicking. Tools such as MonsterInsights can help you see which internal links your visitors are the most interested in.
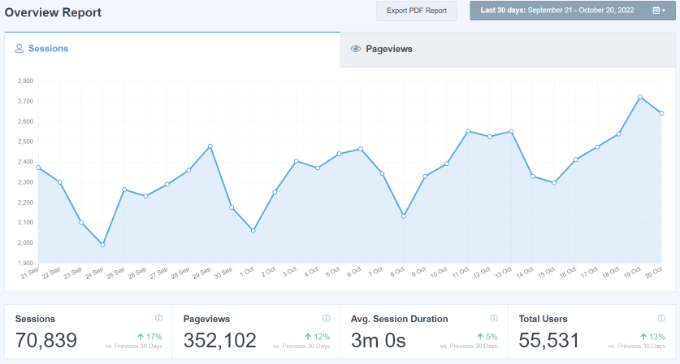
You can then use these insights to improve the way you add internal links to your posts and pages.
We offer detailed instructions on tracking different types of links in our guide on how to track link clicks and button clicks in WordPress.
You might also like to see our guide on how to track user engagement in WordPress.
12. Enable Breadcrumbs in WordPress or WooCommerce
Breadcrumb navigation is a term used to describe a hierarchical navigation menu presented as a trail of links.
It’s often used as a secondary navigation that allows users to go up in the website’s hierarchy of pages.
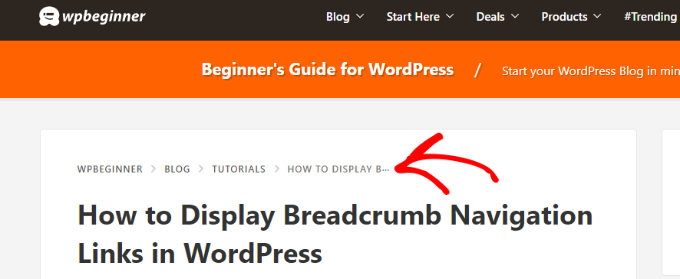
Breadcrumbs are great for internal linking because they define a clean path or trail to the page you are on.
These breadcrumbs also appear in search results giving your site an extra advantage in rankings.

We cover two ways to add breadcrumbs in our guide on how to display breadcrumb navigation links in WordPress. Most users will find Method 1 easier, using All in One SEO.
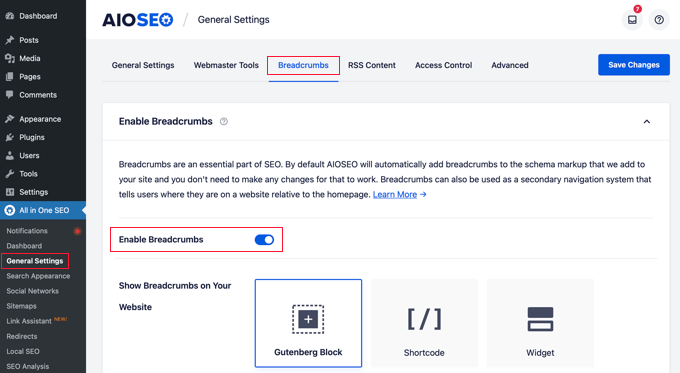
You can also use All in One SEO to enable breadcrumbs for your WooCommerce products. For details, see the fifth tip in our guide on WooCommerce SEO made easy.
We hope this tutorial helped you learn how the best internal linking practices for SEO. You may also want to see our ultimate WordPress security guide, or check out our list of tips on how to increase your blog traffic.
If you liked this article, then please subscribe to our YouTube Channel for WordPress video tutorials. You can also find us on Twitter and Facebook.
WORDPRESS
10 Amazing WordPress Design Resouces – WordPress.com News
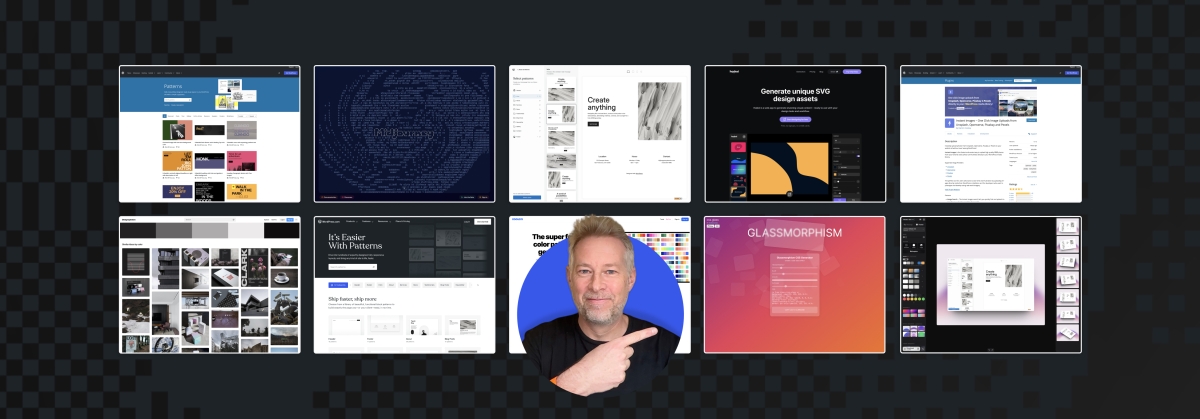
Designing a beautiful website from scratch can be difficult for developers of all skill levels. Luckily, in today’s Build and Beyond video, Jamie Marsland reveals his ten favorite WordPress design tools and websites to elevate your next build.
Get inspiration for your next website’s design and then start building with WordPress.com. Ready to get going? Click below to embark on your free trial today:
Here are the sites and resources mentioned in the video:
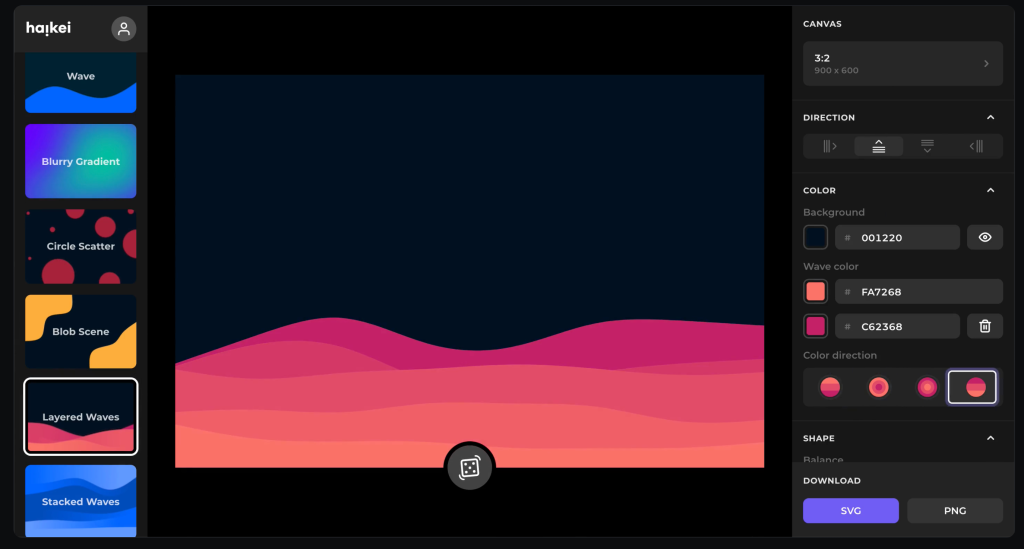
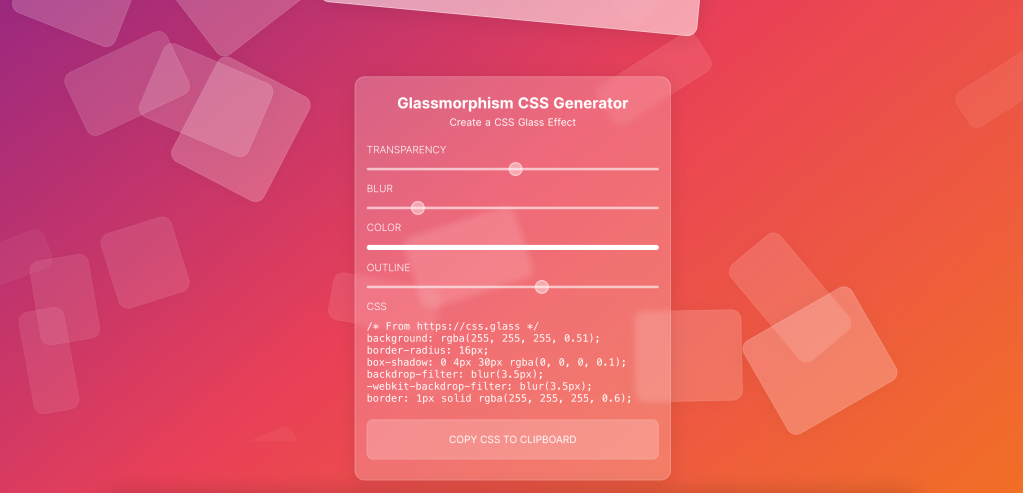
Heikei
Stunning backgrounds and visuals
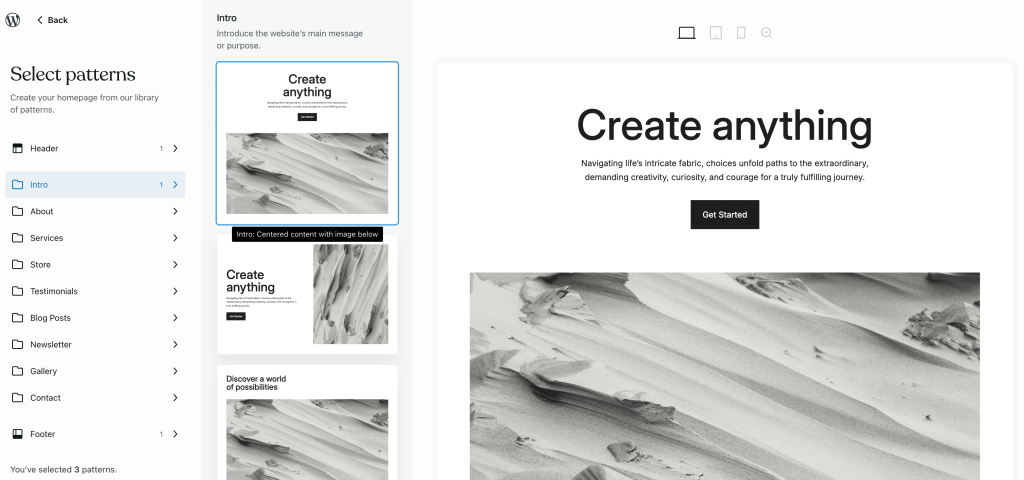

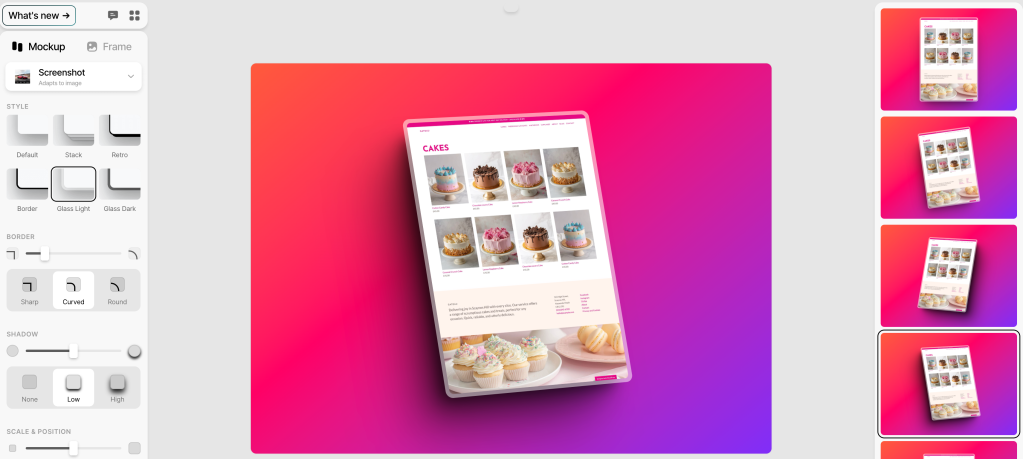
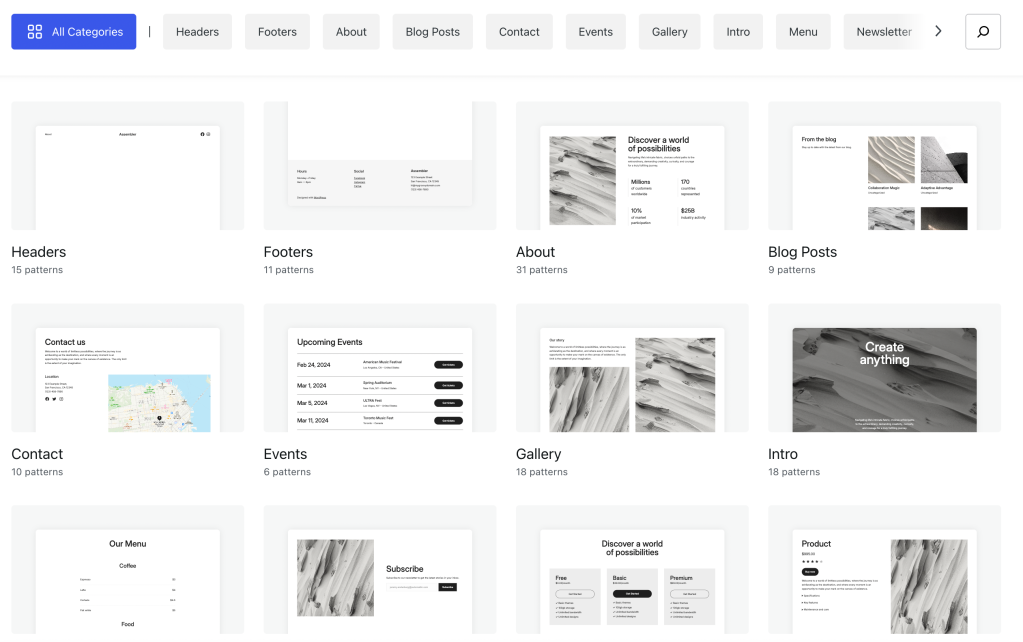
Shots
Easy mockups for products and thumbnails
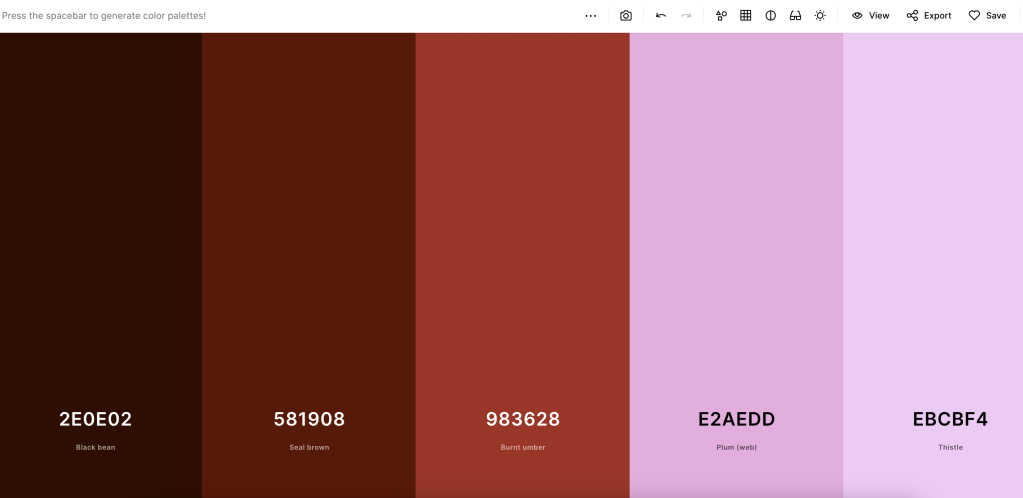
Coolors
Generate color palettes with a click


Join 110.1M other subscribers
WORDPRESS
[GET] The7 Website And Ecommerce Builder For WordPress
The7 website and ecommerce builder for wordpress is the most customizable WordPress, Elementor, and WooCommerce theme available on the market up to …
Source link
WORDPRESS
Making 43% of the Web More Dynamic with the WordPress Interactivity API – WordPress.com News

Creating rich, engaging, and interactive website experiences is a simple way to surprise, delight, and attract attention from website readers and users. Dynamic interactivity like instant search, form handling, and client-side “app-like” navigation where elements can persist across routes, all without a full page reload, can make the web a more efficient and interesting place for all.
But creating those experiences on WordPress hasn’t always been the easiest or most straightforward, often requiring complex JavaScript framework setup and maintenance.
Now, with the Interactivity API, WordPress developers have a standardized way for doing that, all built directly into core.
The Interactivity API started as an experimental plugin in early 2022, became an official proposal in March 2023, and was finally merged into WordPress core with the release of WordPress 6.5 on April 2, 2024. It provides an easier, standardized way for WordPress developers to create rich, interactive user experiences with their blocks on the front-end.
ELI5: The Interactivity API and the Image Block
Several core WordPress blocks, including the Query Loop, Image, and Search blocks, have already adopted the Interactivity API. The Image block, in particular, is a great way to show off the Interactivity API in action.
At its core, the Image blocks allow you to add an image to a post or page. When a user clicks on an image in a post or page, the Interactivity API launches a lightbox showing a high-resolution version of the image.
The rendering of the Image block is handled server-side. The client-side interactivity, handling resizing and opening the lightbox, is now done with the new API that comes bundled with WordPress. You can bind the client-side interactivity simply by adding the wp-on--click directive to the image element, referencing the showLightbox action in view.js.
You might say, “But I could easily do this with some JavaScript!” With the Interactivity API, the code is compact and declarative, and you get the context (local state) to handle the lightbox, resizing, side effects, and all of the other needed work here in the store object.
actions: {
			showLightbox() {
				const ctx = getContext();

				// Bails out if the image has not loaded yet.
				if ( ! ctx.imageRef?.complete ) {
					return;
				}

				// Stores the positons of the scroll to fix it until the overlay is
				// closed.
				state.scrollTopReset = document.documentElement.scrollTop;
				state.scrollLeftReset = document.documentElement.scrollLeft;

				// Moves the information of the expaned image to the state.
				ctx.currentSrc = ctx.imageRef.currentSrc;
				imageRef = ctx.imageRef;
				buttonRef = ctx.buttonRef;
				state.currentImage = ctx;
				state.overlayEnabled = true;

				// Computes the styles of the overlay for the animation.
				callbacks.setOverlayStyles();
			},
...
The lower-level implementation details, like keeping the server and client side in sync, just work; developers no longer need to account for them.
This functionality is possible using vanilla JavaScript, by selecting the element via a query selector, reading data attributes, and manipulating the DOM. But it’s far less elegant, and up until now, there hasn’t been a standardized way in WordPress of handling interactive events like these.
With the Interactivity API, developers have a predictable way to provide interactivity to users on the front-end. You don’t have to worry about lower-level code for adding interactivity; it’s there in WordPress for you to start using today. Batteries are included.
How is the Interactivity API different from Alpine, React, or Vue?
Prior to merging the Interactivity API into WordPress core, developers would typically reach for a JavaScript framework to add dynamic features to the user-facing parts of their websites. This approach worked just fine, so why was there a need to standardize it?
At its core, the Interactivity API is a lightweight JavaScript library that standardizes the way developers can build interactive HTML elements on WordPress sites.
Mario Santos, a developer on the WordPress core team, wrote in the Interactivity API proposal that, “With a standard, WordPress can absorb the maximum amount of complexity from the developer because it will handle most of what’s needed to create an interactive block.”
The team saw that the gap between what’s possible and what’s practical grew as sites became more complex. The more complex a user experience developers wanted to build, the more blocks needed to interact with each other, and the more difficult it became to build and maintain sites. Developers would spend a lot of time making sure that the client-side and server-side code played nicely together.
For a large open-source project with several contributors, having an agreed-upon standard and native way of providing client-side interactivity speeds up development and greatly improves the developer experience.
Five goals shaped the core development team’s decisions as they built the API:
- Block-first and PHP-first: Prioritizing blocks for building sites and server side rendering for better SEO and performance. Combining the best for user and developer experience.
- Backward-compatible: Ensuring compatibility with both classic and block themes and optionally with other JavaScript frameworks, though it’s advised to use the API as the primary method. It also works with hooks and internationalization.
- Declarative and reactive: Using declarative code to define interactions, listening for changes in data, and updating only relevant parts of the DOM accordingly.
- Performant: Optimizing runtime performance to deliver a fast and lightweight user experience.
- Send less JavaScript: Reduce the overall amount of JavaScript being sent on the page by providing a common framework that blocks can reuse. So the more that blocks leverage the Interactivity API, the less JavaScript will be sent overall.
Other goals are on the horizon, including improvements to client-side navigation, as you can see in this PR.
Interactivity API vs. Alpine
The Interactivity API shares a few similarities to Alpine—a lightweight JavaScript library that allows developers to build interactions into their web projects, often used in WordPress and Laravel projects.
Similar to Alpine, the Interactivity API uses directives directly in HTML and both play nicely with PHP. Unlike Alpine, the Interactivity API is designed to seamlessly integrate with WordPress and support server-side rendering of its directives.
With the interactivity API, you can easily generate the view from the server in PHP, and then add client-side interactivity. This results in less duplication, and its support in WordPress core will lead to less architectural decisions currently required by developers.
So while Alpine and the Interactivity API share a broadly similar goal—making it easy for web developers to add interactive elements to a webpage—the Interactivity API is even more plug-and-play for WordPress developers.
Interactivity API vs. React and Vue
Many developers have opted for React when adding interactivity to WordPress sites because, in the modern web development stack, React is the go-to solution for declaratively handling DOM interactivity. This is familiar territory, and we’re used to using React and JSX when adding custom blocks for Gutenberg.
Loading React on the client side can be done, but it leaves you with many decisions: “How should I handle routing? How do I work with the context between PHP and React? What about server-side rendering?”
Part of the goal in developing the Interactivity API was the need to write as little as little JavaScript as possible, leaving the heavy lifting to PHP, and only shipping JavaScript when necessary.
The core team also saw issues with how these frameworks worked in conjunction with WordPress. Developers can use JavaScript frameworks like React and Vue to render a block on the front-end that they server-rendered in PHP, for example, but this requires logic duplication and risks exposure to issues with WordPress hooks.
For these reasons, among others, the core team preferred Preact—a smaller UI framework that requires less JavaScript to download and execute without sacrificing performance. Think of it like React with fewer calories.
Luis Herranz, a WordPress Core contributor from Automattic, outlines more details on Alpine vs the Interactivity API’s usage of Preact with a thin layer of directives on top of it in this comment on the original proposal.
Preact only loads if the page source contains an interactive block, meaning it is not loaded until it’s needed, aligning with the idea of shipping as little JavaScript as possible (and shipping no JavaScript as a default).
In the original Interactivity API proposal, you can see the run-down and comparison of several frameworks and why Preact was chosen over the others.
What does the new Interactivity API provide to WordPress developers?
In addition to providing a standardized way to render interactive elements client-side, the Interactivity API also provides developers with directives and a more straightforward way of creating a store object to handle state, side effects, and actions.
Directives
Directives, a special set of data attributes, allow you to extend HTML markup. You can share data between the server-side-rendered blocks and the client-side, bind values, add click events, and much more. The Interactivity API reference lists all the available directives.
These directives are typically added in the block’s render.php file, and they support all of the WordPress APIs, including actions, filters, and core translation APIs.
Here’s the render file of a sample block. Notice the click event (data-wp-on--click="actions.toggle"), and how we bind the value of the aria-expanded attributes via directives.
<div
	<?php echo get_block_wrapper_attributes(); ?>
	data-wp-interactive="create-block"
	<?php echo wp_interactivity_data_wp_context( array( 'isOpen' => false ) ); ?>
	data-wp-watch="callbacks.logIsOpen"
>
	<button
		data-wp-on--click="actions.toggle"
		data-wp-bind--aria-expanded="context.isOpen"
		aria-controls="<?php echo esc_attr( $unique_id ); ?>"
	>
		<?php esc_html_e( 'Toggle', 'my-interactive-block' ); ?>
	</button>

	<p
		id="<?php echo esc_attr( $unique_id ); ?>"
		data-wp-bind--hidden="!context.isOpen"
	>
		<?php
			esc_html_e( 'My Interactive Block - hello from an interactive block!', 'my-interactive-block' );
		?>
	</p>
</div>
Do you need to dynamically update an element’s inner text? The Interactivity API allows you to use data-wp-text on an element, just like you can use v-text in Vue.
You can bind a value to a boolean or string using wp-bind– or hook up a click event by using data-wp-on–click on the element. This means you can write PHP and HTML and sprinkle in directives to add interactivity in a declarative way.
Handling state, side effects, and actions
The second stage of adding interactivity is to create a store, which is usually done in your view.js file. In the store, you’ll have access to the same context as in your render.php file.
In the store object, you define actions responding to user interactions. These actions can update the local context or global state, which then re-renders and updates the connected HTML element. You can also define side effects/callbacks, which are similar to actions, but they respond to state changes instead of direct user actions.
import { store, getContext } from '@wordpress/interactivity';

store( 'create-block', {
	actions: {
		toggle: () => {
			const context = getContext();
			context.isOpen = ! context.isOpen;
		},
	},
	callbacks: {
		logIsOpen: () => {
			const { isOpen } = getContext();
			// Log the value of `isOpen` each time it changes.
			console.log( `Is open: ${ isOpen }` );
		},
	},
} );
Try it out for yourself
The Interactivity API is production-ready and already running on WordPress.com! With any WordPress.com plan, you’ll have access to the core blocks built on top of the Interactivity API.
If you want to build your own interactive blocks, you can scaffold an interactive block by running the below code in your terminal:
npx @wordpress/create-block@latest my-interactive-block --template @wordpress/create-block-interactive-template
This will give you an example interactive block, with directives and state handling set up.
You can then play around with this locally, using wp-env, using a staging site, or by uploading the plugin directly to your site running a plugin-eligible WordPress.com plan.
If you want a seamless experience between your local dev setup and your WordPress.com site, try using it with our new GitHub Deployments feature! Developing custom blocks is the perfect use case for this new tool.
The best way to learn something new is to start building. To kick things off, you may find the following resources a good starting point:
Join 106.9M other subscribers
-

 SEO7 days ago
Google Limits News Links In California Over Proposed ‘Link Tax’ Law
-

 SEARCHENGINES6 days ago
Google Core Update Volatility, Helpful Content Update Gone, Dangerous Google Search Results & Google Ads Confusion
-
SEARCHENGINES7 days ago
Daily Search Forum Recap: April 12, 2024
-

 SEO6 days ago
10 Paid Search & PPC Planning Best Practices
-

 MARKETING6 days ago
2 Ways to Take Back the Power in Your Business: Part 2
-

 MARKETING5 days ago
5 Psychological Tactics to Write Better Emails
-

 SEARCHENGINES5 days ago
Weekend Google Core Ranking Volatility
-

 PPC6 days ago
Critical Display Error in Brand Safety Metrics On Twitter/X Corrected


