Connect with us

SEO

The 6 Best AI Content Checkers To Use In 2024

Published

on

The 6 Best AI Content Checkers To Use In 2024

Today, many people see generative AI like ChatGPT, Gemini, and others as indispensable tools that streamline their day-to-day workflows and enhance their productivity.

However, with the proliferation of AI assistants comes an uptick in AI-generated content. AI content detectors can help you prioritize content quality and originality.

These tools can help you discern whether a piece of content was written by a human or AI – a task that’s becoming increasingly difficult – and this can help detect plagiarism, and ensure content is original, unique, and high-quality.

In this article, we’ll look at some of the top AI content checkers available in 2024. Let’s dive in.

The 6 Best AI Content Checkers

1. GPTZero

Screenshot from GPTZero.me, July 2024

Launched in 2022, GPTZero was “the first public open AI detector,” according to its website – and it’s a leading choice among the tools out there today.

GPTZero’s advanced detection model comprises seven different components, including an internet text search to identify whether the content already exists in internet archives, a burstiness analysis to see whether the style and tone reflect that of human writing, end-to-end deep learning, and more.

Its Deep Scan feature gives you a detailed report highlighting sentences likely created by AI and tells you why that is, and GPTZero also offers a user-friendly Detection Dashboard as a source of truth for all your reports.

The tool is straightforward, and the company works with partners and researchers from institutions like Princeton, Penn State, and OpenAI to provide top-tier research and benchmarking.

Cost:

  • The Basic plan is available for free. It includes up to 10,000 words per month.
  • The Essential plan starts at $10 per month, with up to 150,000 words, plagiarism detection, and advanced writing feedback.
  • The Premium plan starts at $16 per month and includes up to 300,000 words, everything in the Essential tier, as well as Deep Scan, AI detection in multiple languages, and downloadable reports.

2. Originality.ai
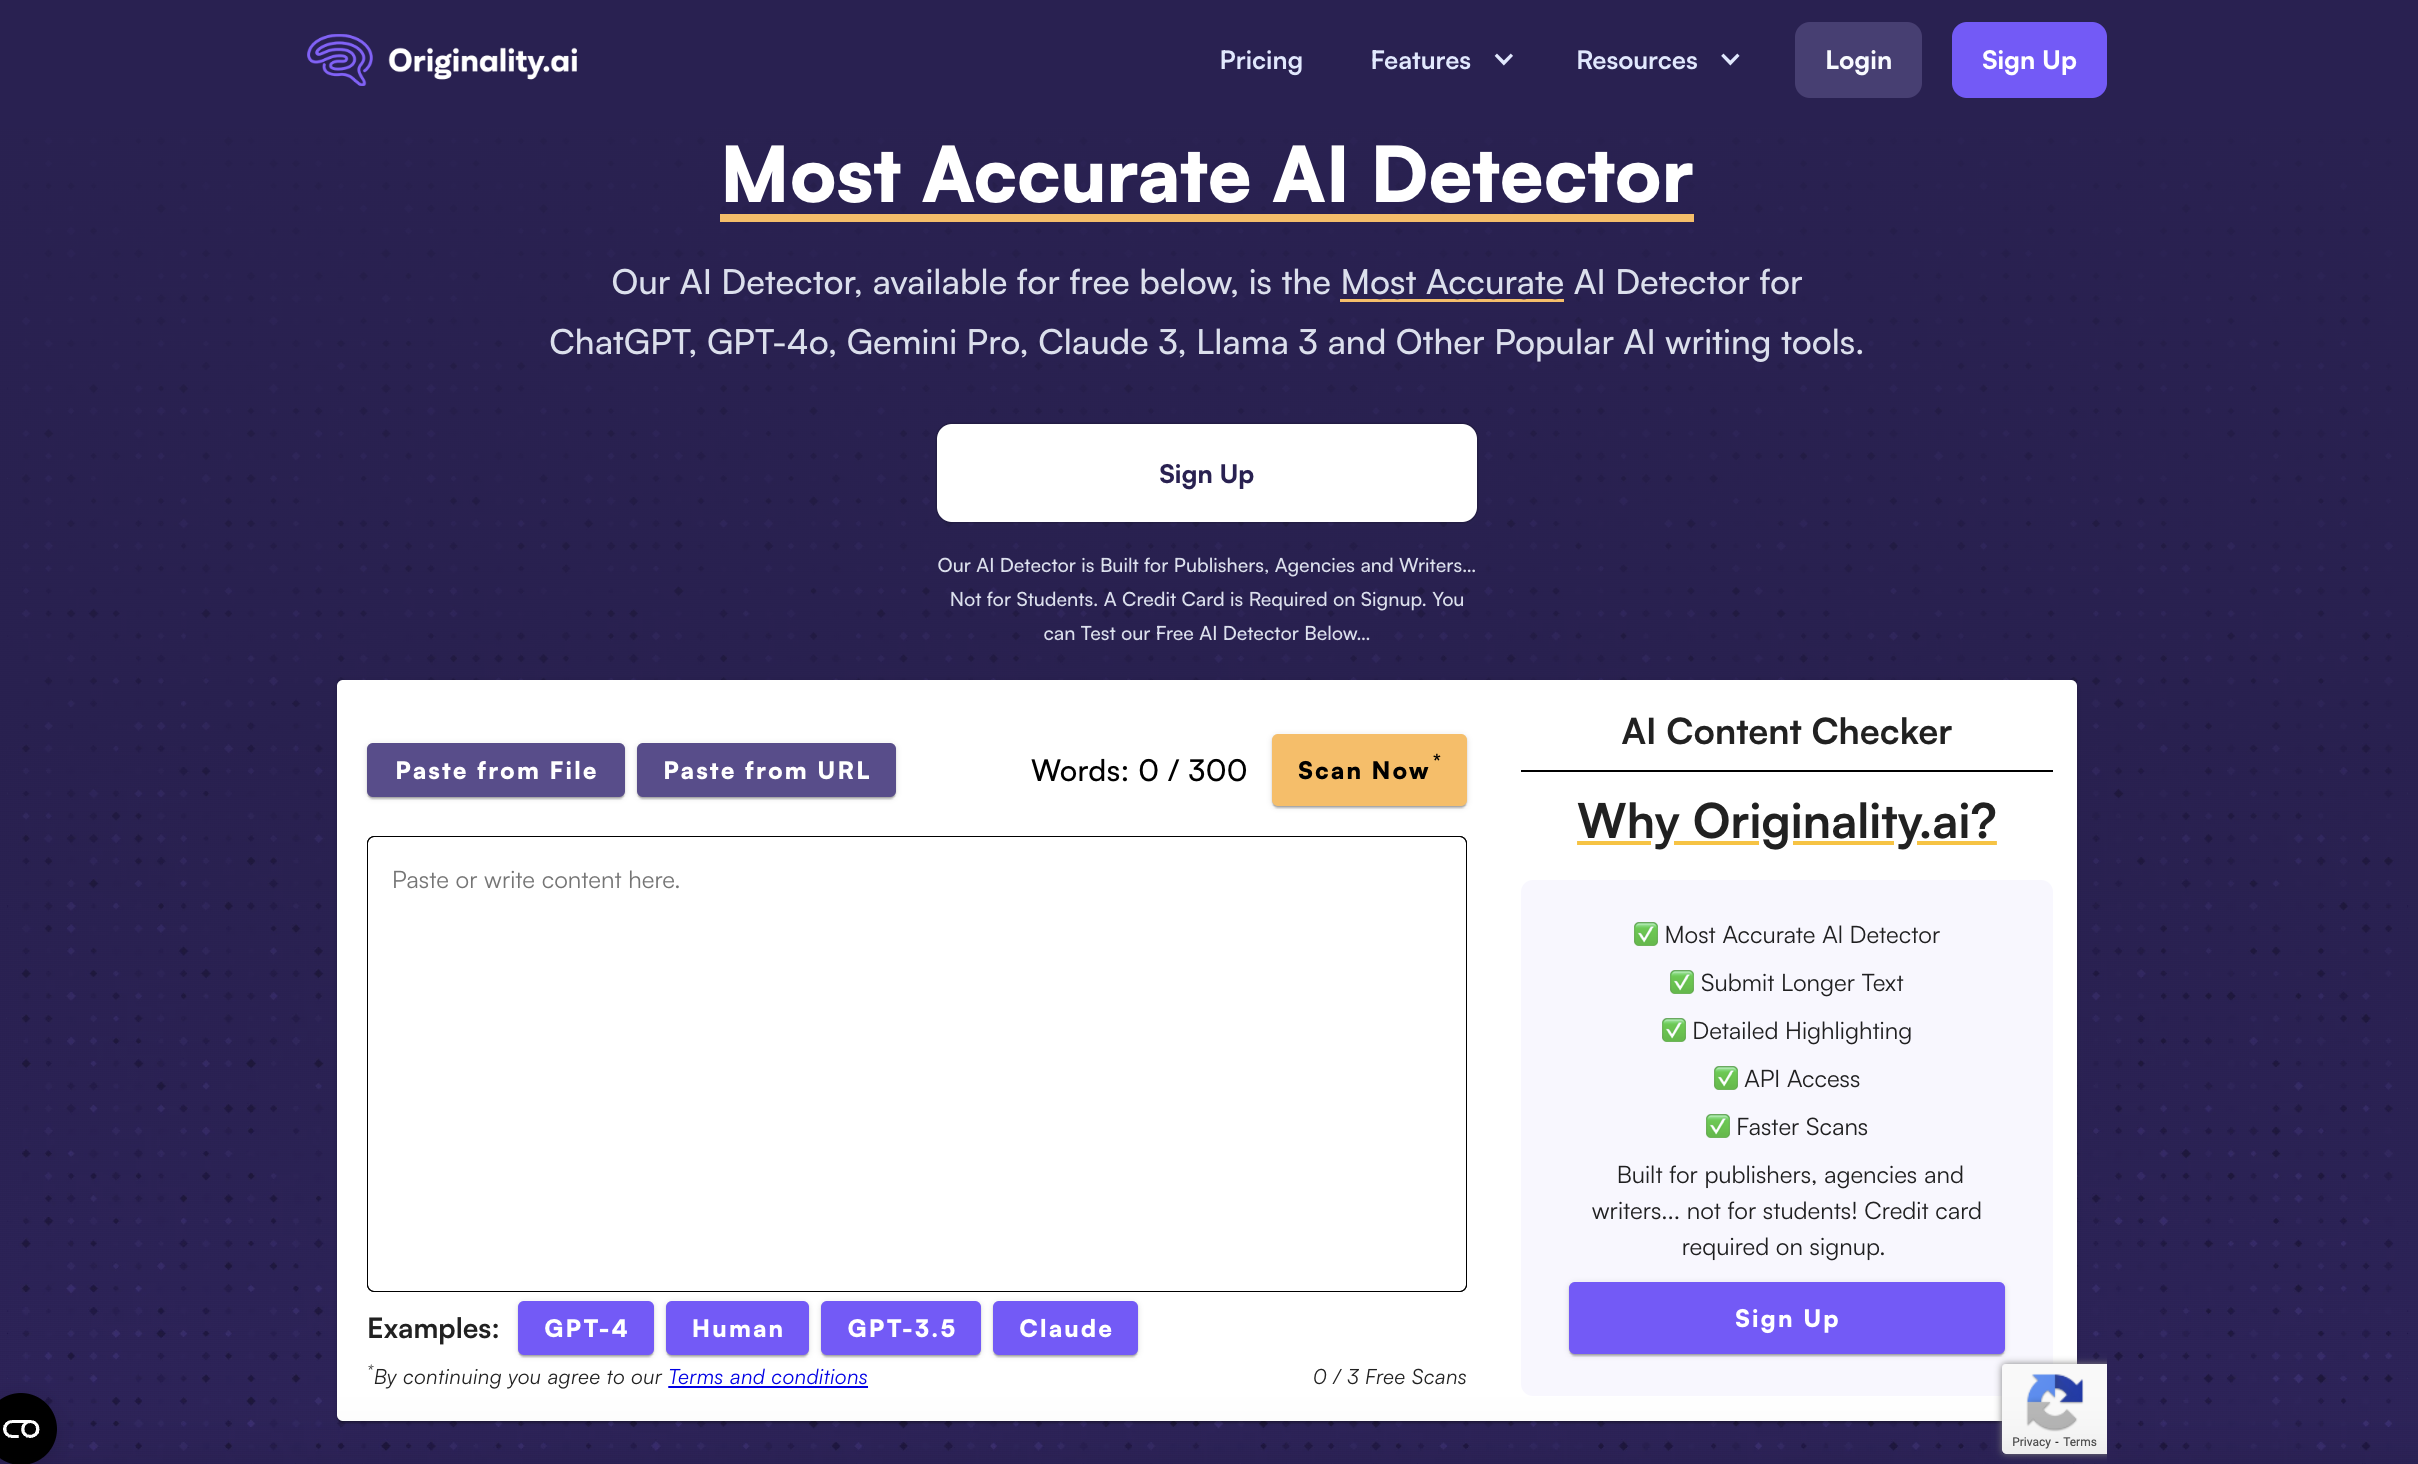
1723361162 608 The 6 Best AI Content Checkers To Use In 2024Screenshot from Originality.ai, July 2024

Originality.ai is designed to detect AI-generated content across various language models, including ChatGPT, GPT-4o, Gemini Pro, Claude 3, Llama 3, and others. It bills itself as the “most accurate AI detector,” and targets publishers, agencies, and writers – but not students.

The latter is relevant because, the company says, by leaving academia, research, and other historical text out of its scope, it’s able to better train its model to hone in on published content across the internet, print, etc.

Originality.ai works across multiple languages and offers a free Chrome extension and API integration. It also has a team that works around the clock, testing out new strategies to create AI content that tools can’t detect. Once it finds one, it trains the tool to sniff it out.

The tool is straightforward; users can just paste content directly into Originality.ai, or upload from a file or even a URL. It will then give you a report that flags AI-detected portions as well as the overall originality of the text. You get three free scans initially, with a 300-word limit.

Cost:

  • Pro membership starts at $12.45 per month and includes 2,000 credits, AI scans, shareable reports, plagiarism and readability scans, and more.
  • Enterprise membership starts at $179 per month and includes 15,000 credits per month, features in the Pro plan, as well as priority support, API, and a 365-day history of your scans.
  • Originality.ai also offers a “pay as you go” tier, which consists of a $30 one-time payment to access 3,000 credits and some of the more limited features listed above.

3. Copyleaks

1723361162 435 The 6 Best AI Content Checkers To Use In 2024Screenshot from Copyleaks.com, July 2024

While you’ve probably heard of Copyleaks as a plagiarism detection tool, what you might not know is that it also offers a comprehensive AI-checking solution.

The tool covers 30 languages and detects across AI models including ChatGPT, Gemini, and Claude – and it automatically updates when new language models are released.

According to Copyleaks, its AI detector “has over 99% overall accuracy and a 0.2% false positive rate, the lowest of any platform.”

It works by using its long history of data and learning to spot the pattern of human-generated writing – and thus, flag anything that doesn’t fit common patterns as potentially AI-generated.

Other notable features of Copyleaks’ AI content detector are the ability to detect AI-generated source code, spot content that might have been paraphrased by AI, as well as browser extension and API offerings.

Cost:

  • Users with a Copyleaks account can access a limited number of free scans daily.
  • Paid plans start at $7.99 per month for the AI Detector tool, including up to 1,200 credits, scanning in over 30 languages, two users, and API access.
  • You can also get access to an AI + Plagiarism Detection tier starting at $13.99 per month.

4. Winston AI
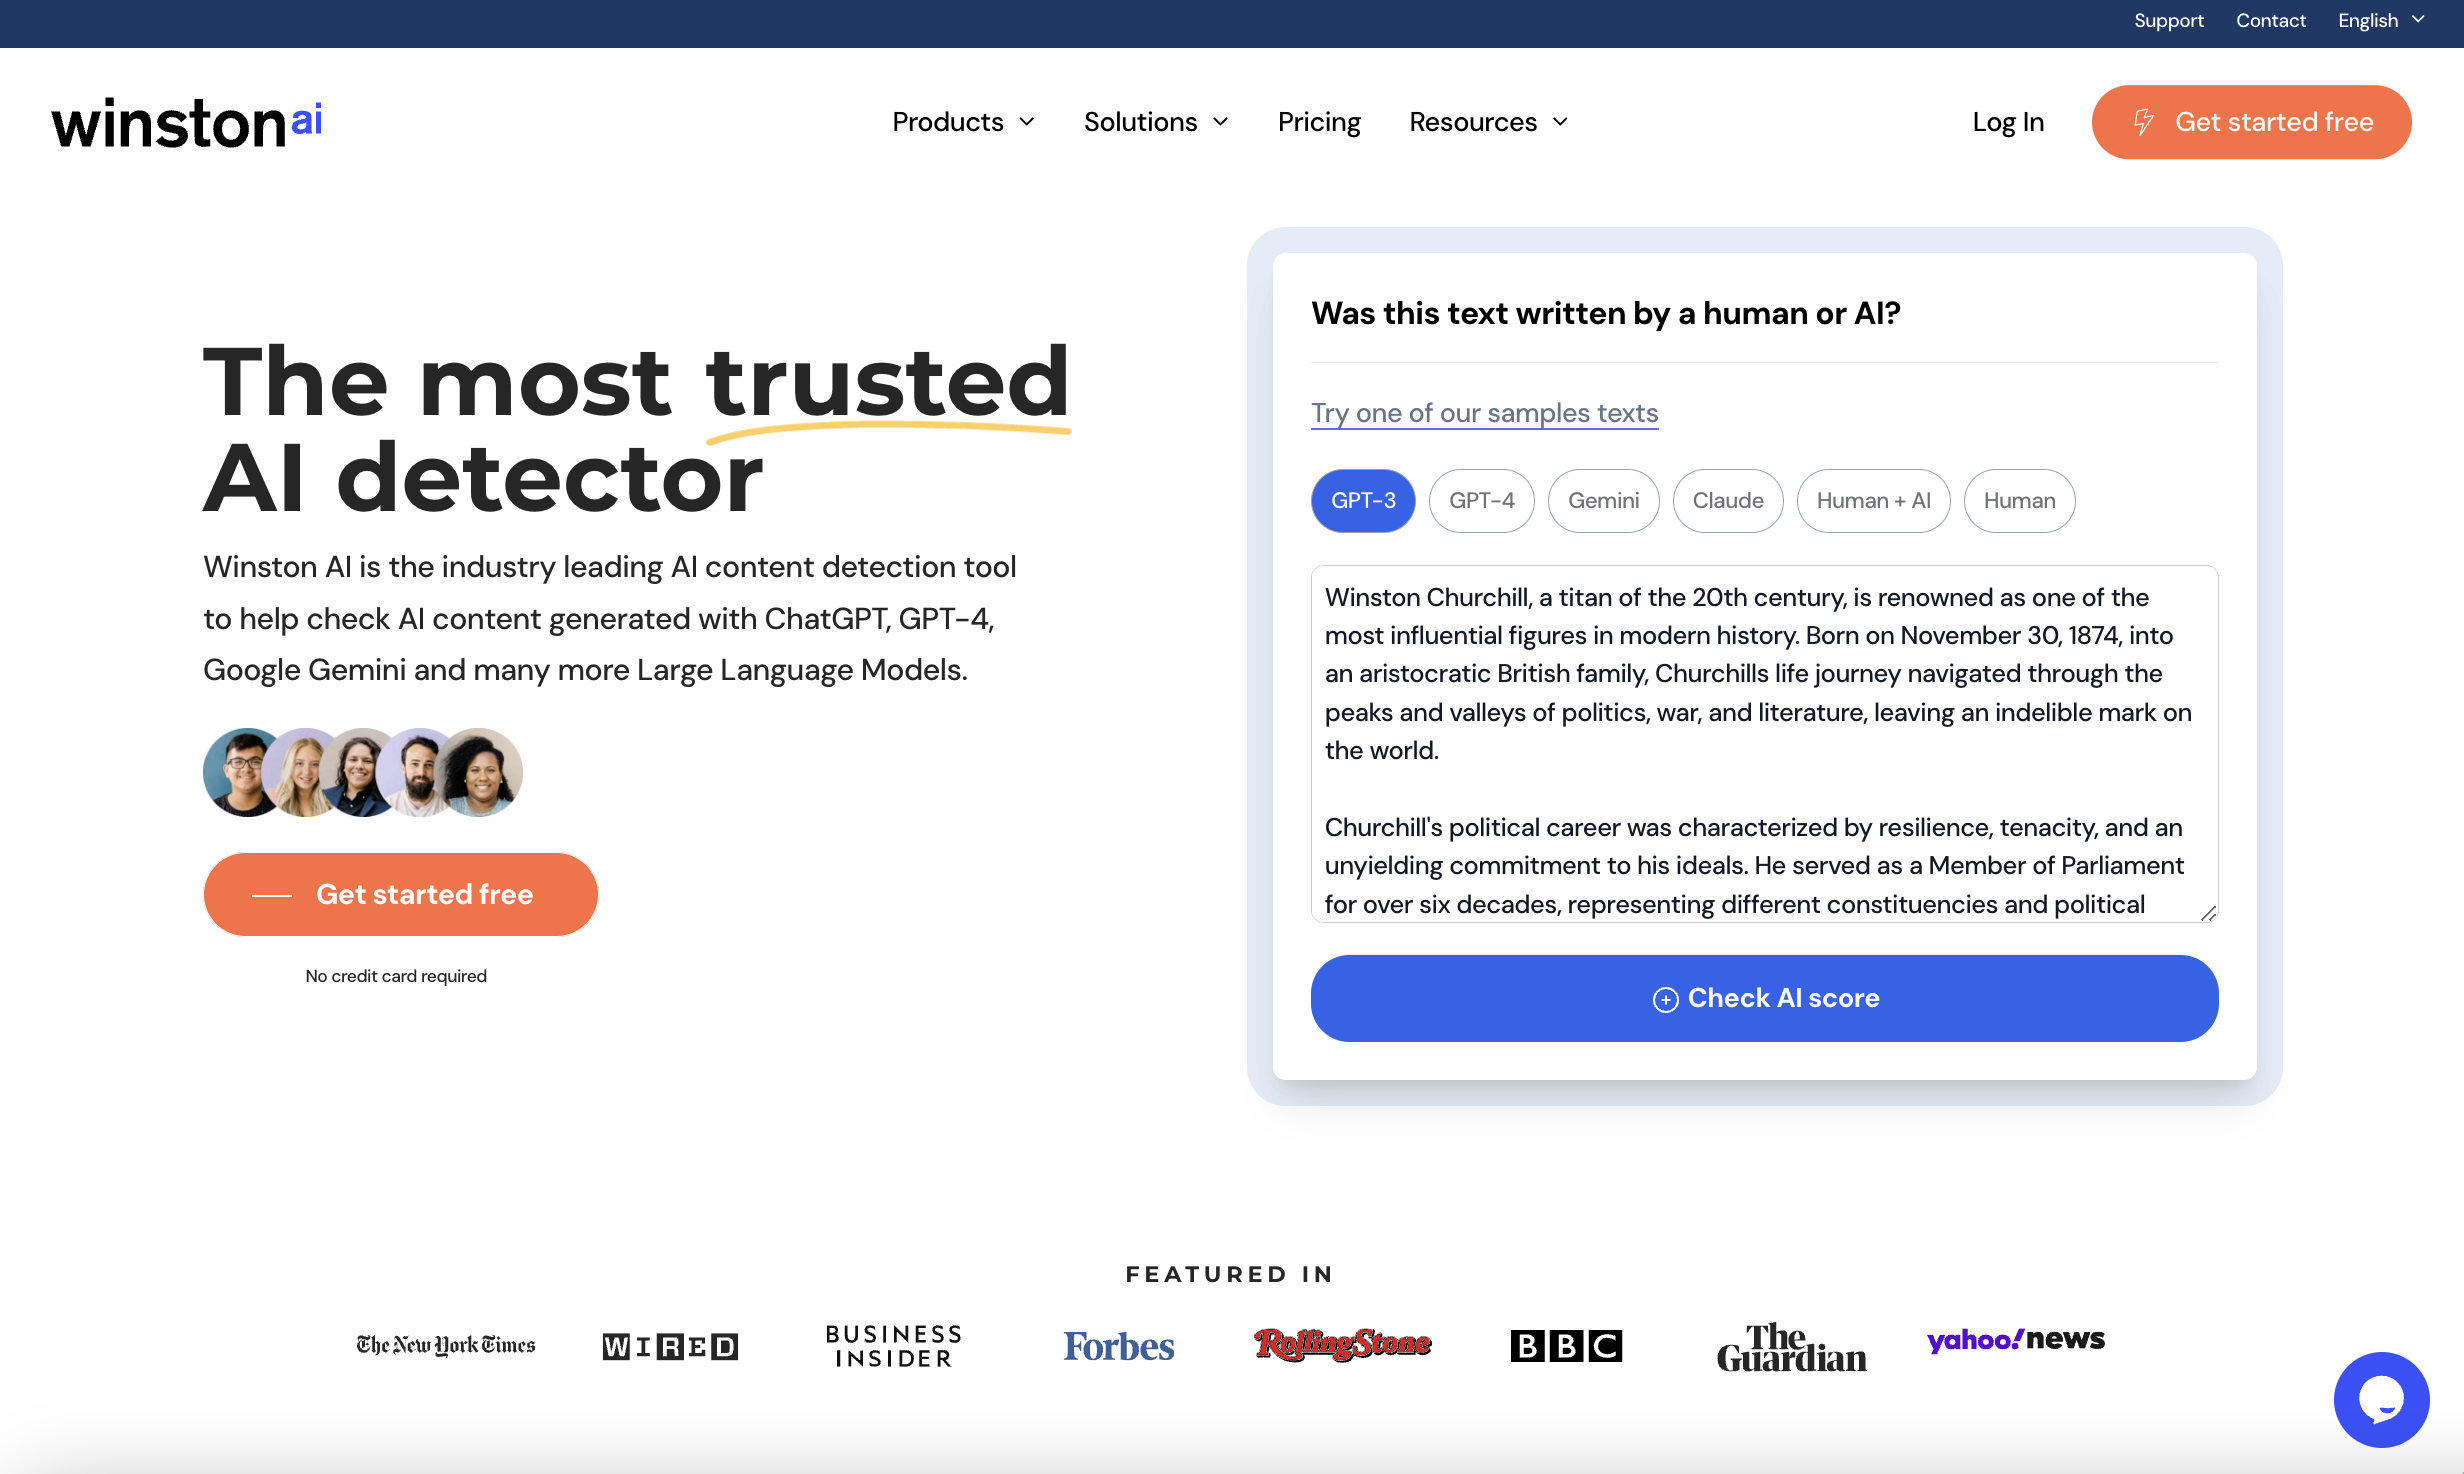
1723361162 141 The 6 Best AI Content Checkers To Use In 2024Screenshot from GoWinston.ai, July 2024

Another popular AI content detection tool, Winston AI calls itself “the most trusted AI detector,” and claims to be the only such tool with a 99.98% accuracy rate.

Winston AI is designed for users across the education, SEO, and writing industries, and it’s able to identify content generated by LLMs such as ChatGPT, GPT-4, Google Gemini, Claude, and more.

Using Winston AI is easy; paste or upload your documents into the tool, and it will scan the text (including text from scanned pictures or handwriting) and provide a printable report with your results.

Like other tools in this list, Winston AI offers multilingual support, high-grade security, and can also spot content that’s been paraphrased using tools like Quillbot.

One unique feature of Winston AI is its “AI Prediction Map,” a color-coded visualization that highlights which parts of your content sound inauthentic and may be flagged by AI detectors.

Cost

  • Free 7-day trial includes 2,000 credits, AI content checking, AI image and deepfake detection, and more.
  • Paid plans start at $12 per month for 80,000 credits, with additional advanced features based on your membership tier.

5. TraceGPT
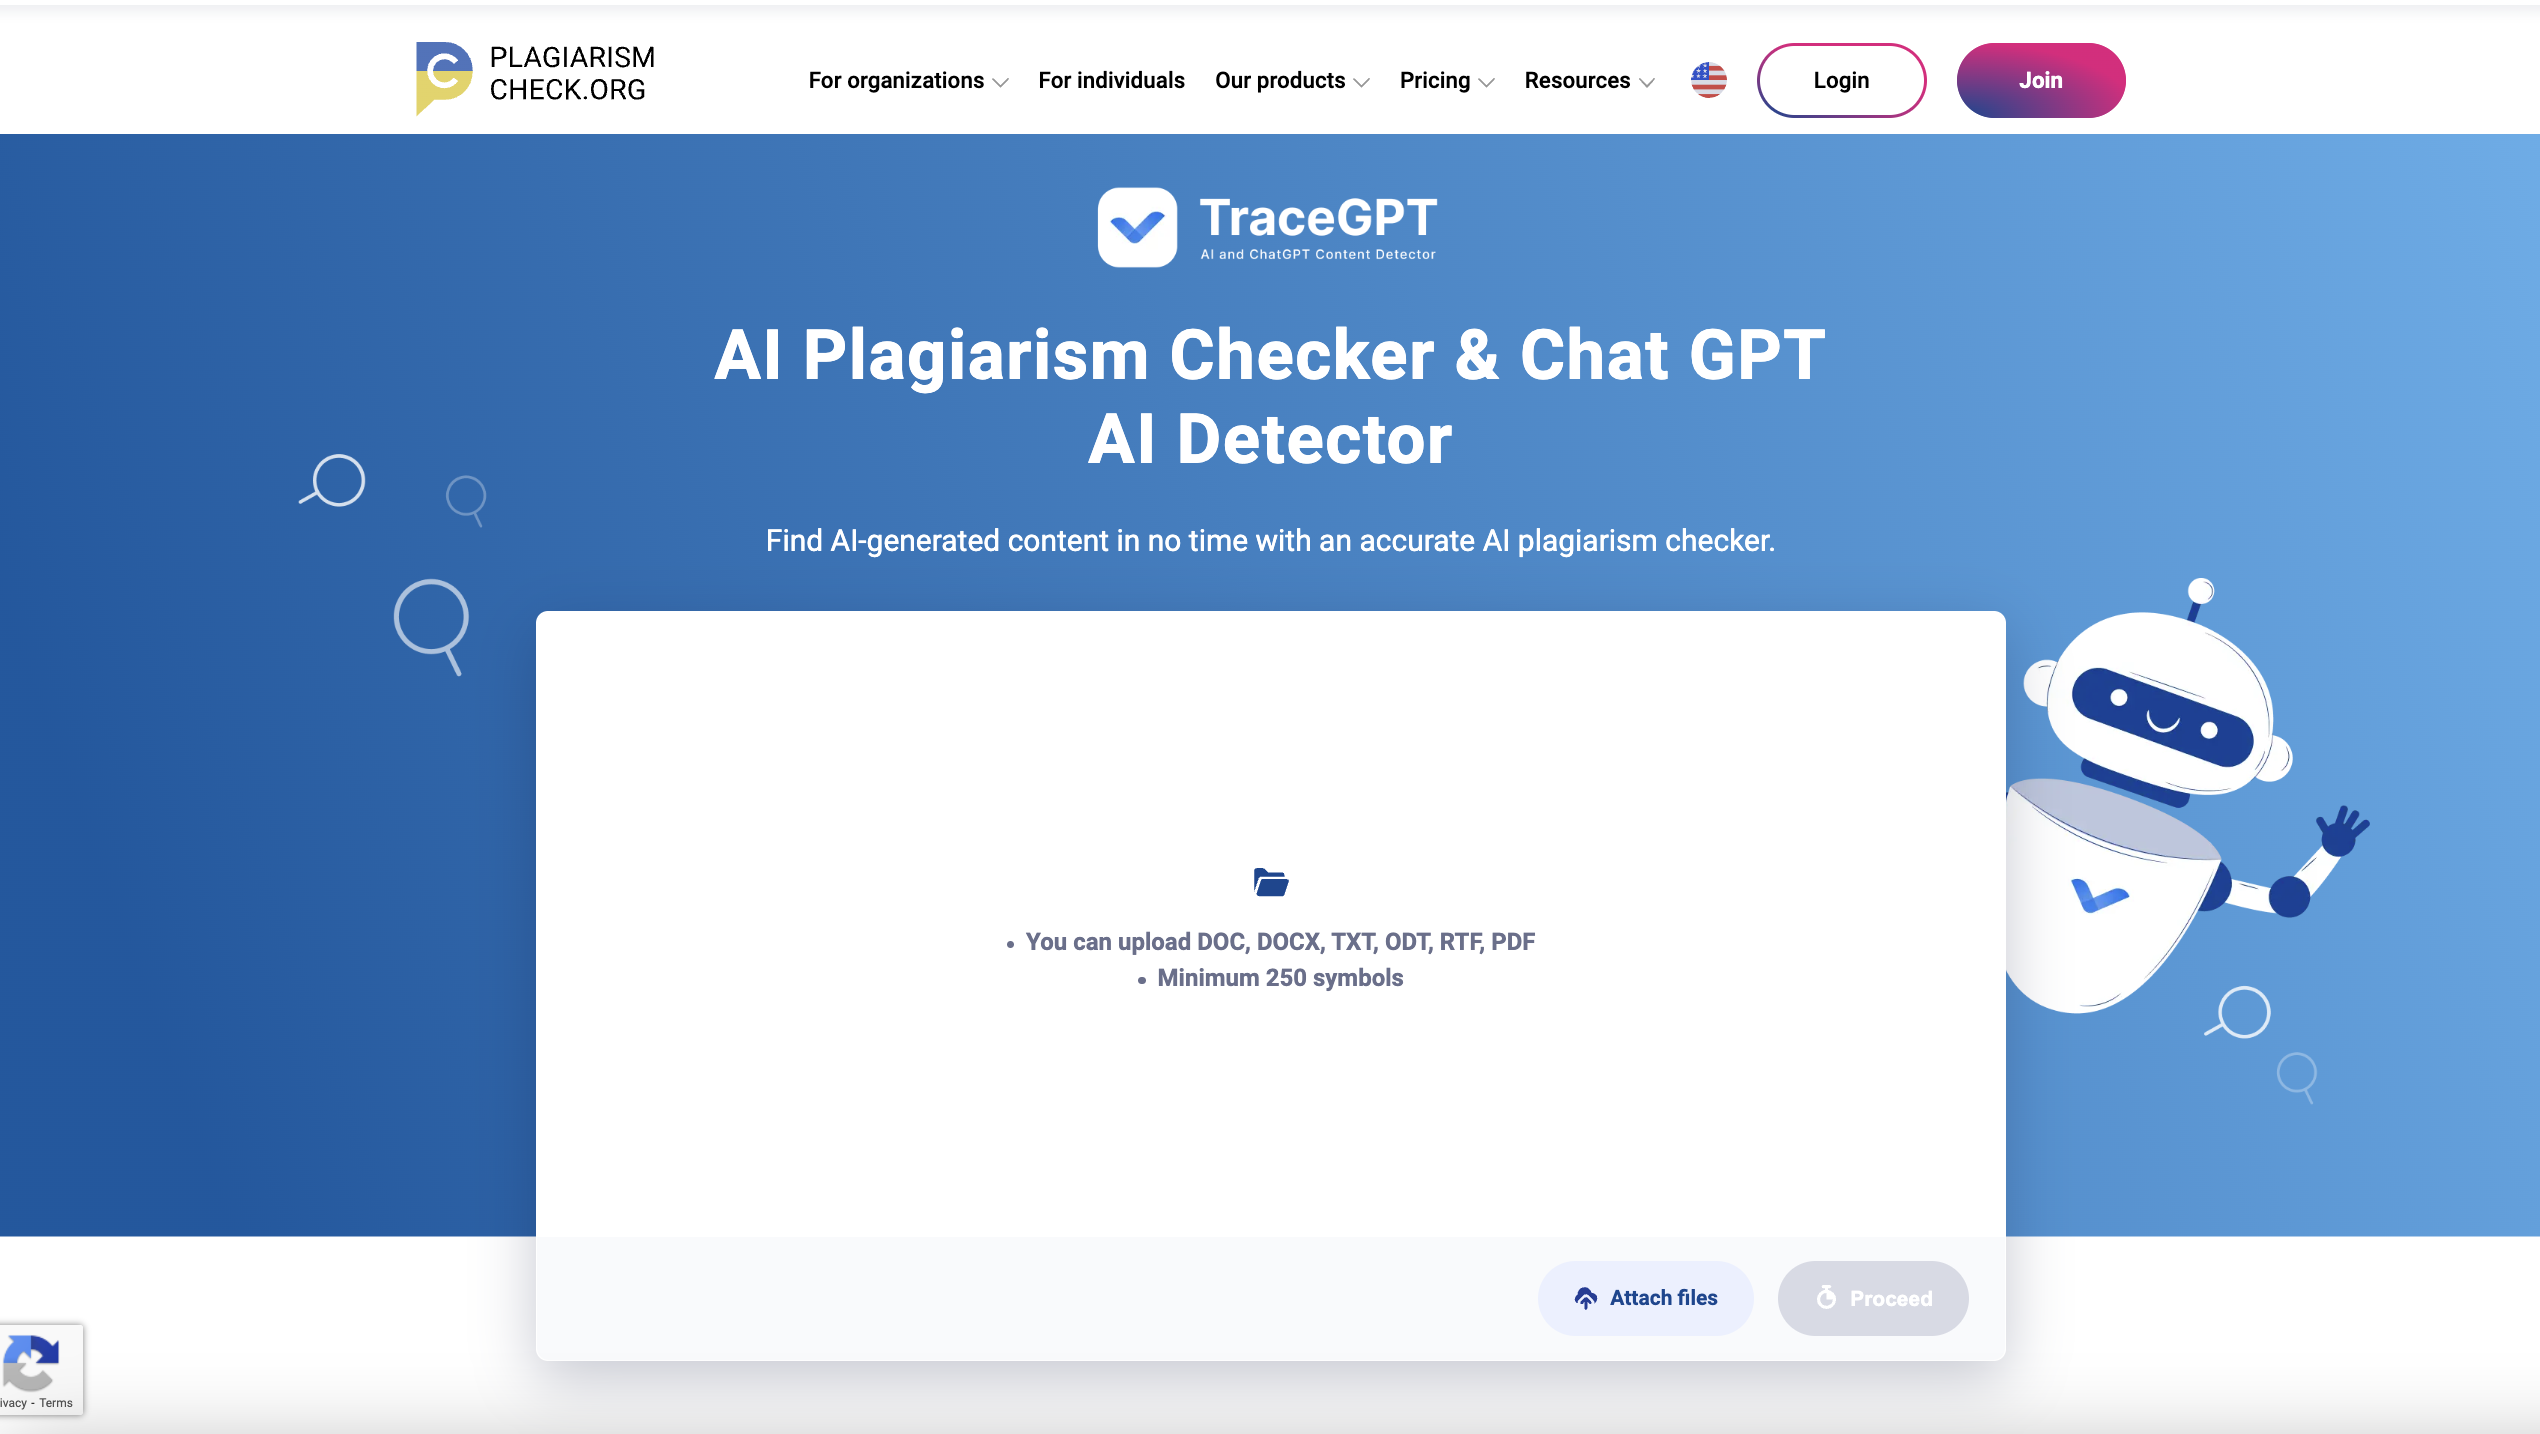
1723361162 837 The 6 Best AI Content Checkers To Use In 2024Screenshot from plagiarismcheck.org, July 2024

Looking for an extremely accurate AI content detector? Try TraceGPT by PlagiarismCheck.org.

It’s a user-friendly tool that allows you to upload files across a range of formats, including doc, docx, txt, odt, rtf, and pdf. Then, it leverages creativity/predictability ratios and other methods to scan your content for “AI-related breadcrumbs.”

Once it’s done, TraceGPT will provide results that show you what it has flagged as potential AI-generated text, tagging it as “likely” or “highly likely.”

As with many of the options here, TraceGPT offers support in several languages, as well as API and browser extension access. The tool claims to be beneficial for people in academia, SEO, and recruitment.

Cost

  • You can sign up to use TraceGPT and will be given limited free access.
  • Paid plans differ based on the type of membership; for businesses, they start at $69 for 1,000 pages, and for individuals, it starts at $5.99 for 20 pages. Paid plans also give you access to 24/7 support and a grammar checker.

6. Hive Moderation
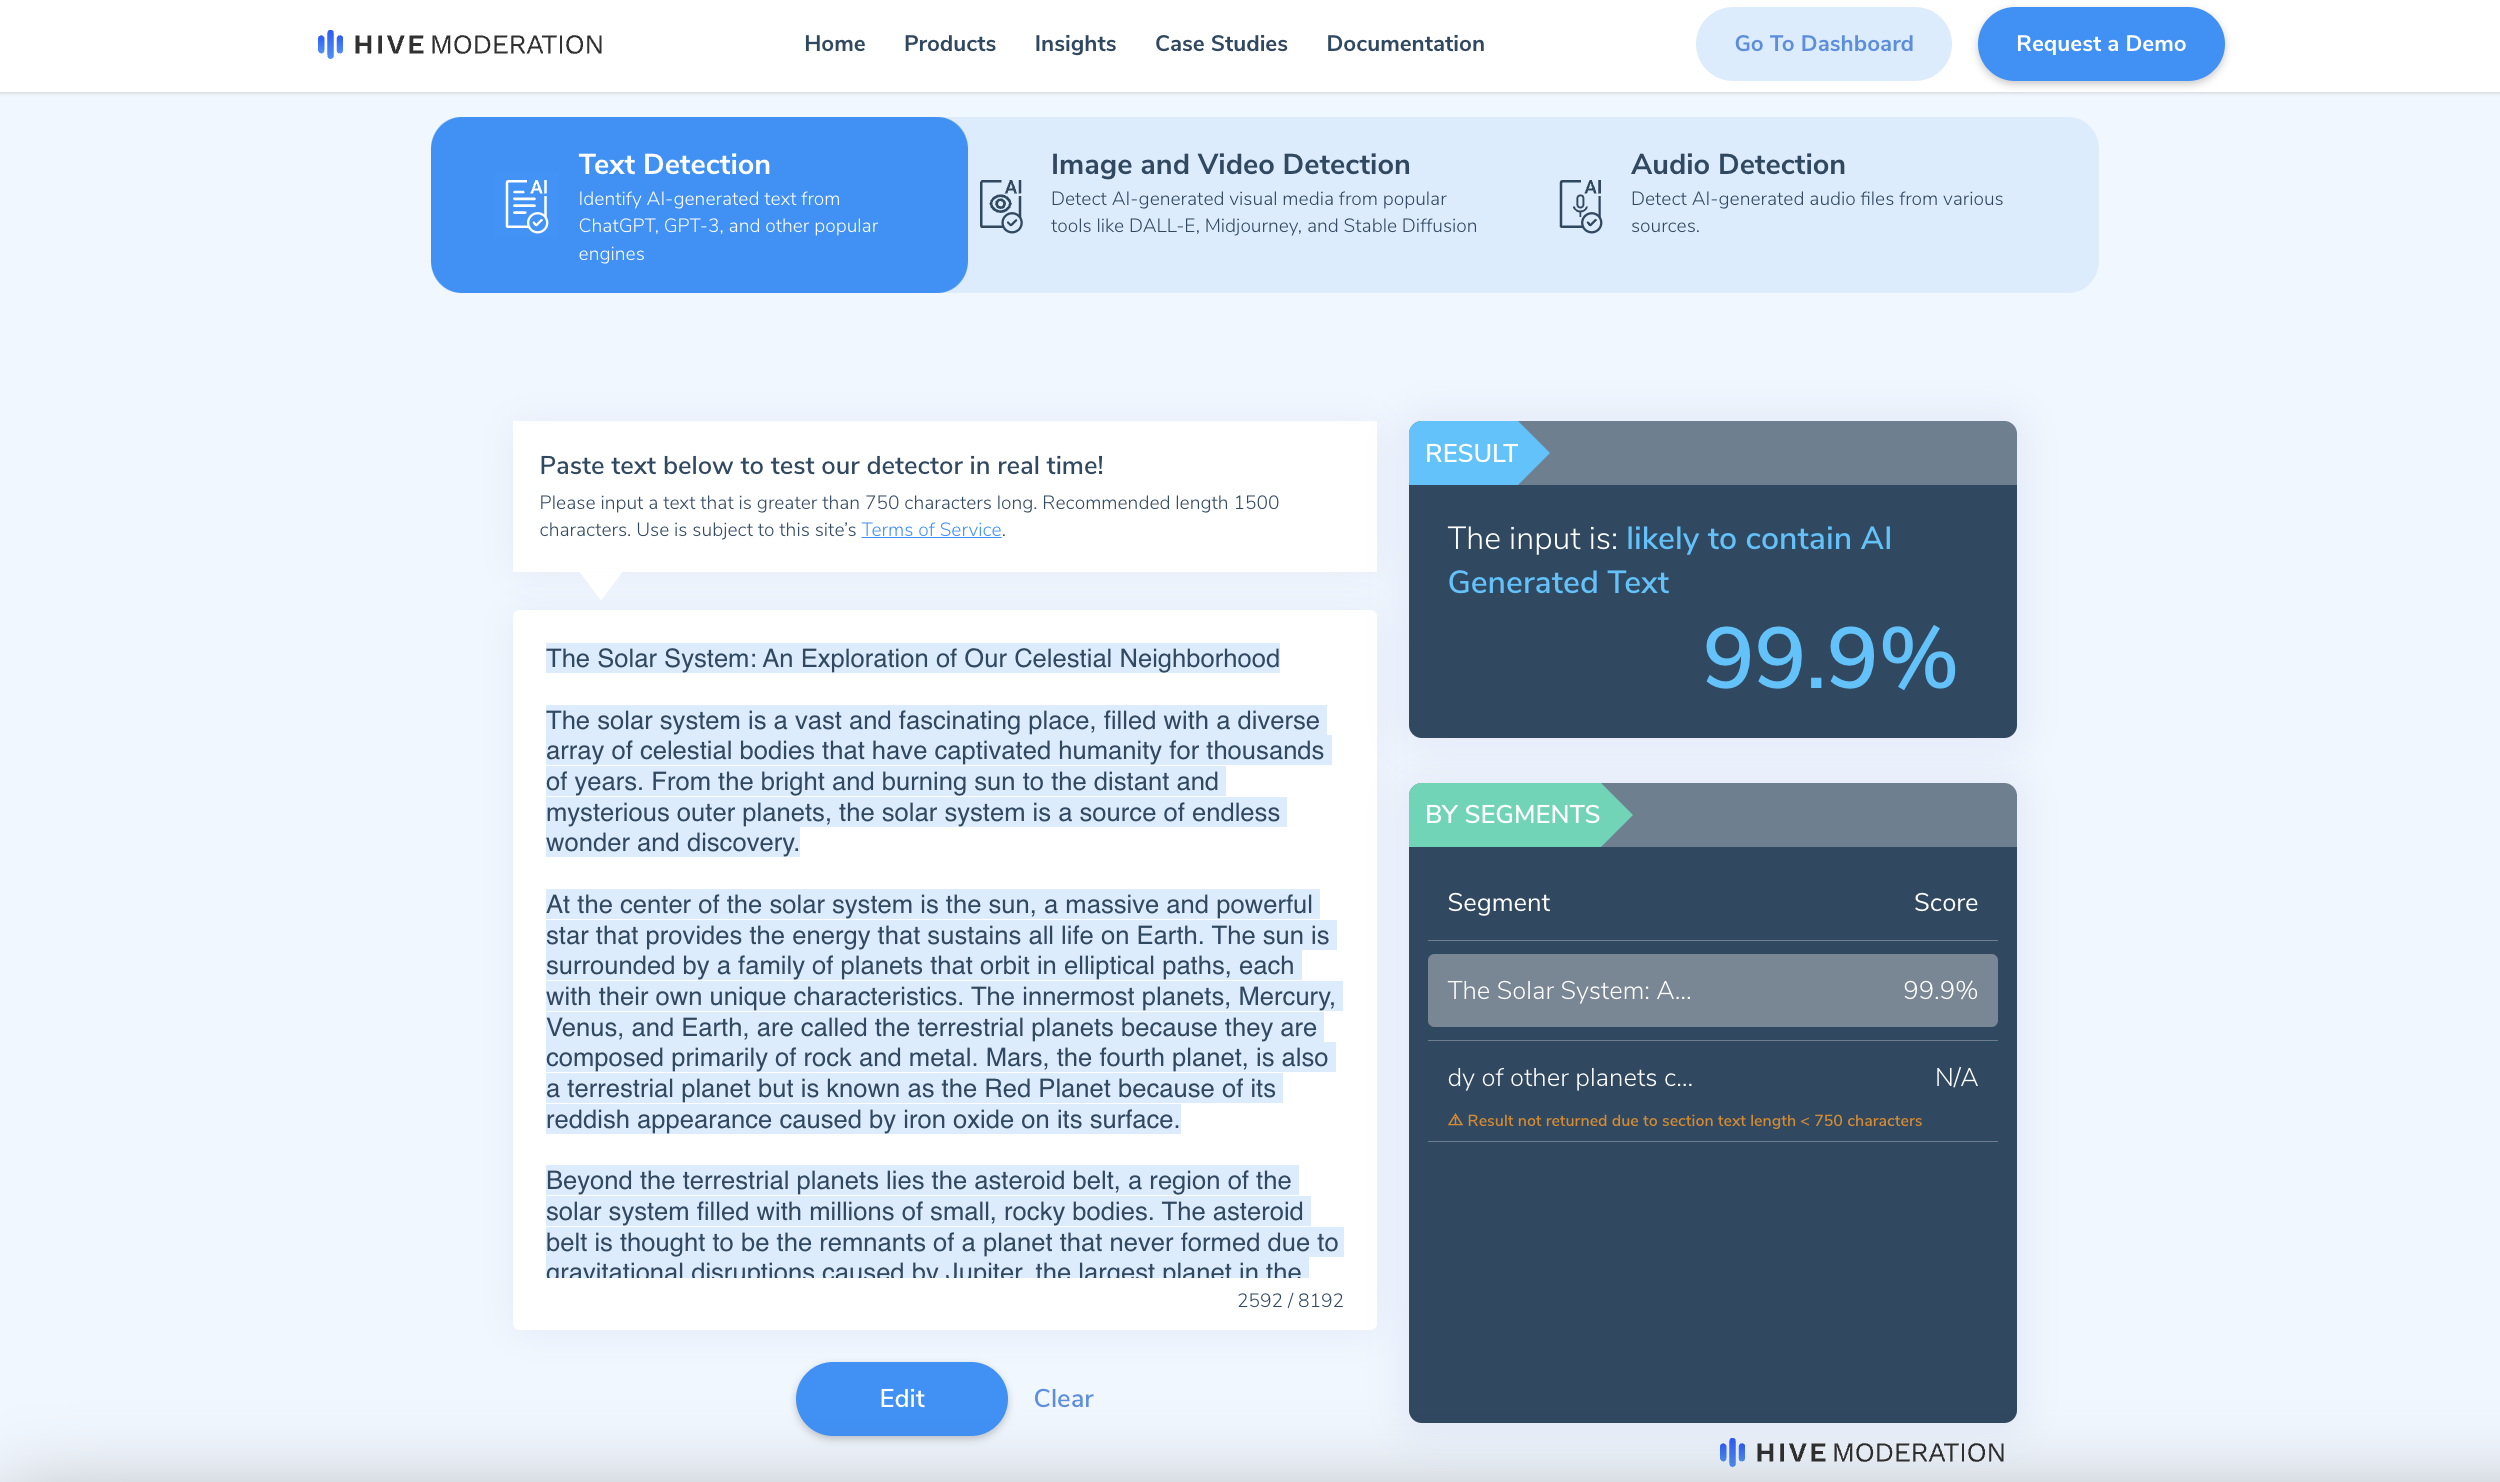
1723361162 146 The 6 Best AI Content Checkers To Use In 2024Screenshot from hivemoderation.com, July 2024

Hive Moderation, a company that specializes in content moderation, offers an AI content detector with a unique differentiator. Unlike most of the other examples listed here, it is capable of checking for AI content across several media formats, including text, audio, and image.

Users can simply input their desired media, and Hive’s models will discern whether they believe them to be AI-generated. You’ll get immediate results with a holistic score and more detailed information, such as whether Hive thinks your image was created by Midjourney, DALL-E, or ChatGPT, for example.

Hive Moderation offers a Chrome extension for its AI detector, as well as several levels of customization so that customers can tweak their usage to fit their needs and industry.

Pricing:

  • You can download the Hive AI Chrome Extension for free, and its browser tool offers at least some free scans.
  • You’ll need to contact the Hive Moderation team for more extensive use of its tools.

What Is An AI Content Checker?

An AI content checker is a tool for detecting whether a piece of content or writing was generated by artificial intelligence.

Using machine learning algorithms and natural language processing, these tools can identify specific patterns and characteristics common in AI-generated content.

An important disclaimer: At this point in time, no AI content detector is perfect. While some are better than others, they all have limitations.

They can make mistakes, from falsely identifying human-written content as AI-generated or failing to spot AI-generated content.

However, they are useful tools for pressure-testing content to spot glaring errors and ensure that it is authentic and not a reproduction or plagiarism.

Why Use An AI Content Detector?

As AI systems become more widespread and sophisticated, it’ll only become harder to tell when AI has produced content – so tools like these could become more important.

Other reasons AI content checkers are beneficial include:

  • They can help you protect your reputation. Say you’re publishing content on a website or blog. You want to make sure your audience can trust that what they’re reading is authentic and original. AI content checkers can help you ensure just that.
  • They can ensure you avoid any plagiarism. Yes, generative AI is only getting better, but it’s still known to reproduce other people’s work without citation in the answers it generates. So, by using an AI content detector, you can steer clear of plagiarism and the many risks associated with it.
  • They can confirm that the content you’re working with is original. Producing unique content isn’t just an SEO best practice – it’s essential to maintaining integrity, whether you’re a business, a content creator, or an academic professional. AI content detectors can help here by weeding out anything that doesn’t meet that standard.

AI content detectors have various use cases, including at the draft stage, during editing, or during the final review of content. They can also be used for ongoing content audits.

AI detectors may produce false positives, so you should scrutinize their results if you’re using them to make a decision. However, false positives can also help identify human-written content that requires a little more work to stand out.

We recommend you use a variety of different tools, cross-check your results, and build trust with your writers. Always remember that these are not a replacement for human editing, fact-checking, or review.

They are merely there as a helping hand and an additional level of scrutiny.

In Summary

While we still have a long way to go before AI detection tools are perfect, they’re useful tools that can help you ensure your content is authentic and of the highest quality.

By making use of AI content checkers, you can maintain trust with your audience and ensure you stay one step ahead of the competition.

Hopefully, this list of the best solutions available today can help you get started. Choose the tool that best fits your resources and requirements, and start integrating AI detection into your content workflow today.

More resources: 


Featured Image: Sammby/Shutterstock

Source link

Keep an eye on what we are doing
Be the first to get latest updates and exclusive content straight to your email inbox.
We promise not to spam you. You can unsubscribe at any time.
Invalid email address

SEO

A Complete Guide for Digital Marketers

Published

on

By

A Complete Guide for Digital Marketers

Imagine browsing your favorite blog and spotting a visually engaging ad that seamlessly fits the content and stands out just enough to grab your attention.

That’s the power of display advertising at work.

If you’re a digital marketing professional, you’ve likely heard of display networks as part of PPC advertising.

But are you using this channel to the best of your abilities?

In a world where advertising changes daily, it can be difficult to keep up with the best ways to optimize display ads.

In this in-depth guide, we’ll explain display advertising, its different types, and how it differs from search. We’ll also provide strategies and tools to help you take your display ads to the next level.

What Is Display Advertising?

Display advertising is a type of online advertising that typically uses images or videos to showcase your brand.

Thanks to responsive display ads, this ad format becomes much more personalized and can include elements like:

  • Text.
  • Images.
  • Videos.
  • Logos.

Potential customers see these ads while browsing the internet, using other mobile apps, social media platforms, or even connected TV devices.

Display ads are meant to capture the user’s attention in a way that doesn’t disrupt their experience. At the same time, they also encourage them to take action.

While display ads are typically associated with top-of-funnel marketing, advertisers use these ads across the buyer’s entire user journey. Brands can use display ads for:

  • Brand awareness.
  • Product-specific marketing.
  • Promotional sales.
  • Promoting specific content or services.
  • And much more.

Types Of Display Ads

By understanding the various types of display ads available, you can choose the right format to align with your marketing goals and effectively reach your target audience.

Each type offers unique advantages and can be used strategically to maximize engagement and conversions.

Responsive Display Ads

Unique to the Google Display Network, responsive display ads automatically adjust their size, appearance, and format to fit available ad spaces.

Advertisers provide assets such as images, headlines, logos, and descriptions, and Google uses machine learning to create the best possible combinations for different placements, unique to each user.

This flexibility allows responsive display ads to reach a broader audience and perform well across a wide range of devices and websites.

Banner Ads

Banner ads are considered a more traditional type of display advertising.

Banner ads appear across websites and apps and are placed at the top, bottom, or sides of webpages.

They’re typically static in format but can also use animation to catch the user’s eye without being too disruptive to their experience.

Interstitial Ads

Interstitial ads are full-screen ads that cover the whole screen of a webpage or an app.

They typically show up during natural transition points of a web session, like waiting for content to load or going between app screens.

They’re meant to be highly engaging but should be used strategically and sparingly to not overwhelm or annoy the user.

Rich Media Ads

Rich media display ads offer a more interactive experience with a potential customer.

What makes them interactive compared to the other display advertising types?

The beauty of this ad type is the combination of video, image, audio, and clickable elements to engage a user more fully.

Native Ads

The opposite of rich media ads would be native ads. This ad type is meant to blend seamlessly with the content and overall design of a webpage.

Native ads are meant to be non-disruptive to the user experience because they can match the look and feel of the content surrounding the ad.

By blending in more cohesively, it can help increase engagement rates.

Retargeting Ads

Retargeting display ads are intended to re-engage past website or app users who haven’t taken the desired action.

This ad type can look like any of the above-mentioned ad formats, or it could show dynamic content based on the user’s previous browsing history.

Unlike standard display ads, retargeting ads aren’t meant to scale broadly. They have a specific intended audience to invite them back to make a purchase.

Display Advertising Vs. Search Advertising

Display ads and search ads are both essential components of a sound digital marketing strategy.

However, they both serve different purposes and are meant to complement each other – not compete.

Below are the key main differentiators between display and search ads:

  • Targeting. While display ads typically use targeting like demographics, interests, and browsing behavior, search ads are primarily keyword-based and what they search for.
  • Intent. Display ads can help create demand by focusing on awareness and product consideration. Search ads, on the other hand, are intended to capture existing demand.
  • Ad format. Display ads are more visual in nature and utilize elements like images, videos, text, and logos. Search ads are primarily text-based with headlines and descriptions.
  • Reach. Display ads can reach broader audiences across the internet and are easier to scale. Search ads are limited to the specific search engines and their search partner networks, if applicable.

Display Advertising Examples

Display Ads come in many different shapes and sizes. Below are a few examples of ads found across the web in a variety of sizes.

Example: Leaderboard Display Ad

The example below was taken as I was browsing People.com. This ad for US Bank appeared at the top of the page before the hero content.

Example: Skyscraper Display Ad

This example was taken as I was browsing Business Insider. An ad for Oracle Netsuite showed on the right-hand side of the page on a desktop device.

A skyscraper ad example on a desktop site.Source: Businessinsider.com, screenshot taken by author, July 2024

Example: Mobile Display Ad

I found this ad when reading a blog post on Southern Living on my mobile device. A display ad for Best Buy was inserted between paragraphs of the blog post.

A mobile display ad example on a phone.Source; Southernliving.com, screenshot taken by author July 2024

Display Advertising Strategy

Just like any other campaign type, display advertising should be driven by a sound strategy.

Let’s take a look at some of the key components of crafting a display advertising strategy.

1. Define Clear Goals

It’s important to establish the objective of each display campaign, such as brand awareness, lead generation, or sales.

If you’re not sure where to start, take a step back and consider your overarching business needs and what you’re trying to achieve.

For example, are you looking to gain new customers or re-engage existing customers? Is brand awareness more important, or are you looking to drive sales of a new product?

In Google Ads, you’ll start the campaign creation by choosing from the following objectives and then choose the ‘Display’ campaign type after choosing an objective:

Google Ads objectives in new campaign creation.Screenshot taken by author, July 2024

2. Choose Your Budget, Bidding Strategy, And Audience

Budgets and bid strategies are set at the campaign level.

The typical bid strategy pricing models for display ads are a cost-per-click (CPC) basis or a cost per 1,000 impressions (CPM) model. You’ll want to choose the one that aligns with the campaign goal and your overall budget.

In this example, I chose “Awareness” as the campaign objective, so Google Ads recommends a Viewable impressions bid strategy.

Choosing bid strategies in Google Ads for display campaign.Screenshot taken by author, July 2024.

Next is to refine the audience targeting for your campaigns.

If the goal is to attract new customers, you can use your own data on existing customers to build audience profiles to target.

Keep in mind the demographics, interests, and overall browsing behavior when putting together your target audience.

Display ads targeting options.Screenshot taken by author, July 2024.

3. Choose Display Ad Type, Format, And Placements

The nice part about Google Ads is the ability to target (or exclude) specific website placements or apps to ensure your ads show up in the right place.

You may be tempted to choose a short list of very specific websites, but by doing so, you could end up limiting your reach immensely. It’s also not guaranteed that your ads will show on those placements if your budget or bid is not competitive enough.

At the beginning, use negative placements to your advantage to exclude sites where your content would be inappropriate.

Now, as for ad size and format, there are two options in Google Ads:

  • Uploaded display ads.
  • Utilize responsive display ads (RDAs).

The main benefit of using uploaded display ads is that you have full control over the design. However, not all websites utilize these formats, and you may be missing out on additional reach if you opt not to use RDAs.

The most typical banner sizes for uploaded display ads include:

  • 728×90 (leaderboard).
  • 300×250 (medium rectangle).
  • 336×280 (large rectangle).
  • 300×50 (mobile banner).
  • 160×600 (skyscraper).

If you opt to use responsive display ads, Google takes the guesswork out of ad sizes for you.

Essentially, you’ll provide the basic elements, and Google will mix and match that content to create personalized ads for each user based on when and where they’re browsing.

Be sure to provide these essentials for a well-formatted ad:

  • Images.
  • Logos.
  • Brand name.
  • Headlines.
  • Descriptions.
  • Custom colors.
  • Call-to-action (CTA) text.

4. Focus On Creating Compelling Ad Content

Expanding on point #3 above, the visual design is your chance to capture the user’s attention.

A boring ad won’t stand out and can turn customers away. When designing ads, make sure to design visually appealing ads that align with your brand.

Additionally, make sure to test different elements and rotate out poor-performing elements.

It’s especially important to remain visually consistent if you’re marketing across different channels like social media. Consistent brand recognition across platforms can pay dividends over time.

5. Track And Optimize Performance

Once your display campaign is launched, you’ll want to monitor the key metrics chosen for the campaign objectives.

It may be tempting to make changes immediately, but it’s important to give the algorithm time to learn before making any major changes.

Unless something serious goes awry, like showing up on inappropriate placements, give the campaign time to run and then make tweaks based on the data coming in.

For example, if an ad shows a lot of impressions but few clicks, you may need to change the creative elements to capture the user’s attention more. Or, it could be the placements that need tweaking.

Or, if an ad is getting a ton of clicks but very few conversions, it may not be the ad itself; it could mean the landing page needs to be optimized. Try segmenting the ads by device to identify if the majority of clicks are coming from mobile and if the corresponding landing page is optimized for mobile delivery.

Ongoing campaign monitoring and optimization are vital for delivering optimal ROI to your display ads.

Read More:

Top Display Advertising Networks

Believe it or not, there’s a ton of different advertising networks to choose from as an alternative to Google.

Depending on your goal and usage of Display ads, you may need a different platform.

Some of the top Display ad network platforms include:

  • AdRoll
  • Amazon
  • StackAdapt
  • AirNow Media
  • Yahoo Ad Tech

You can find a full recommended list of Display Ad networks here.

Read More:

Display Advertising Tools

Depending on which stage you’re in for creating or running display ads, there are multiple tools to help take your display ads to the next level.

Ad Creation And Design Tools

If you’re looking to create display ads where you have full control, there are many user-friendly tools to help guide the ad creation process.

  • Google Web Designer: This is a free tool from Google that allows you to create HTML5 ads and motion graphics.
  • Canva: A more user-friendly option that has tons of templates to start from or the ability to create from scratch.
  • Bannersnack: This tool is specifically for creating banner ads, but it simplifies the design process with drag-and-drop components.

Ad Analysis And Optimization Tools

Analyzing display campaigns can be half the battle, and you need reliable tools to help optimize these campaigns to the fullest.

  • Google Analytics: This tool is essential for tracking and analyzing the performance of your campaigns. It can help marry the metrics like impressions and clicks to user purchase behavior to help you determine where to optimize further.
  • Google Ads Performance Planner: If you need help forecasting potential campaign changes, this tool is for you. It takes historical data and trends into considerations to help provide budget and bidding recommendations.
  • Hotjar: This is a user behavior tool that can provide session recordings, heatmaps, and more to understand how real users interact with your landing page and website.

Ad Management And Automation Tools

  • Google Ads Editor: This tool is great for managing multiple Google Ads campaigns offline, allowing for bulk changes and uploading changes on your own time.
  • Optmzyr: This platform offers more automation and streamlined workflow for PPC campaigns, including display ads.
  • Semrush: This platform can help with competitive analysis for display ads, which can help you refine your strategies.

Summary

Display ads are part of any comprehensive digital marketing strategy.

Because of their scalability and reach, display ads can cast a wide net to make potential customers aware of your brand and increase engagement and, ultimately, sales.

From traditional banner ads to innovative, responsive display ads, each type serves a unique purpose in capturing user attention and driving conversions.

By understanding the differences between display and search advertising, leveraging effective strategies, and utilizing various tools for ad creation, design, analysis, and optimization, you can maximize the impact of your display advertising campaigns.

More resources: 


Featured Image: BestForBest/Shutterstock

Source link

Keep an eye on what we are doing
Be the first to get latest updates and exclusive content straight to your email inbox.
We promise not to spam you. You can unsubscribe at any time.
Invalid email address
Continue Reading

SEO

How You Can Measure Core Web Vitals

Published

on

By

How You Can Measure Core Web Vitals

Google has defined a set of metrics site owners should focus on when optimizing for page experience. Core Web Vitals metrics are part of Google’s page experience factors that all websites should strive to meet.

Users’ expectations for web experiences can vary according to site and context, but some remain consistent regardless of where they are on the web.

Specifically, Google identifies the core user experience needs such as loading speed, interactivity, and visual stability.

What Are Core Web Vitals Scores?

Google recommends site owners have CWV metrics under the ‘good’ threshold specified below:

Metric name Good Poor
Largest Contentful Paint (LCP) ≤2500ms >4000ms
Interaction to Next Paint (INP) ≤2000ms >500mx
Cumulative Layout Shift (CLS) ≤1 >0.25

Anything in between good and poor is considered as moderate, which should be improved.

Diagram showing three Core Web Vitals performance metrics

Google explains why these three metrics, in particular, are so important:

“All of these metrics capture important user-centric outcomes, are field measurable, and have supporting lab diagnostic metric equivalents and tooling.

For example, while Largest Contentful Paint is the topline loading metric, it is also highly dependent on First Contentful Paint (FCP) and Time to First Byte (TTFB), which remain critical to monitor and improve.”

How Google Measures Core Web Vitals

Google CrUX report uses Chrome data when users browse websites to gather real-world user data from their devices. At least 75% of pageviews to the site should have ‘good’ scores for the website to meet CWV thresholds.

Please note it uses 75% of pageviews of the entire site, which means pages with poor CWV and less traffic will not impact the overall website score.

This is why you may find that websites with a ‘good’ score have pages with terrible CWVs and vice versa.

This method of measuring ensures that a low number of percentage visits due to slow network conditions doesn’t take down the entire website’s ‘good’ score.

Here’s how those metrics can be measured.

How To Measure Core Web Vitals

Google incorporates Core Web Vitals measurement capabilities into many of its existing tools.

Core Web Vitals can be measured using these free tools:

Let’s dive into how to use each of these free SEO tools to measure Core Web Vitals.

PageSpeed Insights

PageSpeed Insights allows you to measure Core Web Vitals with both lab and field data included in the reports.

The lab section of the report provides data gathered from real users’ devices in all geos and different network conditions, whereas the field section shows data from simulated devices using just one device.

Pagespeed insights report. Field vs. Lab dataPagespeed insights report. Field vs. Lab data

If your pages have few visits or are new, there might be insufficient historical data for field data to show a report. In that case, the average field score for the entire website will be used as a fallback if available; otherwise, it will show no data.

Once you run reports you will have a list of recommendations on how to improve your scores underneath. You can read our guide on the PageSpeed Insights report to learn how to use it.

Web Vitals Extension

Using the PageSpeed Insights tool is always a great way to debug and audit performance, but it is often not convenient. You have to open a new tab in your browser and navigate away from the page, which is distracting.

Fortunately, there is an extension available to install from the Chrome Web Store that measures Core Web Vitals metrics in real-time during your browsing and also loads field data if available.

Core Web Vitals scoresCore Web Vitals scores

Besides this standard UI, this addon also offers more granular debugging opportunities via the browser DevTools ‘console’ tab. Here is a quick video guide on how to do that.

Debugging the Interaction Next Paint metric is quite challenging as it may degrade at any point during the user interaction journey. In PageSpeed Insights, you get only an average value across all interactions, not which interaction on the specific element on the page was slow.

By using this extension, you can interact with the page and identify elements that degrade the INP metric by checking the console logs. For example, you can click on buttons and check the console to see how long the interaction took.

As soon as you identify which element is slow to respond, you can check your JavaScript code to see if any scripts are blocking the interaction.

Lighthouse

Lighthouse is an open-source tool you can use to audit your webpage’s performance, which is also available in Chrome’s DevTools.

All of the reports that Lighthouse powers are updated to reflect the latest version.

Example lighthouse report in chrome browser DevToolsExample lighthouse report in chrome browser DevTools

One caveat to be aware of is that when running Lighthouse in your browser, it also loads many resources from your Chrome extensions, which can affect your metrics in the Lighthouse report.

Message indicating issues with the Lighthouse run, specifically mentioning that Chrome extensions negatively impacted the page's load performance. The message indicated issues with the Lighthouse run and specifically mentioned that Chrome extensions negatively impacted the page’s load performance.

That’s why I suggest using Chrome Canary for debugging as a good practice. Chrome Canary has an isolated installation from your regular Chrome browser where you can access experimental features. This allows you to test your website with features that will be included in future Chrome releases.

I ran a quick experiment to see how drastically Lighthouse page speed scores can vary in the Canary clean installation vs. your browser with add-ons enabled.

Two screenshots of Google Chrome DevTools' Lighthouse audit results. Left: Chrome stable version with add-ons and right: Canary without add-ons.Two screenshots of Google Chrome DevTools’ Lighthouse audit results. Left: Chrome stable version with add-ons and right: Canary without add-ons.

One important feature that Lighthouse enables is measuring scores while interacting with the webpage and measuring how certain interactions affect your scores, especially the Interaction to Next Paint (INP) metric.

Option timespan in Chrome Lighthouse DevToolsOption timespan in Chrome Lighthouse DevTools

I suggest you dive deep and master how to use Lighthouse by reading our guide written by the two of most experienced technical SEO experts in the world.

CrUX Dashboard

CrUX report is a public dataset of real user experience data on millions of websites. The Chrome UX report measures field versions of all the Core Web Vitals, which means it reports real-world data rather than lab data.

With PageSpeed Insights, Lighthouse, or the Web Vital add-on we have discussed, you now know how to measure individual URL performance. But how do you see the whole picture for a website with thousands of URLs? What percentage of URLs have ‘good’ scores or scores from a few months ago to compare against?

This is where Google’s CrUX free Looker Studio dashboard helps. You can check segments and see your historical data.

To do that, simply copy and paste your domain into the CrUX dashboard launcher.

CrUX dashboard launcherCrUX dashboard launcher

Then, enjoy beautiful reports for free. Here is an example report for Search Engine Journal in case you want to explore a real dashboard.

CrUX dashboard example for Search Engine JournalCrUX dashboard example for Search Engine Journal

In this dashboard, you can find much more besides the CWV metrics. If you fall short of CWV ‘good’ scores but lab data shows you are meeting all thresholds, it may be because your visitors have a bad connection.

This is where the connection distribution report is highly valuable: it can help you understand if your scores’ poor performance is due to network issues.

Connection Distribution in CrUX reportConnection Distribution in CrUX report

Unfortunately, this dashboard doesn’t give you a breakdown of CWV metrics by country, but there is a free tool, treo.sh, which you can use to check performance metrics by geos.

Break down of CWV metrics by geos which helps understand where they fall short of good scoresBreak down of CWV metrics by geos which helps understand where they fall short of good scores

Search Console

GSC is another tool to see how your overall website CWV metrics.

A Google Search Console dashboard displaying A Google Search Console dashboard displaying “Core Web Vitals”

The report identifies groups of pages that require attention based on real-world data from the Chrome UX report. If you open the report by clicking on the top right corner link, you will see a breakdown of your issues.

Core Web Vitals report for Mobile in GSCCore Web Vitals report for Mobile in GSC

With this report, be aware that it pulls data from CruX, and URLs will be omitted if they do not have a minimum amount of reporting data, which means you may have pages with poor CWV metrics that are not reported here.

Web-Vitals.JS And GA4

web-vitals.js is an open-source library that accurately measures CWV metrics the same way Chrome or PageSpeed Insights does. The web vitals extension we discussed above actually uses this library for reporting and logging.

However, you can integrate it with Google Analytics 4 to get a detailed performance report at scale on a website with many pages. Below is a code sample for GA4’s gtag integration.


In the code sample, ‘value’ is a built-in parameter, and ‘metric_id’, ‘metric_value’, ‘metric_delta’, ‘metric_rating’, and ‘debug_target’ are optional custom dimensions you may want to include per your needs.

If you want to see these dimensions in GA4’s exploration reports, you need to add them in GA4’s admin of custom definitions. Otherwise, if you decide to send these parameters and not add them via admin you can access raw data via BigQuery only. This provides much more flexibility but requires SQL expertise.

If you decide to include ‘metric_id,’ which, in the case of websites with a lot of traffic, will have an indefinite number of unique values, it may cause cardinality issues in exploration reports.

So, you may want to enable those additional custom parameters for a short period to gather sample data for troubleshooting.

To send CWV metrics data via Google Tag Manager, refer to this guide created by Google’s marketing solution team. As a best practice, you should use GTM integration, and the code above (which is fully functional) demonstrates the fundamental mechanics of CWV data collection and reporting.

Other than what we have discussed, freemium or paid tools such as Debugbear, treo.sh, Oncrawl, Lumar, or Semrush may help you identify your scores on all pages at a scale in real time.

However, I would like to note that from the listed tools, Debugbear and treo.sh are highly specialized in CWV metrics and provide high-granularity insights with advanced segmentations.

What About Other Valuable Metrics?

As important as the Core Web Vitals are, they’re not the only page experience metrics to focus on.

Ensuring your site uses HTTPS, is mobile-friendly, avoids intrusive interstitials, and maintains a clear distinction between the website are crucial parts of page experience ranking factors.

So think of it also from a user-centric point of view, and not only because it is a ranking factor.

For example, from a conversions perspective, if you have a slow ecommerce website, your potential customers may churn, and it will cause revenue losses.

More resources: 


Featured Image: BestForBest/Shutterstock

Source link

Keep an eye on what we are doing
Be the first to get latest updates and exclusive content straight to your email inbox.
We promise not to spam you. You can unsubscribe at any time.
Invalid email address
Continue Reading

SEO

How I Rank #1 on Google

Published

on

How I Rank #1 on Google

SEO content is content optimized to rank high on search engines.

I’ve created plenty of them in my career. In fact, I’ve written 111 articles for this blog, of which ~80%—90% are SEO content.

Altogether, they receive an estimated 121,000 monthly search visits from Google.

Amount of organic search traffic I'm acquiring from my articlesAmount of organic search traffic I'm acquiring from my articles

Suffice it to say, I know a little something about writing SEO content. Follow along as I show you how I put together this article on how to create SEO content (meta, I know).

If we want to acquire search traffic, we need to target topics that people are searching for on Google. In this case, I’m targeting the keyword “seo content creation”.

How do I know people are searching for this keyword? Well, according to Ahrefs’ Keywords Explorer, this keyword has a search volume of 500 and a traffic potential of 1,100.

Search volume and traffic potential for "seo content creation"Search volume and traffic potential for "seo content creation"

A search volume of 500 means on average, there are 500 searches per month for this keyword on Google. And a Traffic Potential (TP) of 1,100 means I could potentially acquire 1,100 monthly search traffic from targeting this keyword, if I manage to rank #1 on Google.

Sidenote.

Why the discrepancy? That’s because there are many ways to search for the same thing. Google understands that and ranks nearly the same pages for all variations. Therefore, your page could potentially rank for these different keywords and generate search traffic from all of them.

How did I find this keyword? I found it by analyzing what our competitors were ranking for. After all, if they rank for it, it’s likely relevant to us and something we can potentially rank for too.

To find what our competitors rank for, I entered our competitor’s website into Ahrefs’ Site Explorer and went to the Top pages report.

Our competitor's top pages reportOur competitor's top pages report

This report shows which pages on our competitor’s website get the most organic search traffic. For example, SEMRush’s page on competitive analysis ranks for ~3,000 keywords and gets an estimated total of 24,000 monthly search visits. The #1 keyword sending them the most search traffic is “analyse competitors”, which they rank for in position one.

I went through the report and that’s where I found this keyword:

How I found the keyword "seo content creation"How I found the keyword "seo content creation"

We want to rank high on Google, but we don’t want to do that for any random topic. We want to make sure we only target topics that can generate us sales eventually.

We do this by assigning a business potential score to every relevant topic we find. The business potential score is simply how easy it will be to pitch your product while covering a certain topic.

Business potential chartBusiness potential chart

We want to prioritize topics that score at least a “2” and above.

In this case, I scored “seo content creation” a “2”—Our product isn’t essential, but boy is it a yuge timesaver.

To know what type of content I need to create, I need to figure out why searchers are searching for “seo content creation”. This is known as matching search intent.

Since Google’s aim is to rank relevant content, I can look at the SERPs to figure search intent. I did this by entering “seo content creation” into Keywords Explorer, scrolling down to SERP Overview, and clicking Identify intents.

Identify intents feature in Ahrefs' Keywords ExplorerIdentify intents feature in Ahrefs' Keywords Explorer

I see that searchers want a step-by-step guide on how to create SEO content. And I also see that the main audience for this topic are beginners.

With the outline approved, it’s time to move on to the next step. This depends on what you’ve pitched.

For example, the unique angle for my post on the best marketing books was to get recommendations from other marketers. So, rather than dive right into drafting, bulk of the work involved reaching out to people on LinkedIn or email.

My outreach to marketers asking for their book recommendationMy outreach to marketers asking for their book recommendation

For this post, I’m writing from my lived experience, so it was more of a key-bashing-and-backspacing-session on Google Docs. (You can’t see it, but I backspaced a lot.)

Unfortunately, I’m no Anthony Trollope and don’t have a fixed routine for you to copy.

Anthony Trollope's routineAnthony Trollope's routine

My one non-negotiable is a cup of coffee. I’m sure most people who write will agree with me. Otherwise, I’m all over the place. If I feel like Charles Darwin, I’ll set a 30-minute timer and start writing. Or I’ll go for a walk.

Charles Darwin rantingCharles Darwin ranting

Sorry to disappoint you, but neither ChatGPT, Claude, Gemini, or Llama feature here. Call me trad, but I still prefer to write, not generate content. Writing is thinking, after all. I often surprise myself by discovering things I never knew simply by writing.

Beyond the productivity advice, the things I try to do in my drafts (after getting whipped into shape by Ahrefs over the past five years) are:

  • Ensuring I’m including use cases of Ahrefs naturally within the narrative (this post is an example of how I’m doing this.)
  • Making sure every statement is as accurate as possible. No hype, no lying, qualifiers like “could”, “perhaps”, or “may” widely accepted.
  • Be clear. No fluff, and only use jargon when needed. Include images where possible.

Once I’m sufficiently satisfied with the draft, I tag Ryan on Basecamp (where we track the progress of drafts) for his feedback. Here’s his feedback for this post:

Ryan's feedback for my draftRyan's feedback for my draft

Since there are no major changes, it’s ready to be uploaded and published (after making the edits.)

Hol’ up, not so fast. Before we actually publish, I need to make sure the on-page SEO for this post is done. Matching search intent is 80% of the way, but there’s no harm in ensuring that Google clearly understands what your page is about.

Think of it like the icing on a cake. The cake is already edible, but the icing just makes it better and prettier.

On-page SEO is really a simple checklist, like:

  • Including the target keyword in the title, URL, H1, and the intro paragraph.
  • Writing an engaging meta description.
  • Linking to other useful pages on our website.
  • Adding alt text to all our images.

In my opinion, getting the title right is the most important. Beyond the SEO benefits, it’s the first thing any human sees. So it must do the job to convince them to click.

The title is the first thing a searcher seesThe title is the first thing a searcher sees

I follow Ryan’s advice when it comes to titles.

I try to brainstorm at least ten titles in varying styles for every blog post I write. This takes up a lot of brain juice, so this is also where I introduce my best friend, ChatGPT:

Using ChatGPT to generate title ideasUsing ChatGPT to generate title ideas

I eventually stuck with my original title, but it’s a good exercise to get your ideas going.

Final thoughts

You might have been expecting some secret SEO tricks I use to rank, but unfortunately, there’s none of that. It’s really just a simple process of keyword research, matching search intent, making something unique, and adding that final touch of on-page SEO.

As this meme explains:

Midwit meme on how not to complicate SEOMidwit meme on how not to complicate SEO

My process isn’t fancy, but it works.


Source link

Keep an eye on what we are doing
Be the first to get latest updates and exclusive content straight to your email inbox.
We promise not to spam you. You can unsubscribe at any time.
Invalid email address
Continue Reading

Trending