Connect with us

WORDPRESS

How Open Source Collaboration Enhances Studio – WordPress.com News

Published

on

Using WordPress Components and Tailwind CSS in our Local Development App  – WordPress.com News

It’s now time for Part 3 of our “Building Studio in Public” series! In today’s post, we’ll explore how the Studio app connects with other open source projects, with a focus on its key relationship with WordPress Playground. We’ll also dive into the benefits and challenges of this symbiotic relationship, showing how both projects mutually benefit from improvements and bug fixes.

If you’re following the series, be sure to check out past posts:

As a reminder, Studio is our free and open source local WordPress development app.

How Studio connects to other open source projects

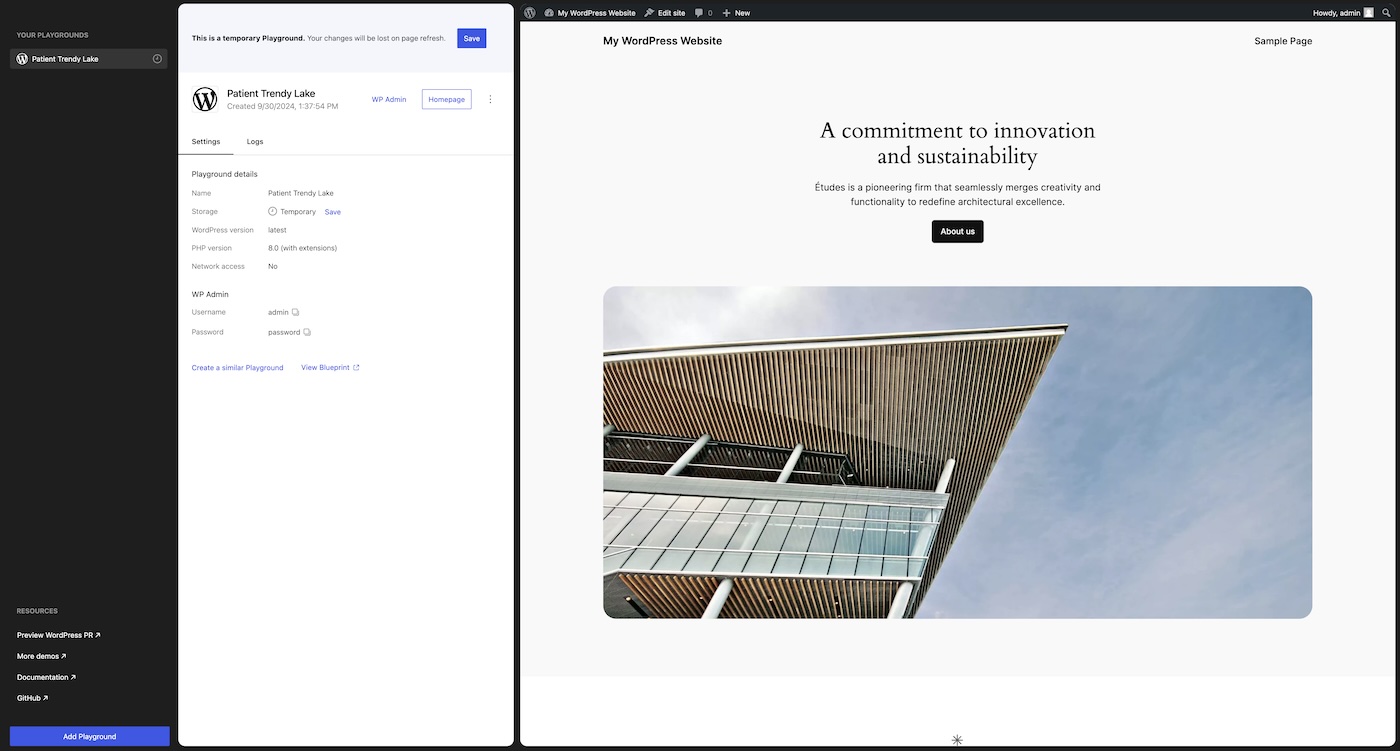
Studio relies on various open source projects, with the primary one being WordPress Playground which provides a local WordPress server, handling everything from running PHP code to serving static files and managing a database. This allows developers to test WordPress sites, plugins, and themes in a local, sandboxed environment.

WordPress Playground utilizes Emscripten to compile the PHP interpreter to WebAssembly, enabling PHP to run in the browser and other platforms—a significant leap for WordPress development.

By way of WordPress Playground, Studio also makes use of other open source tools like the SQLite integration plugin.

Studio itself is open source, which means the codebase is available for review, contribution, and forking by the community. This openness fosters collaboration, encourages innovation, and enables rapid identification and resolution of issues.

Because of the open source nature of Studio and the projects it uses like WordPress Playground, we are not blocked by missing or undesired behavior of our libraries but can instead help uncover issues or opportunities for enhancement in these projects and contribute the necessary fixes and improvements. Instead of building workarounds, we can directly enhance Studio’s performance and capabilities by submitting fixes to the actual problems. 

This creates a virtuous cycle of improvement, showcasing how open source collaboration drives innovation and helps solve complex challenges.

Challenges we discovered working with WordPress Playground

WordPress Playground is powerful, but since it makes WordPress run in an unusual environment–the browser instead of a server–some things work differently than developers expect. While using it to power Studio allows us to achieve all the good things, like a fast setup, we also had to overcome some challenges:

  1. Cross-platform compatibility: Ensuring that WordPress Playground runs smoothly on different operating systems (Windows, macOS, Linux) and across browsers requires extensive testing and fine-tuning.
  2. Performance: Managing multiple resources (PHP interpreter, WordPress site, database, and file system) while running multiple sites in Studio can strain performance. You can learn more about how we maintain high performance in Studio here.
  1. Plugin and theme compatibility: Although WordPress Playground creates a full environment for running sites, some plugins and themes rely on extensions that are not included in WordPress Playground by default. Adjustments are often necessary to accommodate support for the different plugins and themes.
  2. Database handling: WordPress Playground uses an SQLite database instead of MySQL, fundamentally altering how WordPress operates. This shift requires adaptations for database queries and compatibility with plugins and themes.

These complexities sometimes lead to incompatibilities, bugs, or performance issues. However, we believe the benefits of WordPress Playground far outweigh the challenges, and we are committed to addressing them by contributing to the Playground project. Thus not only Studio works better, but everyone who uses Playground has a better experience.

In turn, Studio also benefits from contributions from other Playground users.

Our recent contributions to WordPress Playground and other open source projects

As part of our contributions to the Studio app, we recently focused on improving the compatibility of plugins, themes, and workflows in sites. The following are some of the fixes we made that contributed to the projects.

MySQL database compatibility

With a pull request, we helped improve the compatibility of sites connecting to MySQL databases, making Studio more flexible in handling various site configurations and expanding its capability to support more diverse WordPress setups.

Symlink support

We submitted two contributions (PR 1, PR 2) to add crucial support for handling symlinks in sites, greatly improving file system compatibility and flexibility. This enhancement significantly improves the development workflow, enabling developers to maintain cleaner project structures and more efficiently manage their themes and plugins across multiple projects. It also facilitates easier version control and collaboration by allowing links to external repositories without duplicating files.

Windows media upload fix

A fix resolved critical issues with uploading media on sites when using the Windows version of the Studio app, ensuring a smoother experience for Windows users. This contribution addressed a significant functionality gap, ensuring that Studio provides a consistent and reliable media management experience across all supported operating systems.

WordPress core and extension upgrades

Another contribution fixed the process of upgrading versions of WordPress, plugins, and themes. This improvement streamlined the update process within Studio, allowing developers to maintain their WordPress installations and associated extensions easily.

WooCommerce compatibility

This pull request significantly improved compatibility with the WooCommerce plugin, expanding Studio’s utility for e-commerce development. This contribution addressed specific database queries and operations that were incompatible with the SQLite database used in sites created with Studio. The SQLite integration plugin involves different complexities to allow seamless integration with the WordPress ecosystem, and this contribution addresses one of the main pain points of using WooCommerce in local WordPress environments.

cURL extension compatibility

We contributed the ability to enable the cURL extension on PHP used with Playground which turned out to be a requirement by a significant number of plugins for external API calls or remote data fetching. This broadens the range of plugins that can be used effectively within Studio and WordPress Playground.

File creation compatibility

A fix improved compatibility with plugins that create files using umask to set file permissions, enhancing the file system operations. This was crucial for plugins that generate caches, create custom CSS or JavaScript files, or manage uploads in non-standard ways. By resolving these file operation issues, we ensured that a broader range of plugins could function correctly within Studio, providing a more accurate representation of how sites would behave in a production environment.

All the above examples demonstrate how collaborative contributions help Studio evolve, making it more compatible with the vast array of plugins and themes in the WordPress ecosystem.

a cursor clicking a blue Add demo site button under the Share tab on Studio by WordPress.com

How to contribute

If this post has inspired you to contribute to open source projects (we’re big fans), here’s how you can get involved with some of our favorite open source projects:

Together we can build incredible tools for the community! 🙂

Ready to build?

If this information has piqued your interest, or if you’re developing WordPress sites, start leveraging the power of Studio today. It’s free, it’s open source, and it seamlessly integrates into your development workflow.

After downloading Studio, connect it to your WordPress.com account (free or paid) to unlock features like Demo Sites.


Join 112.5M other subscribers

Source link

Keep an eye on what we are doing
Be the first to get latest updates and exclusive content straight to your email inbox.
We promise not to spam you. You can unsubscribe at any time.
Invalid email address

WORDPRESS

WordPress biz Automattic details WP Engine deal demands • The Register

Published

on

By

WordPress biz Automattic details WP Engine deal demands • The Register

Updated WordPress developer Automattic on Wednesday published details of its efforts to pressure rival WP Engine to sign a trademark license agreement costing millions of dollars.

As well as contributing to and steering the direction of the open source web publishing system WordPress – used by millions and millions of websites – Automattic also provides commercial hosting of WordPress-based blogs. WP Engine, meanwhile, also sells WordPress hosting, and the pair have been beefing.

Automattic, annoyed at WP Engine using “WP Engine” as a name to do boffo business, likened WP Engine to cancer, and wanted the biz to pay millions of dollars in trademark usage fees to, in Automattic’s mind, support the development of WordPress. WP Engine says it shouldn’t have to cough up.

Now, pulling back the curtain further on that drama, Automattic has made public a term sheet, which appears to date back to February 2023, that it was trying to get WP Engine to sign that would make the latter pay “a royalty fee” to fund work on the open source WordPress software that both organizations rely on.

The proposed seven-year Trademark License Agreement [PDF] calls for WP Engine to pay eight percent of its gross revenue on a monthly basis to Automattic, or in the form of WordPress software development time contributed by salaried employees, or a combination of the two options.

It also includes a ban on forking software from Automattic, its WooCommerce subsidiary, or its affiliate’s software (eg, plugins and extensions) “in a manner that disrupts any partnership between Automattic and its commercial partners.”

As an example, the term sheet specifically forbids “changing attribution codes included in any software by Automattic.” Attribution codes are metadata in online transactions that let e-commerce merchants understand the effectiveness of marketing campaigns on product orders. Automattic did not provide any details about whether WP Engine is currently doing this.

WordPress software is subject to the GPL-v2 license. WooCommerce is also “fully open source.”

Both outfits last week issued dueling cease and desist letters, with Automattic accusing [PDF] WP Engine was violating its trademarks, while WP Engine claiming [PDF] Automattic CEO Matthew Mullenweg was demanding payment and making false, disparaging statements that interfered with its business.

Mullenweg contends that WP Engine, backed by venture capital firm Silver Lake, is profiting from WordPress software without giving back to the project. And based on those claims, Automattic’s WordPress.org last week cut off WP Engine’s access to its servers, thereby preventing WP Engine customers with WordPress websites from updating their themes and extensions.

On Friday, in the wake of community criticism, Mullenweg – through WordPress.org – announced a three-day reprieve for WP Engine until October 1, 2024, so his rival could stand up its own software update service.

WP Engine did not immediately respond to a request for comment, though the company’s status page indicates they’ve deployed an alternative update server.

What complicates the debate is that Matthew Mullenweg, CEO of Automattic and co-creator of WordPress, is also a director of the non-profit WordPress Foundation, which chiefly oversees the open source project.

Mullenweg also owns WordPress.org personally, which is not the same as the WordPress Foundation. The fact that the term sheet says WordPress.org would direct the work of WP Engine employees if the time-donation payment option were chosen makes it unclear who or what entity would be the actual beneficiary of said work.

And his dual role has led critics to argue that Mullenweg should step down from the foundation due to concerns about conflict of interest. It has also led a petition on the website unprotected.org asking the America’s consumer watchdog the FTC to investigate Automattic’s business practices.

“It has become common for individuals to establish non-profits to develop open-source software (OSS) using unpaid labor and public contributions,” the petition states. “However, they may then leverage their for-profit entity to monopolize and privatize the gains, creating a market imbalance.”

The FTC declined to comment.

In an email, Bruce Perens, one of the founders of the open source movement who drafted the original Open Source Definition, told The Register, “Let’s be clear about WP Engine: It’s built on WordPress. There would be no business without WordPress. And it’s a large business with big revenue, operated as if it’s funded by private equity.

WP Engine … has to increase returns to the investors. What do they do? Cut any voluntary expense, which includes returning any value to the creators of WordPress

“Private equity always demands big returns, regardless of the harm they do to the business. One of my customers has been completely destroyed by them – they are still operating but on such thin resources that they can’t dedicate the time of one engineer to work with me on an open source compliance review, even if I do it for free.

“So, WP Engine is in that situation, and has to increase returns to the investors. What do they do? Cut any voluntary expense, which includes returning any value to the creators of WordPress. I’m told that WordPress asked for eight percent of revenue, which sounds fair to me considering that it’s the basis of WP Engine’s business.

“But because it’s an open source project, WordPress can ask but can’t demand that money, so they have to turn to hostile enforcement of their trademark and denying access to their updates.”

Perens said the situation exemplifies how open source is broken, with some 60 percent of developers being unfunded.

As you know, I’ve been working on the Post-Open project, which would make it possible for the developer to demand revenue not only from companies like WP Engine but from their deep-pocketed users,” he said.

“As more problems like the WordPress dispute come up, I think people will understand that being able to demand a fair return on their work is essential to continuing the partnership between developers and users fairly, without this sort of dispute.”

The Register asked Automattic to elaborate on its concerns about attribution codes, whether WordPress.org has resumed blocking WP Engine, whether Automattic has made a monetary demand to any other WordPress hosting firm, and whether Mullenweg’s dual roles as CEO of Automattic and director of the WordPress Foundation represent a conflict of interest.

We’ll update this story if we hear back. ®

Updated to add at 0145 UTC, October 3

On Wednesday, WP Engine filed a federal lawsuit [PDF] against Mullenweg and Automattic.

In a statement to The Register, a WP Engine spokesperson summarized the suit’s allegations, thus:

Source link

Keep an eye on what we are doing
Be the first to get latest updates and exclusive content straight to your email inbox.
We promise not to spam you. You can unsubscribe at any time.
Invalid email address
Continue Reading

WORDPRESS

How to Create A Website to Sell Products In 8 Steps [+6 Expert Tips]

Published

on

By

How to Create A Website to Sell Products In 8 Steps [+6 Expert Tips]

For years, my friend Mia sold personalized T-shirts at local markets and online marketplaces, but she always dreamed of reaching a wider audience. Having her own website. Her e-shop.

(more…)

Keep an eye on what we are doing
Be the first to get latest updates and exclusive content straight to your email inbox.
We promise not to spam you. You can unsubscribe at any time.
Invalid email address
Continue Reading

WORDPRESS

How to Easily Add Snapchat Pixel for WooCommerce in WordPress

Published

on

By

How to Easily Add Snapchat Pixel for WooCommerce in WordPress

Snapchat is a fun social media platform, but did you also know that you can use it to get visitors to your WooCommerce store?

Adding a Snapchat pixel in WordPress is a quick and easy way to see how Snapchat visitors are interacting with your online store. The pixel can also help you learn more about your audience to improve your offers and promotions.

Connecting your website to new tools can feel overwhelming, especially if you are not a tech expert. But don’t worry, you are in the right place.

Here at WPBeginner, we’ve helped countless users get more out of their online stores with campaign tracking, and we are here to guide you, too.

In this article, we will show you exactly how to easily add the Snapchat pixel to your WooCommerce store on WordPress.

Add Snapchat Pixel for WordPress and WooCommerce

What Is a Snapchat Pixel, and Why Use It?

Imagine this: you’ve launched a stunning ad campaign on Snapchat that shows off your best products with engaging videos and interactive photos. Users are swiping up and landing in your WooCommerce store, and they are excited to see what else you have to offer.

This is where the Snapchat pixel comes into play.

A Snapchat pixel is a piece of JavaScript code that you can add to your website to track user interactions. It can also gather data on how visitors engage with your site after seeing your ads.

For instance, if a Snapchat user clicks on your ad and visits your website, the pixel can capture events such as page views, purchases, cart abandonments, product views, and sign-ups.

This real-time event tracking lets you retarget audiences and optimize your ad campaigns effectively.

Here are more reasons to add a Snapchat pixel and supercharge your marketing efforts:

  • Track conversions in your online store. The pixel lets you monitor every action and conversion on your site, all linked to your ad campaigns. You can focus on the ads that work and change or drop the ones that don’t.
  • Reach the ideal audience. You can create custom audiences based on how users interact with your site. Want to target people who viewed specific products or added items to their cart but didn’t buy? No problem.
  • Improve cross-channel marketing. This pixel integrates seamlessly with other marketing tools, such as email marketing services and CRM apps. You can combine data from Snapchat with other analytics tools to see the big picture and track the entire customer journey.
  • Optimize campaigns for conversions. You can set up retargeting ad campaigns focused on users who have already shown interest in your products. For example, you can remind users who abandoned their cart to come back and complete their purchase.

Events That You Can Track With WooCommerce Snapchat Pixel

Adding a Snapchat pixel to your WooCommerce store is a smart move for keeping tabs on how users interact with your site. Here are some key events you can track:

  • Page view: When a user views a specific page on your website.
  • Add to cart: When a user adds an item to their shopping cart.
  • Initiate checkout: When a user starts processing their checkout.
  • Purchase: When a user who completes a purchase or transaction on your website goes to the thank you page.
  • Search: When a visitor uses the search bar to find a product in your store.
  • View content: When someone views specific content like blog posts or product details.
  • Sign-up: When a user registers for an account or subscribes to your newsletter.

Beyond tracking events, the Snapchat pixel lets you collect detailed user information. This includes event variables like the product ID, which identifies the product involved, and the product price at the time of the event.

Each transaction has a unique ID, and you can also track the currency used and the category of the product or page viewed.

Plus, the Snapchat pixel gathers user data. This includes email addresses for marketing and retargeting purposes, phone numbers for personalized marketing, and IP addresses to help identify the user’s location.

With that in mind, we will show you 2 methods for how to add a Snapchat pixel for WooCommerce in WordPress. You can use the quick links below to jump to the method you want to use:

Before we get to the 2 methods, let’s first prepare your Snapchat Pixel.

How to Create a Snapchat Pixel

To create a Snapchat Pixel, you must log in to your Snapchat Ad Manager account.

log into snapchat ads accountlog into snapchat ads account

If this is your first time using Snapchat Ad Manager, you’ll need to set up the account by adding your business name, business email, and name. Then, simply follow all of the steps in the setup wizard to complete the process.

Once done, you should create a business account on Snapchat.

snapchat ad manager setupsnapchat ad manager setup

That means confirming your business details, including the country, currency, and phone number.

After entering the details, go ahead and click ‘Create a Business.’

snapchat business setupsnapchat business setup

Then, you’ll arrive at the ‘Complete your Public Profile’ section.

Be sure to check your username and profile picture. And if everything is correctly set up, simply click on the ‘Create Public Profile’ button.

Create Public Profile in SnapchatCreate Public Profile in Snapchat

The next step is choosing an advertising goal. Snapchat offers five of them:

  • Web visits: When users click on your ad and visit your website.
  • My brand on Snapchat: User interactions with your brand’s Snapchat profile, such as viewing your public profile or subscribing to it.
  • Calls & texts: When users click on your ad to call or text your business directly from their device.
  • App installs: When users click on your ad and install your mobile app.
  • App visits: when users click on your ad and open your mobile app.

Since we are going to use the Snapchat pixel to track your WooCommerce store’s performance metrics, let’s choose ‘Web Visits.’

Once you’ve selected the option, you’ll need to enter your site’s URL into the text field that appears.

Choosing goals and entering site URL in SnapchatChoosing goals and entering site URL in Snapchat

Once you’ve done that, let’s head over to the dropdown menu in the top left corner and select ‘Events Manager’ under the ‘Assets’ section.

This will open the pixel management area, where you can create your Snapchat pixel.

snapchat events managersnapchat events manager

On the next screen, you’ll be asked to create your pixel or connect an app to get started.

Go ahead and click the ‘New Event Source’ button.

snapchat new event sourcesnapchat new event source

When the pop-up window appears, you can choose the event source for your pixels.

Since you want to track user interactions for your WooCommerce site, select ‘Web.’ Then click ‘Next.’

web event sourceweb event source

Next, you’ll need to give the Snapchat pixel a name. Make sure it’s easy to recognize, especially if you have multiple pixels for your online store.

Then click the ‘Confirm’ button.

create a pixelcreate a pixel

Now, simply enter your website URL so Snapchat can optimize your setup experience.

Click the ‘Check’ button. Then, you can wait for the verification process to complete.

add website for snapchat pixeladd website for snapchat pixel

Once done, you’ll want to select how you’d like to connect the Snapchat Pixel to your WooCommerce website.

Go ahead and choose the ‘Pixel Setup Tool’, and then click ‘Next.’

Snapchat pixel setup toolSnapchat pixel setup tool

On the next screen, you’ll choose the funnel events to track.

The Snapchat pixel can help you track many funnel events. It’s a good idea to start with the metrics with the ‘Recommended’ label. Scroll down the page to learn the recommended event for each funnel: ‘Awareness’, ‘Consideration’, and ‘Conversion.’

You can also check all of these funnel events to get 360-degree insights into your WooCommerce user journey.

Once you’ve decided on the funnel events, go ahead and click ‘Next.’

Select funnel events for Snapchat PixelSelect funnel events for Snapchat Pixel

You should now be able to see your Snapchat pixel base code.

If you scroll down this page, you can see step-by-step instructions on how to add the base code to your WordPress website. All you have to do is follow them.

Now, you will want to copy the Snapchat pixel base code. So, go ahead and click the ‘Copy Code’ button.

The Snapchat Pixel base code's copy code buttonThe Snapchat Pixel base code's copy code button

And done! You are now ready to add this code to your WooCommerce store using either method 1 or 2.

Expert tip: Keep your Snapchat tab open, as you’ll still need it for the method you choose below.

Method 1: Adding Snapchat Pixel for WooCommerce in WordPress Using WPCode

The easiest way to add a Snapchat pixel to WooCommerce in WordPress is using WPCode.

WPCode is the best code snippets plugin for WordPress. It lets you add custom PHP, HTML, CSS, and much more without having to edit your site’s theme files. So, you can customize and extend your site’s functionality without putting it at risk.

To get started, you’ll want to install the WPCode plugin. If you need help, then please see our guide to installing a WordPress plugin.

You can use WPCode’s free version to add the Snapchat pixel to your WooCommerce website.

However, upgrading to the premium version will unlock access to the full library of more than 100 expert-approved code snippets. Plus, you’ll get the Conversions Pixel add-on, which allows you to track pixels and run retargeting campaigns on popular social media platforms.

Once activated, let’s go to Code Snippets » Header & Footer. Now, you can paste the base code you’ve copied from your Snapchat Ads Manager into the ‘Header’ field.

Pasting the Snapchat Pixel base code to WPCode Header sectionPasting the Snapchat Pixel base code to WPCode Header section

Then, go ahead and click ‘Save Changes.’

Let’s return to the Snapchat tab to check whether you have added your Snapchat pixel base code correctly.

You can scroll down the page to find the ‘Check Pixel Implementation’ field. Then, simply enter your site’s URL into the field, click ‘Check,’ and wait for the verification to complete.

After a few seconds, you should see the ‘Installed correctly’ notification message just below the text field.

Snapchat Pixel code installed correctlySnapchat Pixel code installed correctly

Go ahead and click ‘Next.’

In the final step, you will be asked to add events to your WordPress website. Go ahead and click on the event buttons. Then, select a funnel event from the dropdown.

In the dropdown menu, you can see a long list of available funnel events. These include ‘Save,’ ‘Start Checkout,’ ‘Sign Up,’ ‘Ad Click,’ ‘Completed Tutorial,’ ‘Add to Wishlist,’ ‘Credit Spent,’ ‘Trial Started,’ and more.

Each of these events represents a checkpoint in the user’s journey. And you can set which one you want to track.

For example, we chose ‘Sign Up’ as the funnel event to track on our WooCommerce website.

Adding pixel events to a websiteAdding pixel events to a website

Then, you might want to set parameters.

Parameters are extra details you can add to your pixel events. They are optional but can be useful for tracking and understanding how users behave on your website. Some parameter examples include product IDs and transaction amounts.

For example, here, we set parameters for Content ID on the page. By choosing the ‘Start Now’ button, we can track if users take the desired action and see if the call-to-action button works.

Adding content parameter in Snapchat PixelAdding content parameter in Snapchat Pixel

After setting up one event and its parameter, you can go ahead and create more if needed. Simply repeat the process, and once everything is ready, you can click Submit » Finish Setup » Confirm Setup.

And that’s it. Your WooCommerce website should now track Snapchat Pixel.

To access the pixel overview, you’ll want to navigate to Event Managers » View Pixel Details.

View pixel details buttons in SnapchatView pixel details buttons in Snapchat

In the ‘Overview’ section, you can view more detailed statistics for all of your recorded events and the date the last event was made.

Simply hover over the touchpoints on the graph to see your event distribution.

Snapchat pixel overviewSnapchat pixel overview

Method 2: Adding Snapchat Pixel for WooCommerce in WordPress Using FunnelKit Automation

In this method, we will be using FunnelKit to add a Snapchat Pixel for WooCommerce.

FunnelKit offers pixel-tracking settings that automate the process of adding code snippets to your entire site. This means you don’t have to manually add the Snapchat pixel and edit your site’s code.

If you haven’t already done so, you’ll need to install the FunnelKit plugin. For more details, follow our tutorial on how to install a WordPress plugin.

Before we head over to the FunnelKit dashboard, let’s return to the Snapchat tab. You’ll need to have your pixel ID number ready to start tracking the Snapchat pixel via FunnelKit.

First, you can head over to Assets » Pixels. Then, simply find the ‘WooCommerce Snapchat Pixel’ that you just created in the list of available pixels. Below the pixel title, you’ll find the pixel ID number.

Go ahead and copy the pixel ID number.

The Snapchat Pixel ID numberThe Snapchat Pixel ID number

Now, let’s head over to your WordPress dashboard.

From here, you’ll want to go to FunnelKit » Settings » Pixel Tracking and open the ‘Snapchat’ tab.

funnelkit pixel trackingfunnelkit pixel tracking

Then, you can paste the pixel ID into the ‘Pixel ID’ field.

Expert tip: With FunnelKit, you can track other social media campaigns, too. Popular social media platforms that integrate with this plugin include Facebook, Instagram, Pinterest, and TikTok.

Below, you can also choose which events you’d like your pixel to start tracking.

add pixel IDadd pixel ID

For example, FunnelKit allows you to track the following events:

  • Site-wide events. Track user interactions across the entire website, such as page views or clicks.
  • Sales page events. Track actions on sales pages, like viewing the page or clicking the ‘Add to Wishlist’ buttons.
  • Optin page events. Track activities on optin pages, such as form submissions, social contest sign-ups, or other button clicks.
  • Order bump events. Track interactions with additional offers during checkout.
  • Checkout events. Track user actions during the checkout process, like entering payment details.
  • Purchase events. Track completed transactions and the details of purchases.

To maximize your tracking, it’s a good idea to track all of your events. That way, you can collect the most data possible.

For example, it’s useful to track every step in the customer journey so you can optimize and tweak your campaigns accordingly.

Once you decide on the events to track, you can click ‘Save.’

woocommerce event tracking from snapchatwoocommerce event tracking from snapchat

There you have it! You’ve added a Snapchat pixel to your WooCommerce store.

To see how the Snapchat pixel performs, you can navigate to FunnelKit » Analytics » Referrers. Then, simply locate the Snapchat section from the list of available campaigns.

Snapchat stats in FunnelKitSnapchat stats in FunnelKit

Testing the Snapchat Pixel on Your WordPress Site

After you have set up the Snapchat pixel in your store, it’s a good idea to make sure it works.

The easiest way to see if your pixel is working is to use a Chrome extension like Snap Pixel Helper.

Make sure you are using Google Chrome, and then add it as an extension.

snap pixel helpersnap pixel helper

You’ll now need to visit your WooCommerce store. It’s a good idea to test all the different events you’ve listed to track in the previous steps.

For example, it’s a good idea to add products to the cart or make a dummy purchase to see that the pixels are working for every user event type.

snapchat event trackingsnapchat event tracking

Once you see that a pixel ID is detected and all of the events were tracked, then you are good to go!

Frequently Asked Questions About Snapchat Pixels

In this section, we will answer some of the most frequently asked questions about adding Snapchat pixels to WooCommerce websites.

How Do I Get Pixels on Snapchat?

Start by logging into Snapchat Ads Manager. Then, you’ll want to navigate to Asset » Pixels » Create Pixel.

Follow the prompts to name your pixel and generate the code. Once you have the code, you can add it to your website using a plugin like WPCode or FunnelKit. This will help you track user interactions on your site and optimize your ad campaigns.

Where Do I Add the Pixel Code in WooCommerce?

Adding the Snapchat pixel to the header of your WooCommerce site is important for effective tracking.

Placing the pixel code in the header ensures it loads on every page from the start, capturing user interactions across your site. This improves accuracy by recording all relevant activities as they happen.

We hope this article helped you learn how to add a Snapchat pixel in WooCommerce. Next, you may also want to see our guide on how to upsell products in WooCommerce and our picks of the best WooCommerce plugins for your store.

If you liked this article, then please subscribe to our YouTube Channel for WordPress video tutorials. You can also find us on Twitter and Facebook.


Source link

Keep an eye on what we are doing
Be the first to get latest updates and exclusive content straight to your email inbox.
We promise not to spam you. You can unsubscribe at any time.
Invalid email address
Continue Reading

Trending