SEO
SEO for Multiple Locations (Beginner’s Guide)
To attract customers from certain geographic locations with organic search, you’ll need to start implementing SEO for multiple locations. But how exactly can you do this?
Let’s get started.
Multiple location SEO (MLS) is the process of optimizing your business’s organic search presence for multiple geographic locations. It may sound complicated, but it’s similar to regular SEO, with a few additions.
MLS is particularly important for businesses like restaurants, service-based businesses, or retail chains that have multiple stores with their own established presence.
The benefits are that it enables your business to reach a larger audience—both in the online world and the offline world.
So how do you get started?
In Google, there are two primary ways to appear for geographic-based searches, either as part of the regular organic results or the map pack (also known as the local pack).
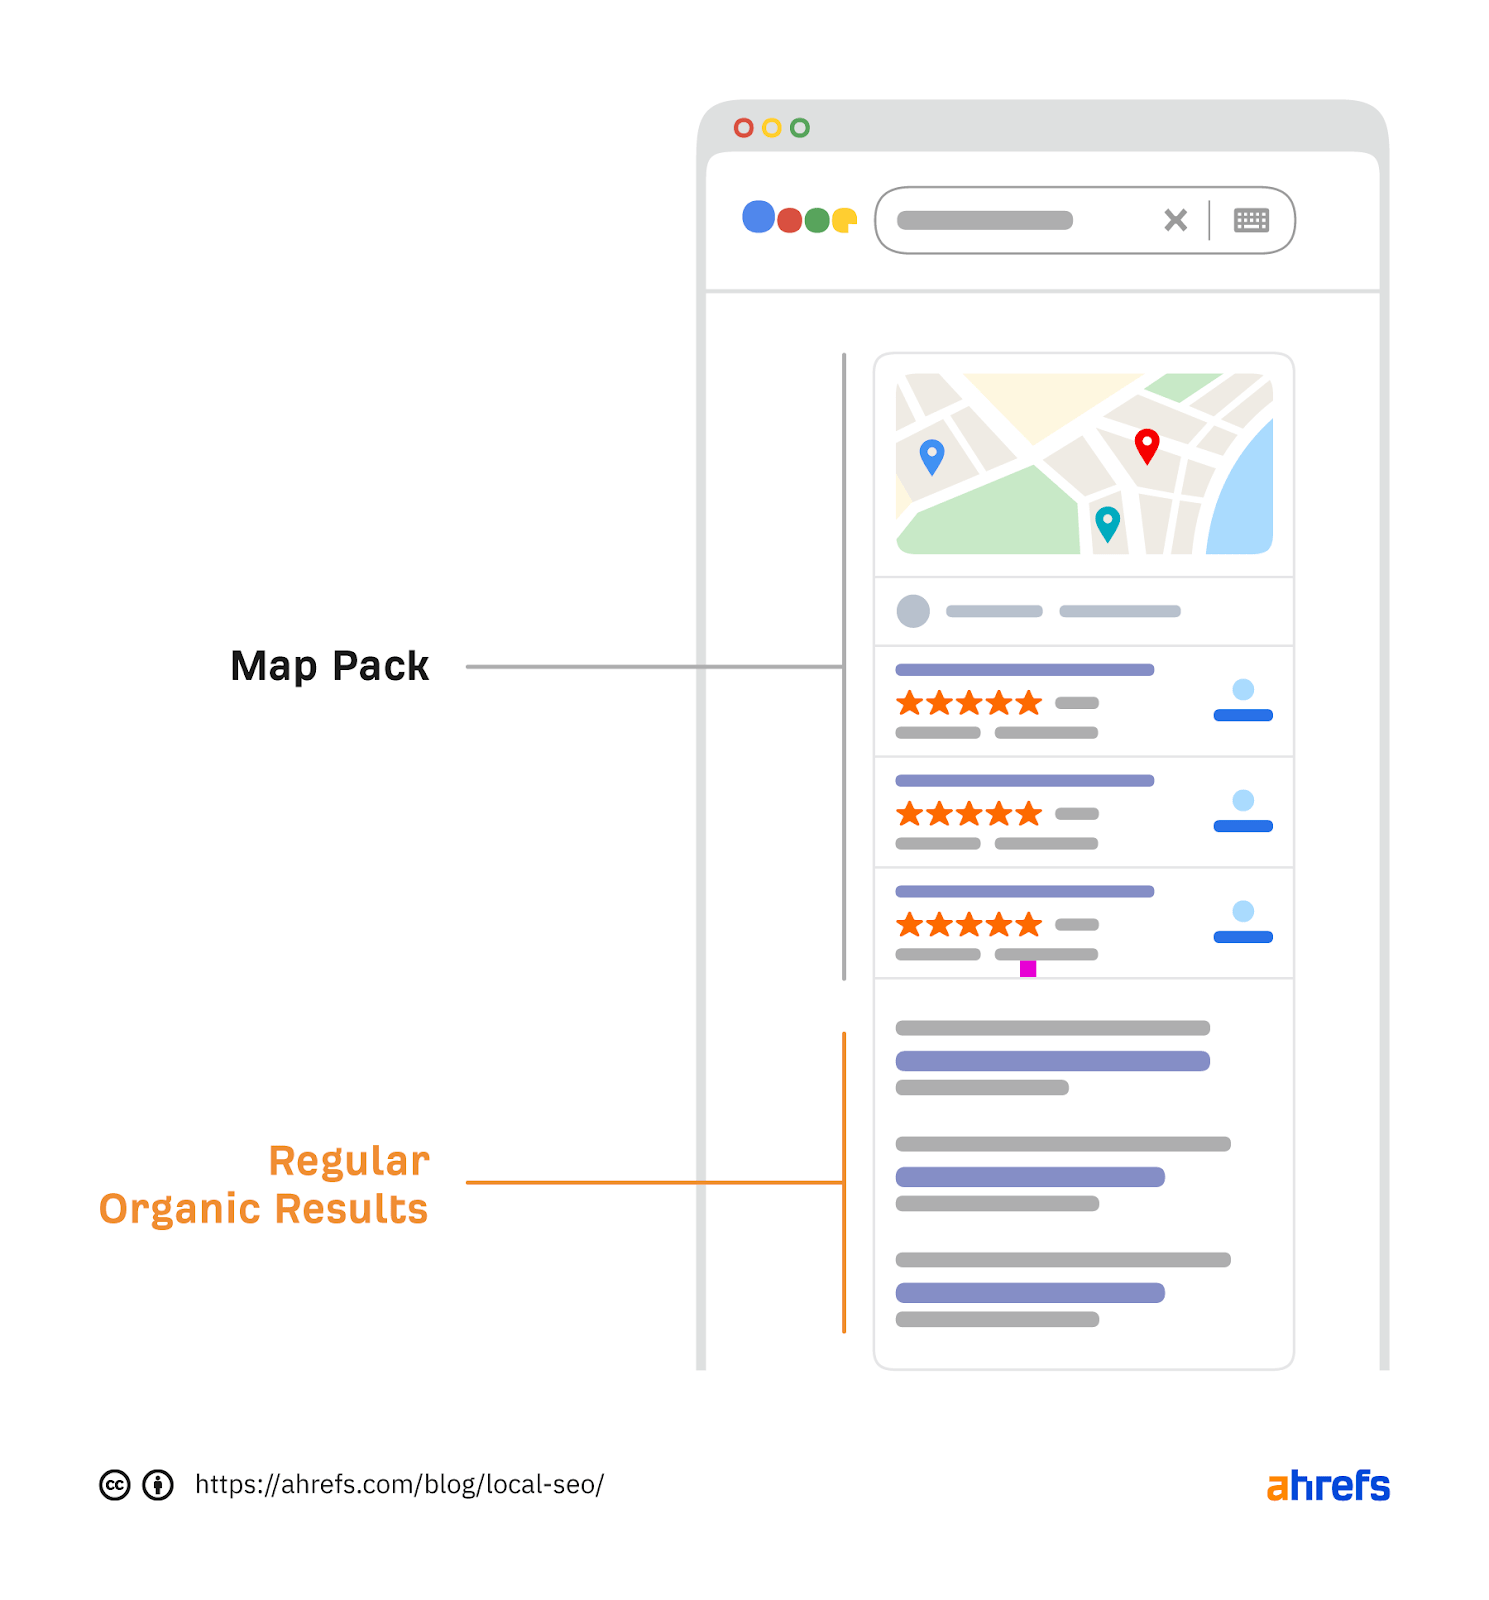
Let’s take a look at how to optimize for these for multiple locations.
How to appear in the localized organic results
The first thing I look at is the website’s structure.
If you have multiple physical locations, it’s a good idea to set up location-specific landing pages. But only if there is search demand for these pages and only if you have a physical location in those places.
But how can you work out what the search demand is? Simple—you can use Ahrefs’ Keywords Explorer.
Let’s say you own a dog walking business in the U.S. and you want to optimize it for the physical locations in New York City and Chicago. How do you do it?
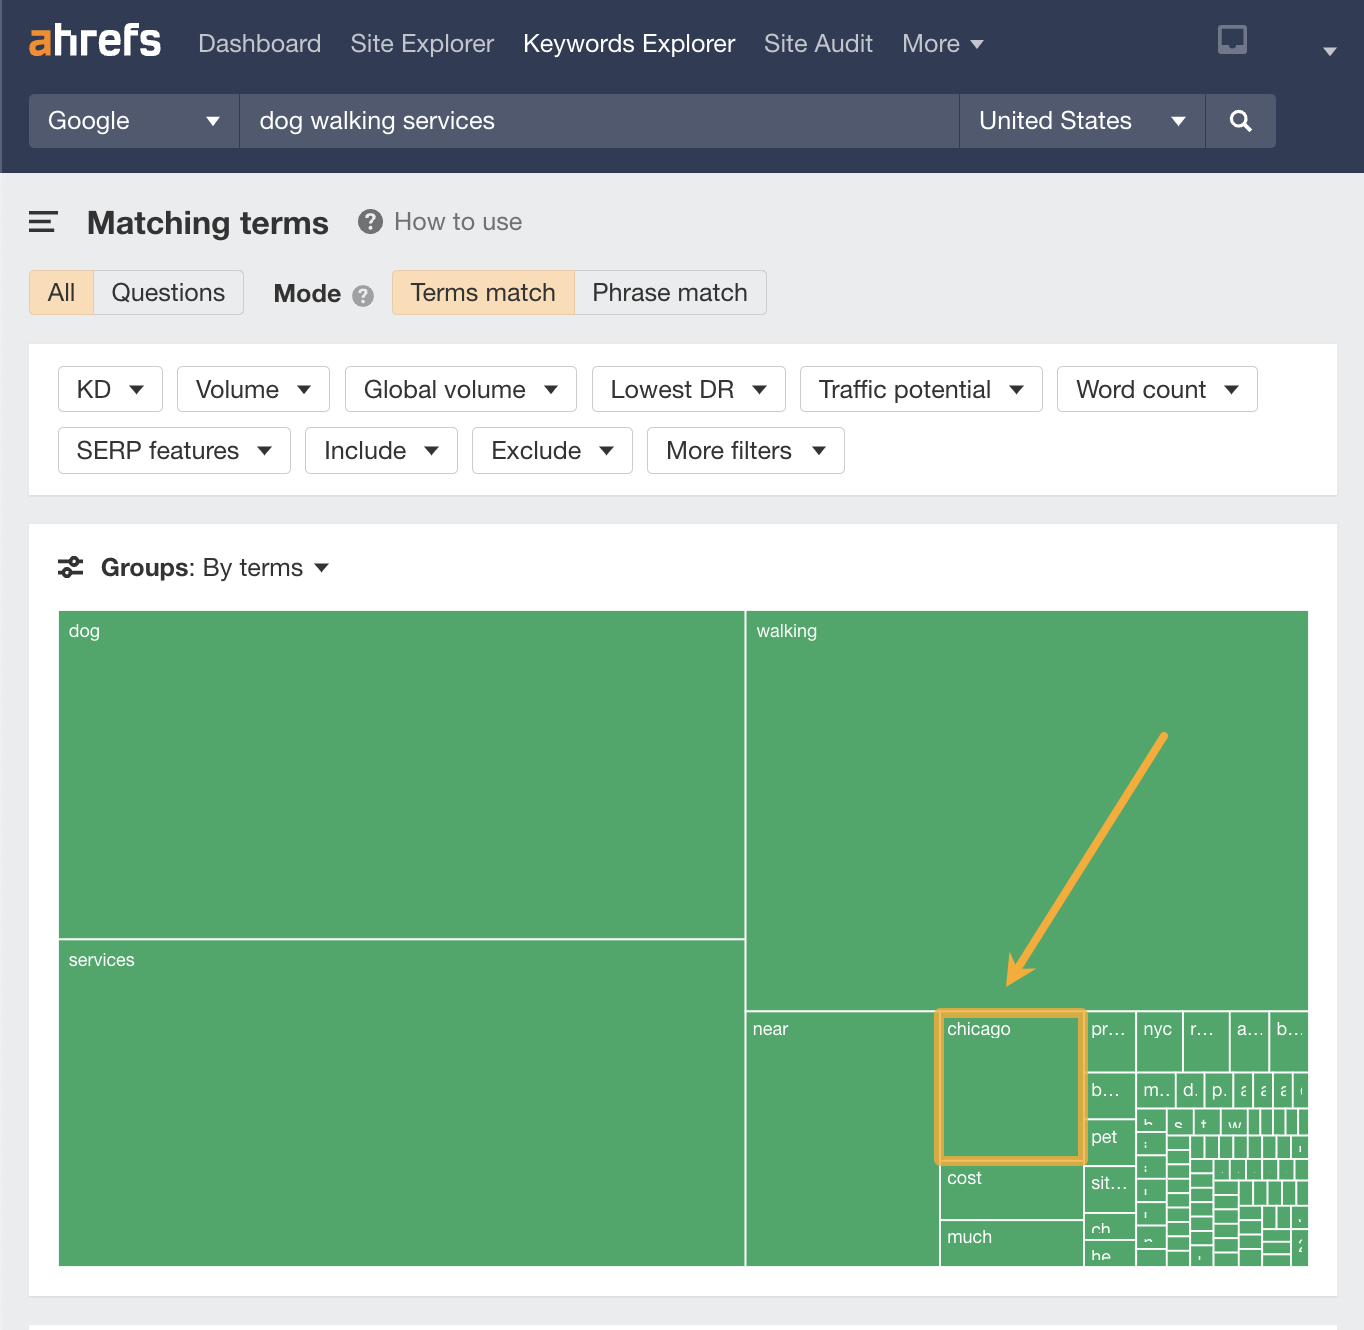
If we open Keywords Explorer, plug in “dog walking services,” and head to the Matching terms report, we can see Chicago is a key location without even looking at the keyword list.
Let’s dive into the keywords a bit more and look at all the popular locations for dog walking services.
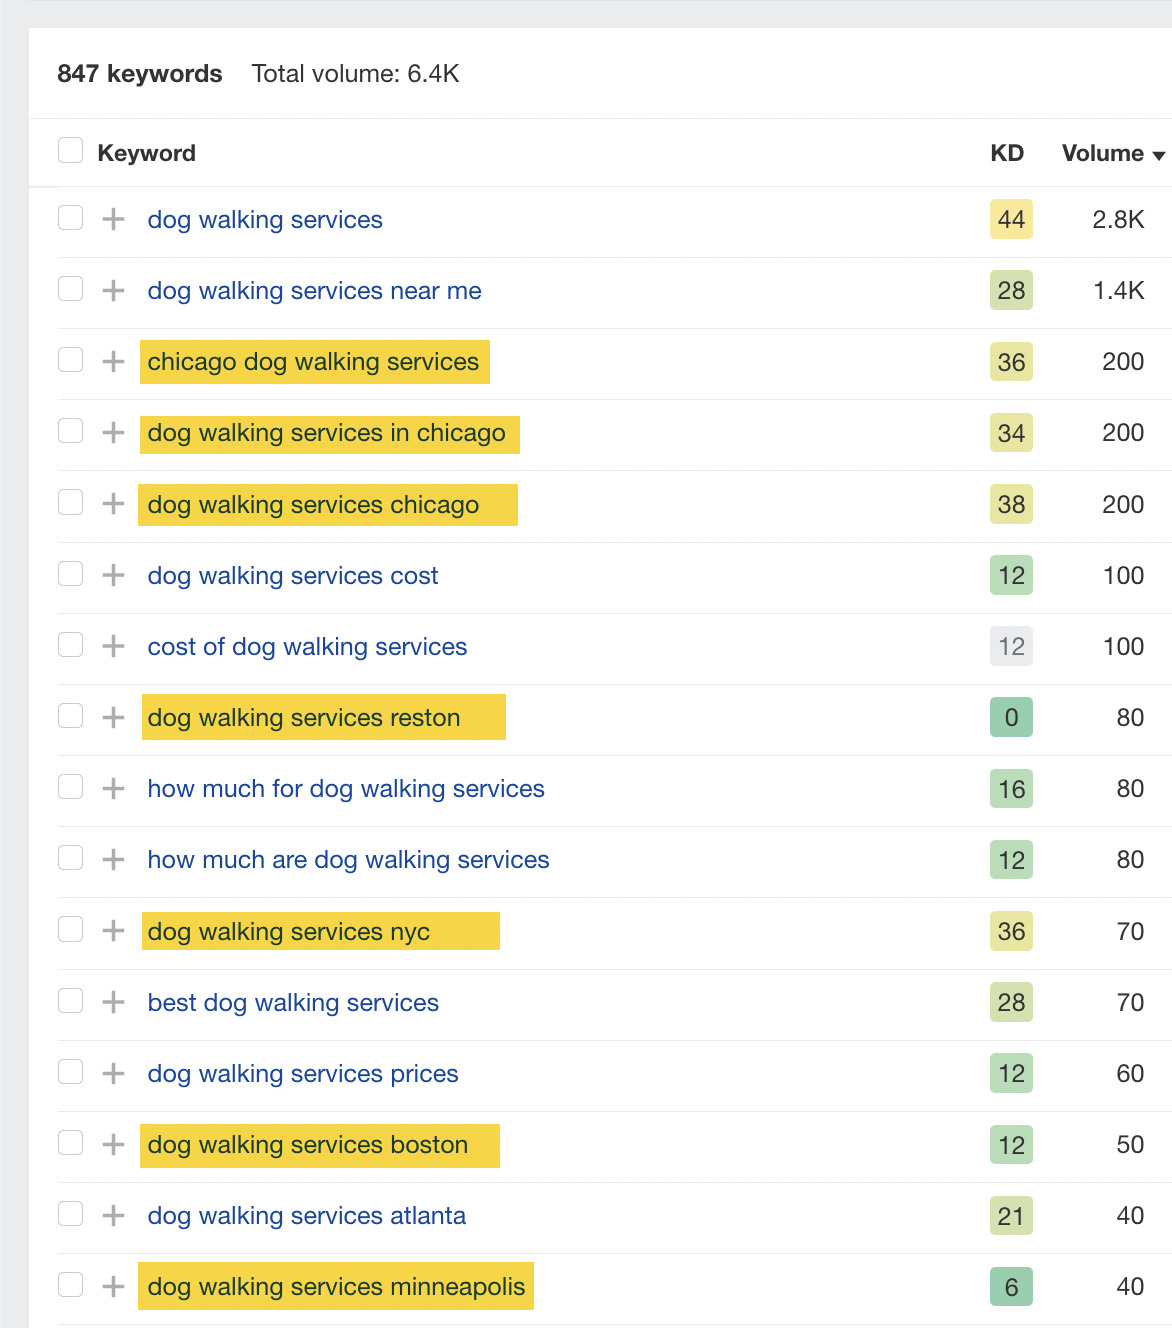
From the above list, we can see that these are the most searched for areas for dog walking services:
- Chicago
- Reston
- NYC
- Boston
- Minneapolis
Using this newly acquired knowledge, we can set up landing pages for our Chicago and NYC stores as a priority, knowing that there is search demand for these particular locations.
When setting up your new landing pages, it’s a good idea to start with the URLs.
They should look something like this:
yourwebsite.com/dog-walking-services/chicago/yourwebsite.com/dog-walking-services/nyc/
Tip
If you see a location appear in Keywords Explorer in short form, e.g., “NYC” instead of “New York City,” it’s usually best to go with the most searched for version.
Once we have set up these pages, we can populate them with all the important information about that particular location.
The important details to include are what’s known as your “NAP”—the name, address, and phone number of that business’s location.
Once you have added this, you can build out the location landing page(s) with further details of the business. This will help build trust with your customers.
It’s a good idea to put yourself in the shoes of your customers when doing this and think about what information they would be interested in.
If we take a look at one of the landing pages in the SERPs for “reston va dog walking,” we can see that it’s reasonably well optimized.
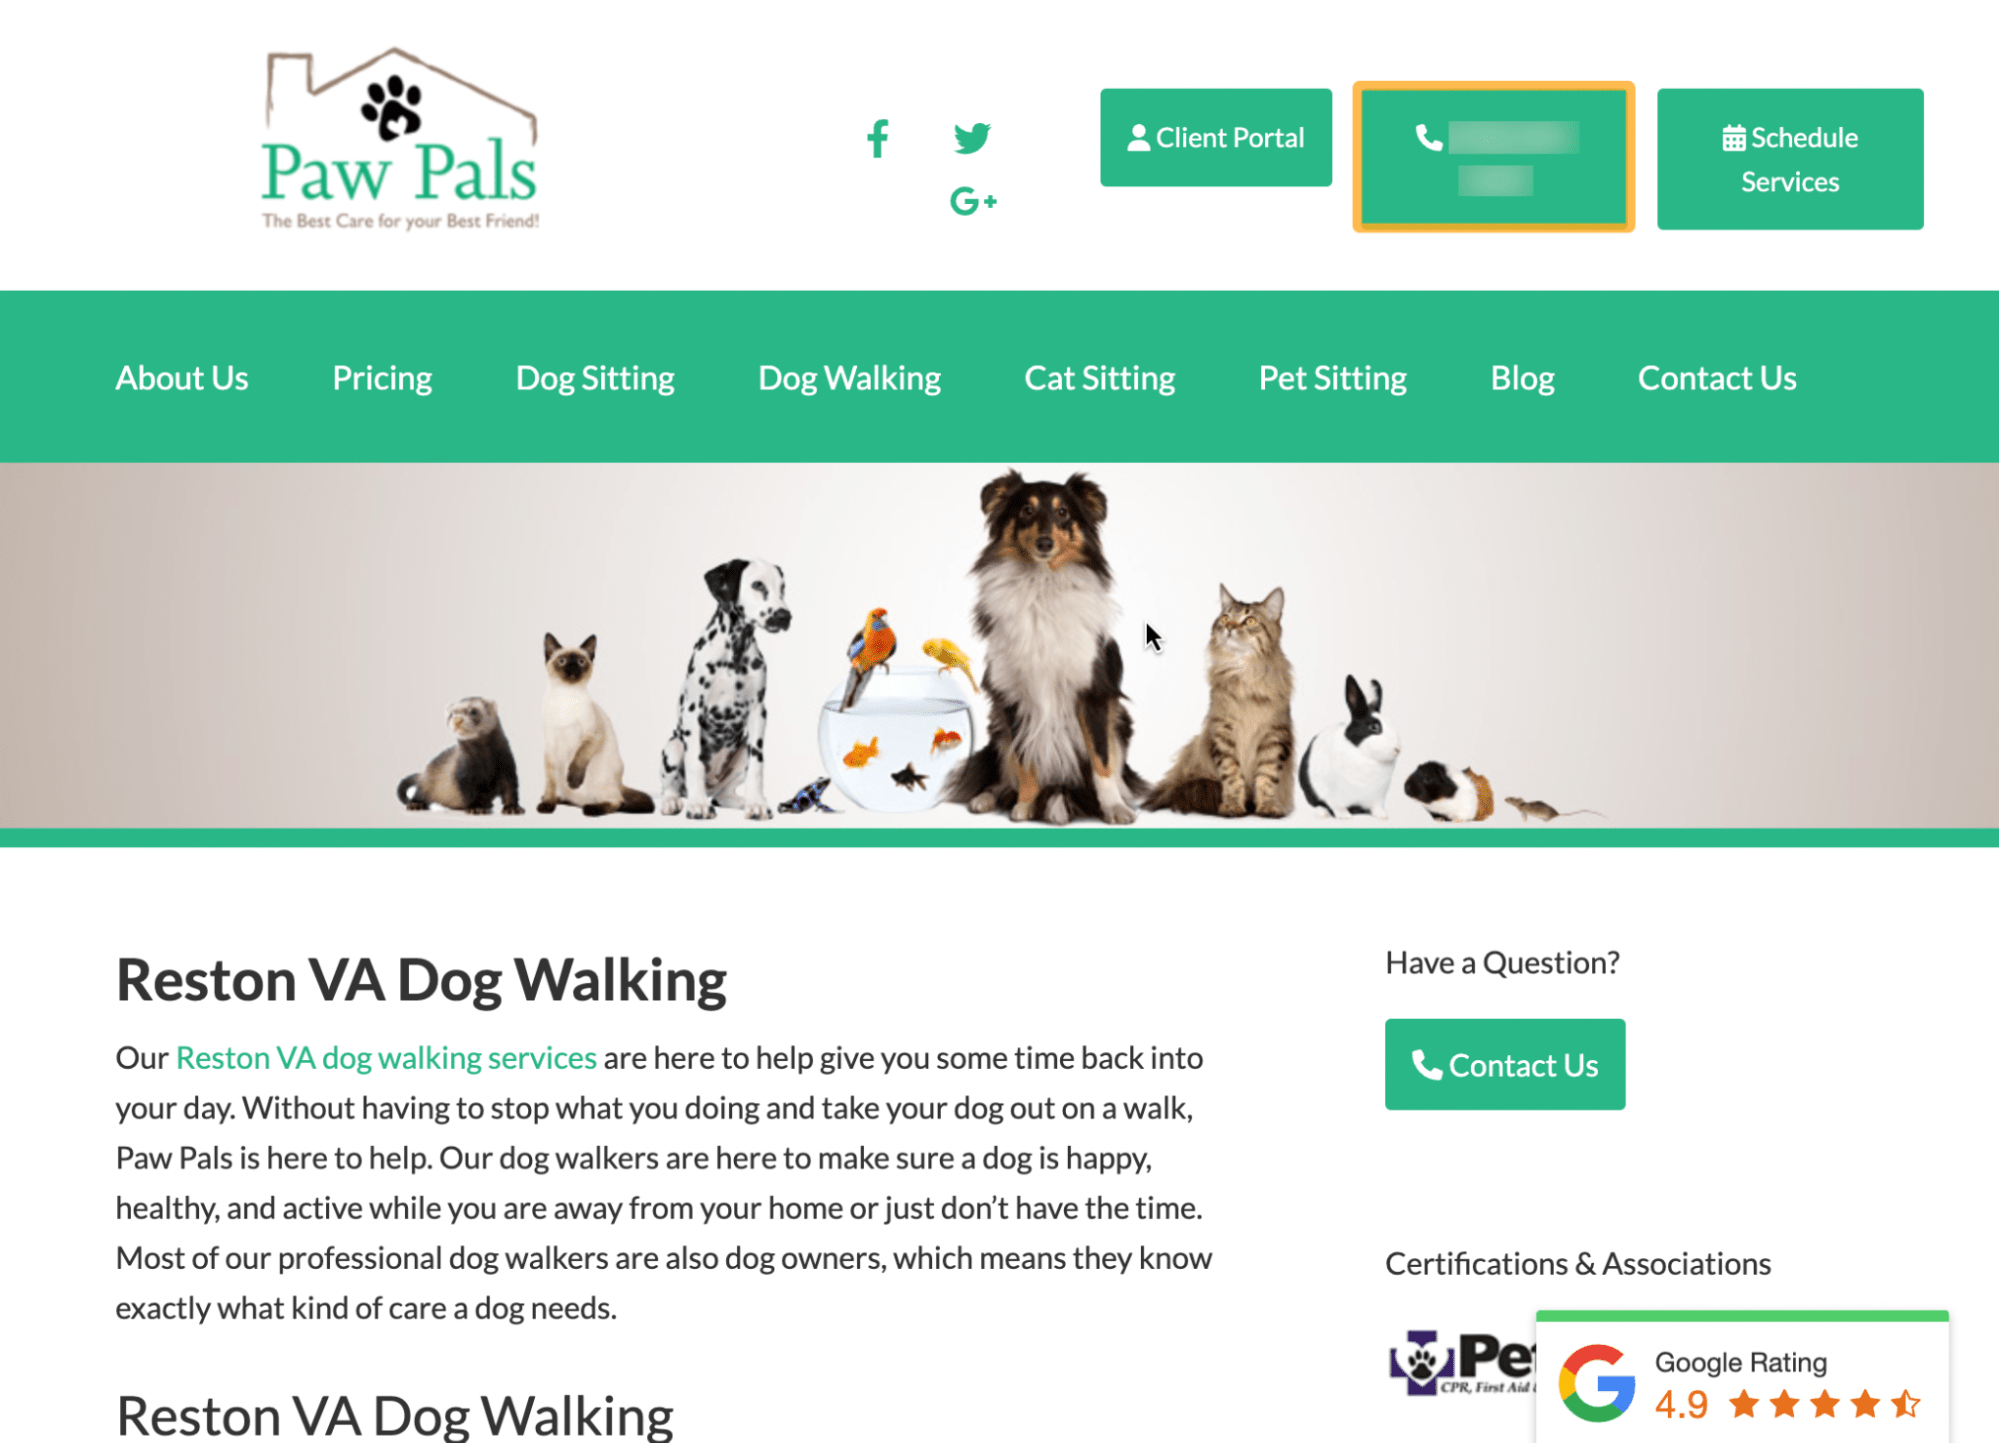
It includes helpful information for customers, such as:
- The opening hours.
- Certifications and awards it has won and associations it is part of.
- Holiday schedule and pricing details.
- Google rating widget.
- “Other areas served” list.
- Contact form.
- Google map embed.
The NAP details are at the bottom of the page, with a contact form and phone number in the top right-hand corner.

Although these elements are for a dog walking site, you can see that these simple elements are reproducible for many businesses.
The only extra information I would have added to this landing page is more detail about the staff providing the services.
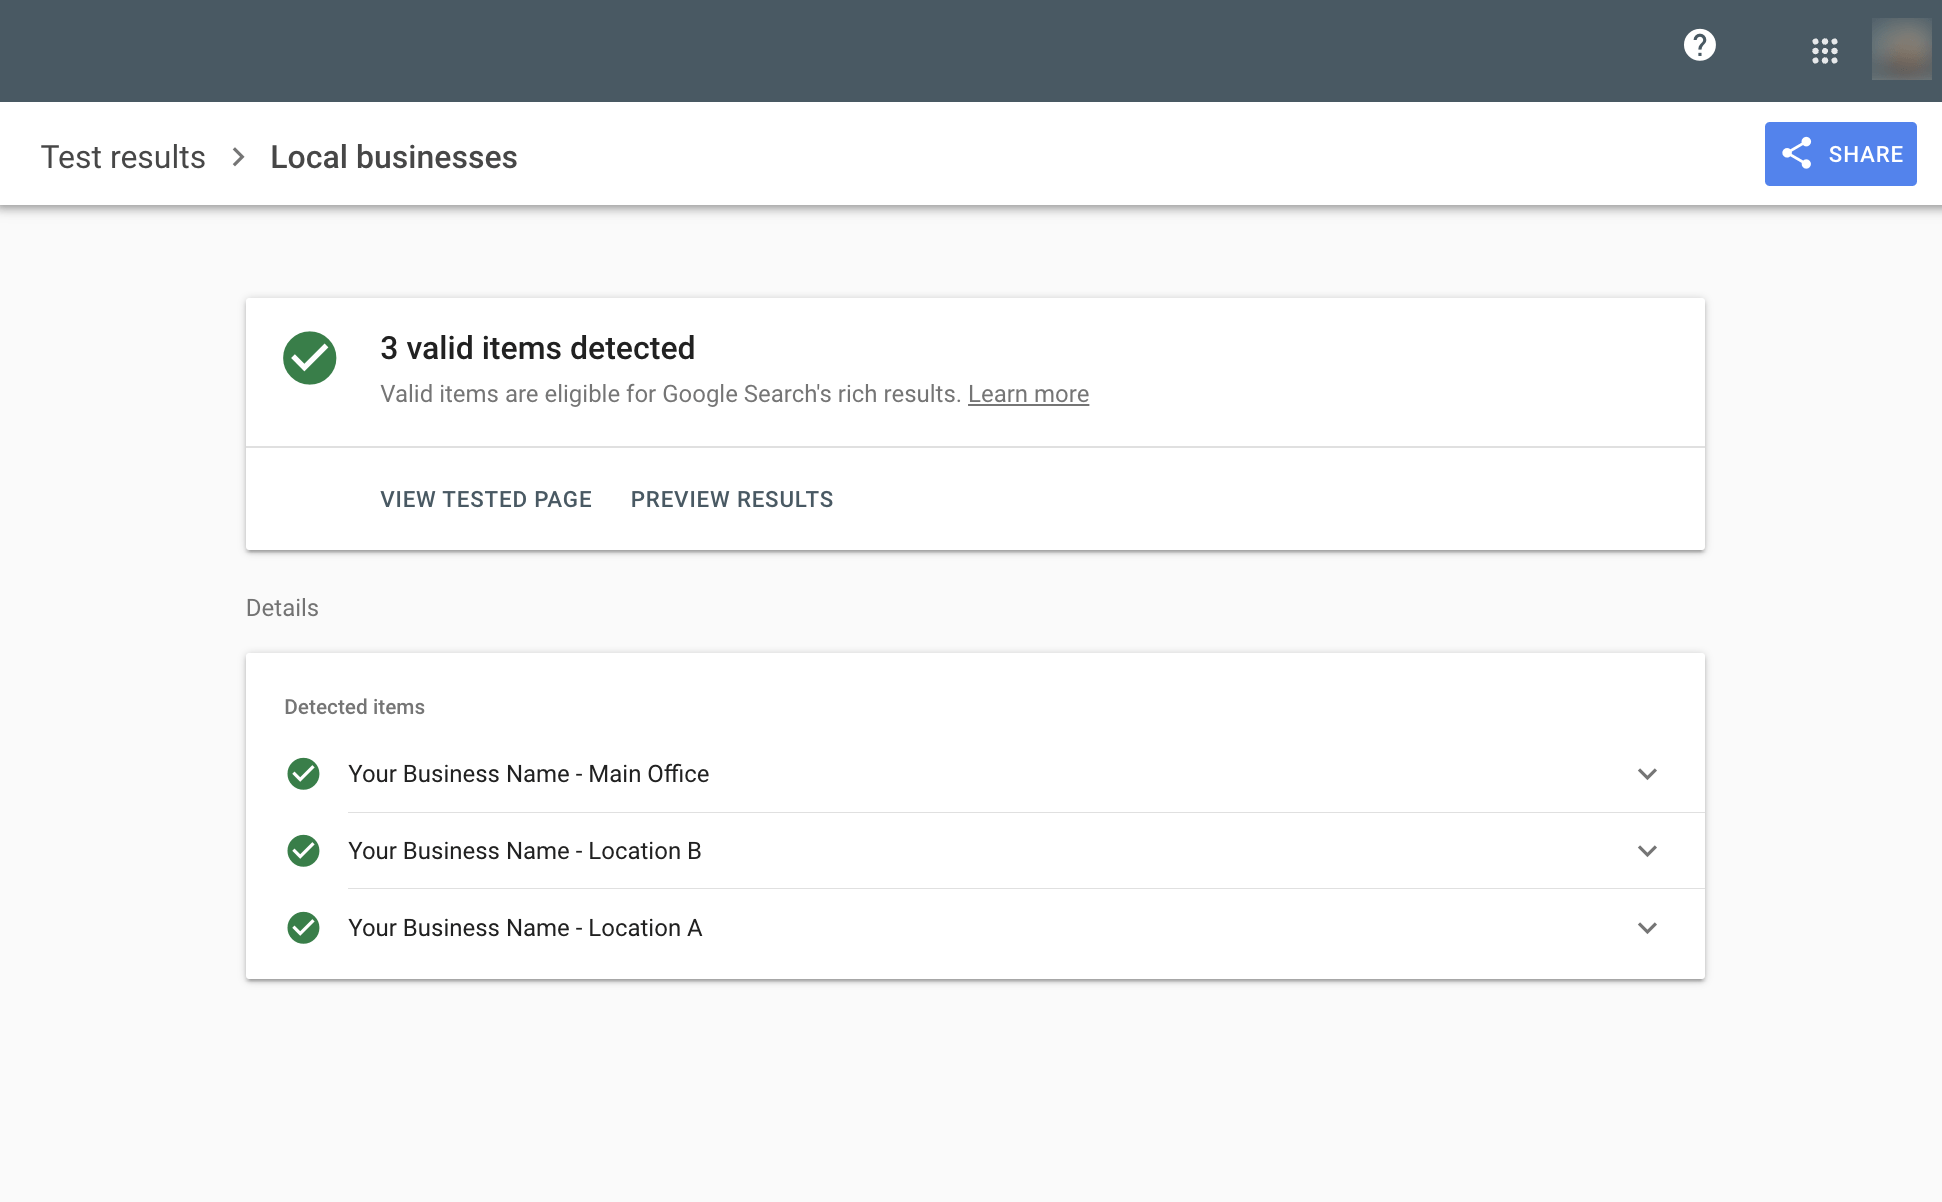
With a quick check of this page using the Rich Results Test, I can see that it doesn’t have any location schema markup.
Schema is a further addition that you can make to your multiple-location landing pages.
Without going into too much technical detail, I recommend checking out this guide that shows you how to optimize for multiple locations using schema.
Once you are done, it should look something like this in the Rich Results Test:
How to appear in the local pack
Once you have set up your location-based landing page(s), it’s time to consider the other elements of your online presence, such as how to appear in the local pack results.
For location-based searches, Google typically shows the local pack at the top of the page ahead of the organic results.
If we search for the phrase “brewdog manchester”—(a popular craft beer brand + a city in the U.K.), we can see the local pack above the organic results.
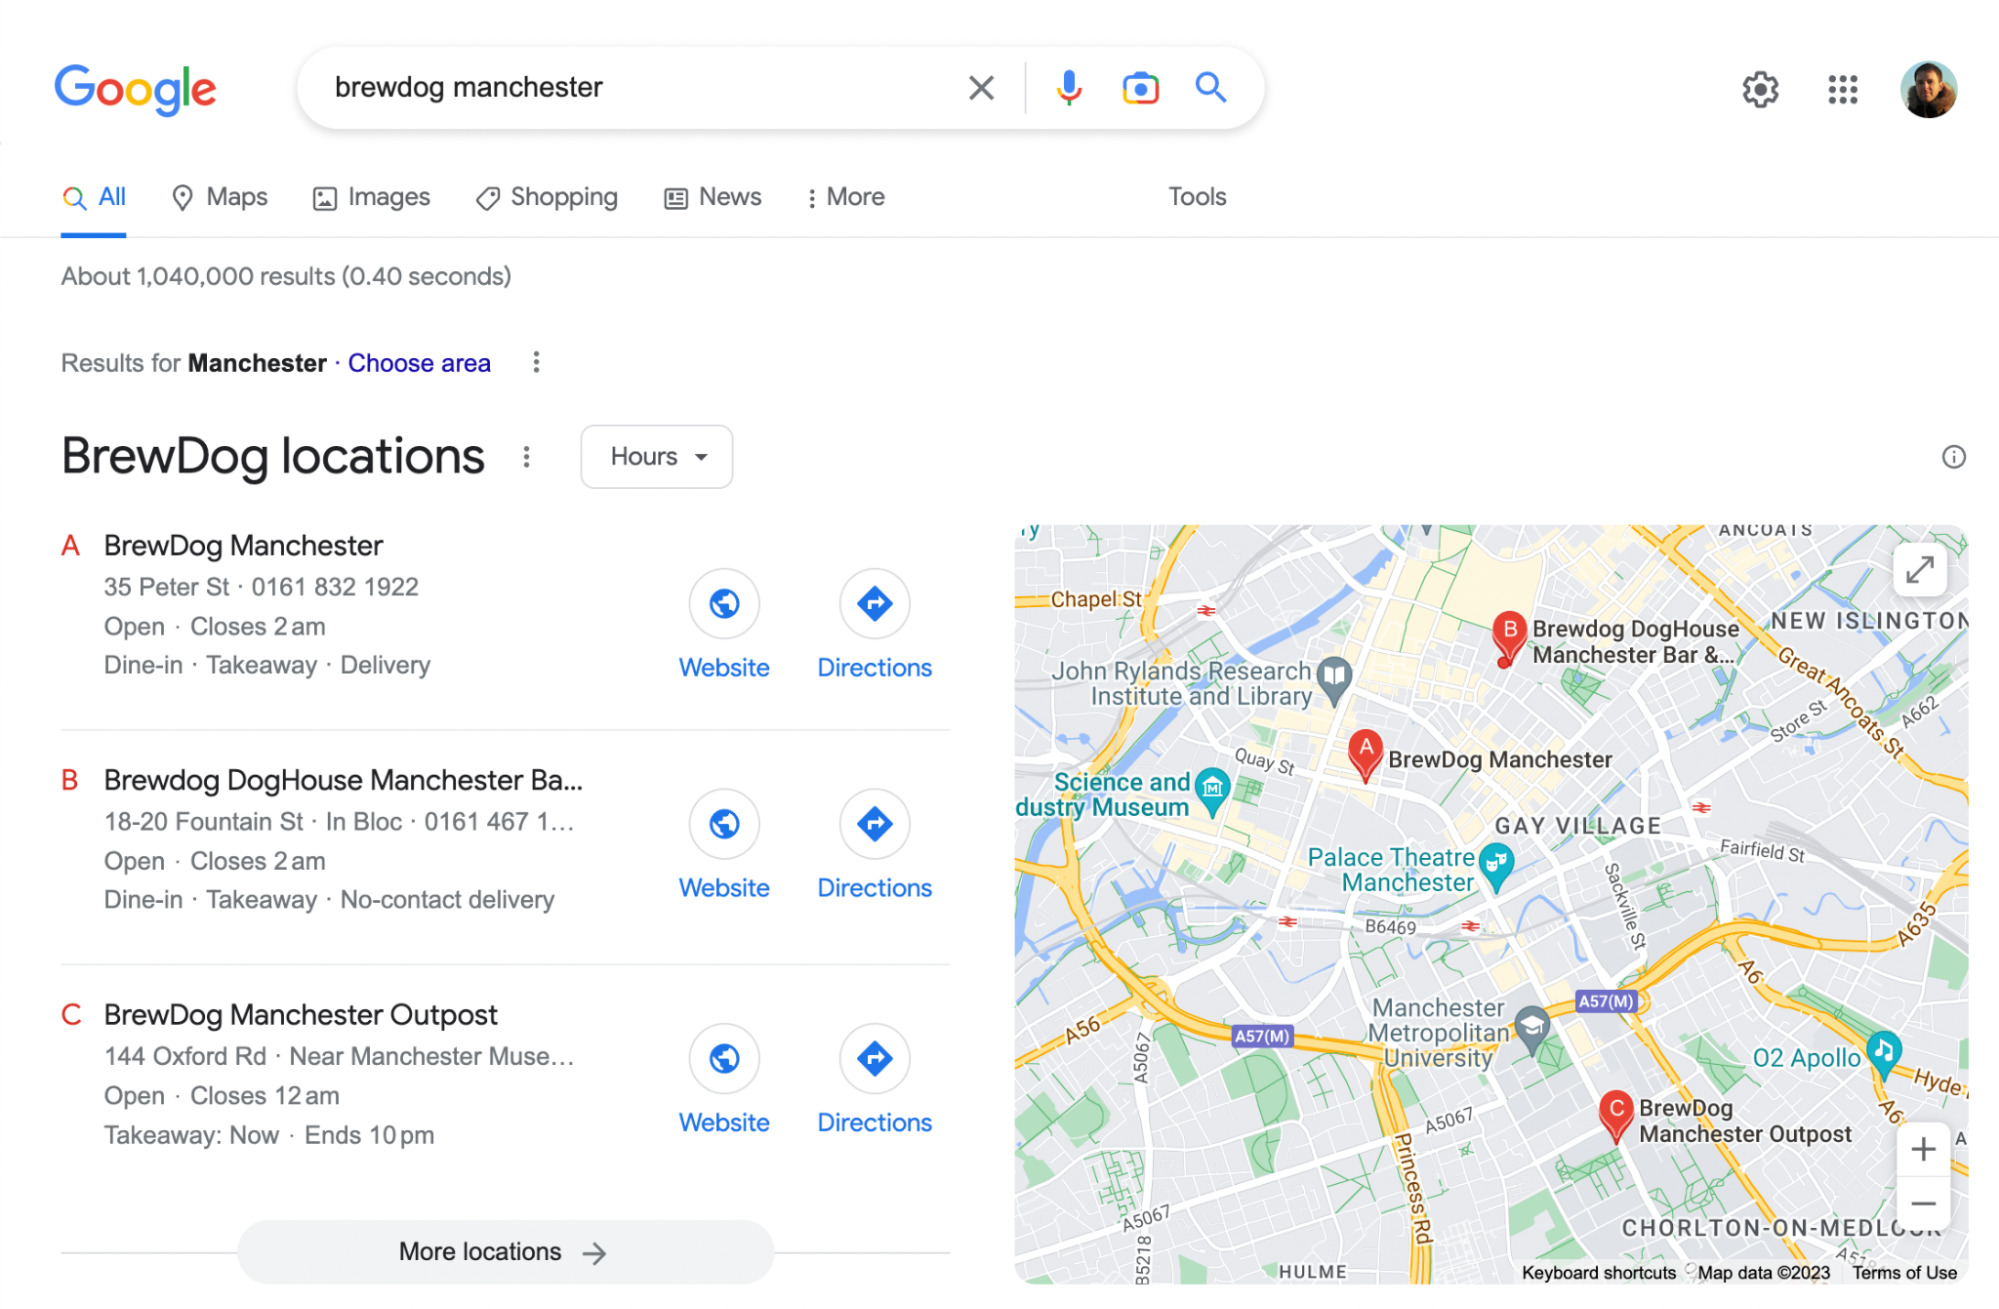
If we search for the same keyword phrase on Ahrefs’ Keywords Explorer, the SERP overview shows us the details of the local pack and breaks out the same results in an easier-to-scan format.

Setting up a Google Business Profile is the key to appearing in the local pack results.
To do this, head over here to get started.
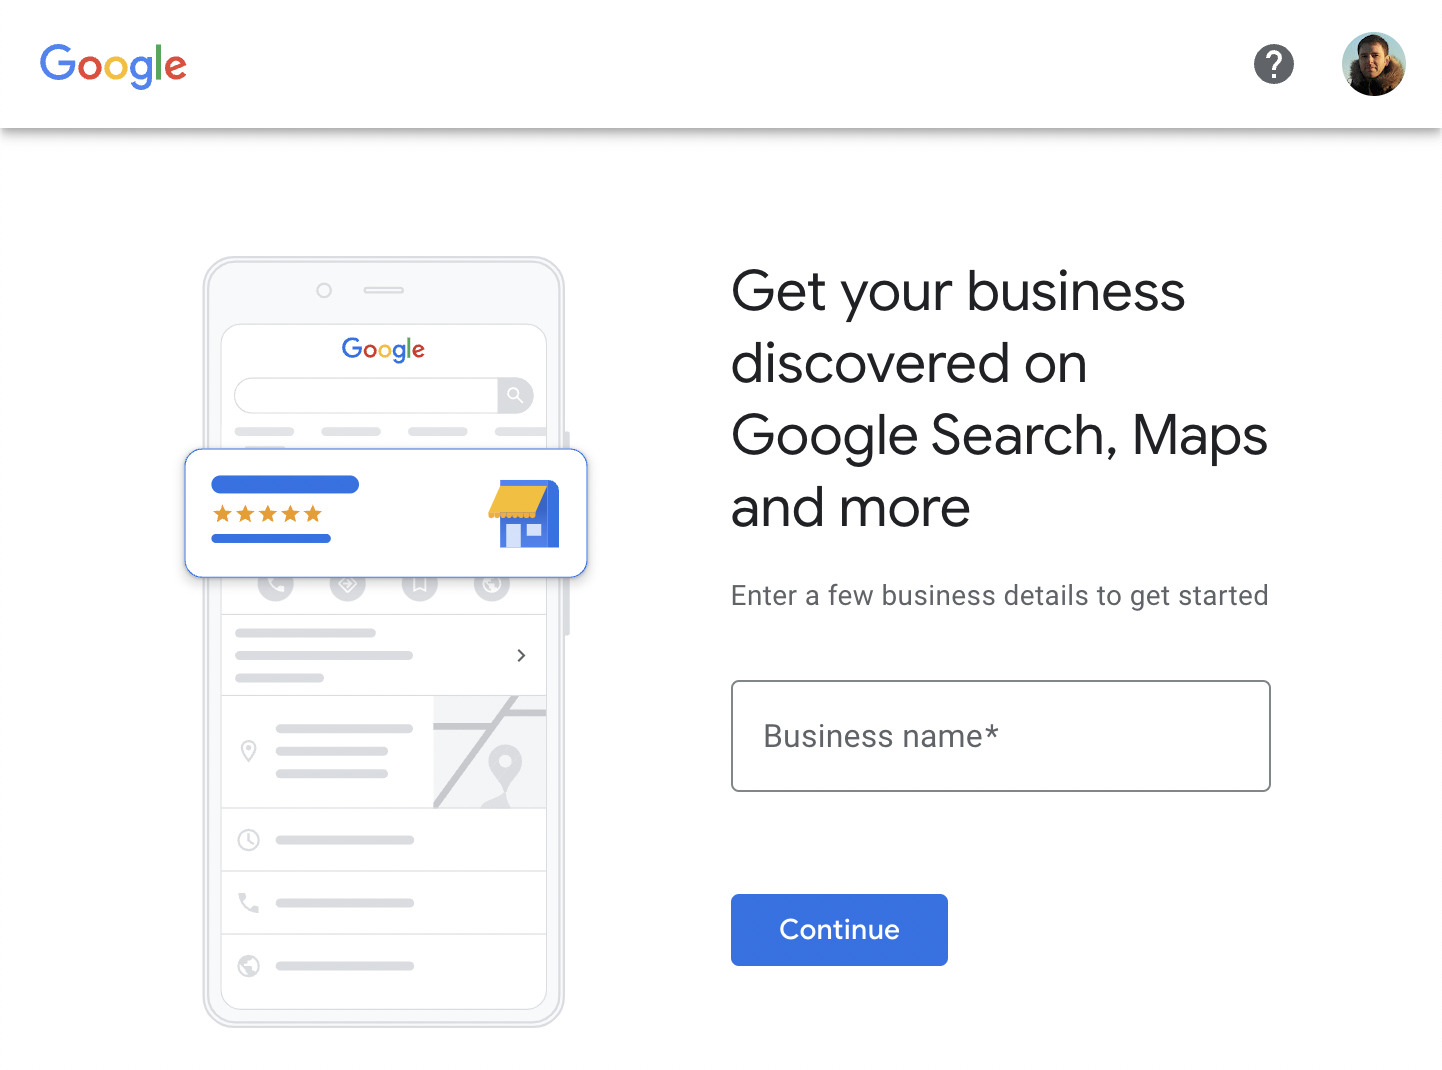
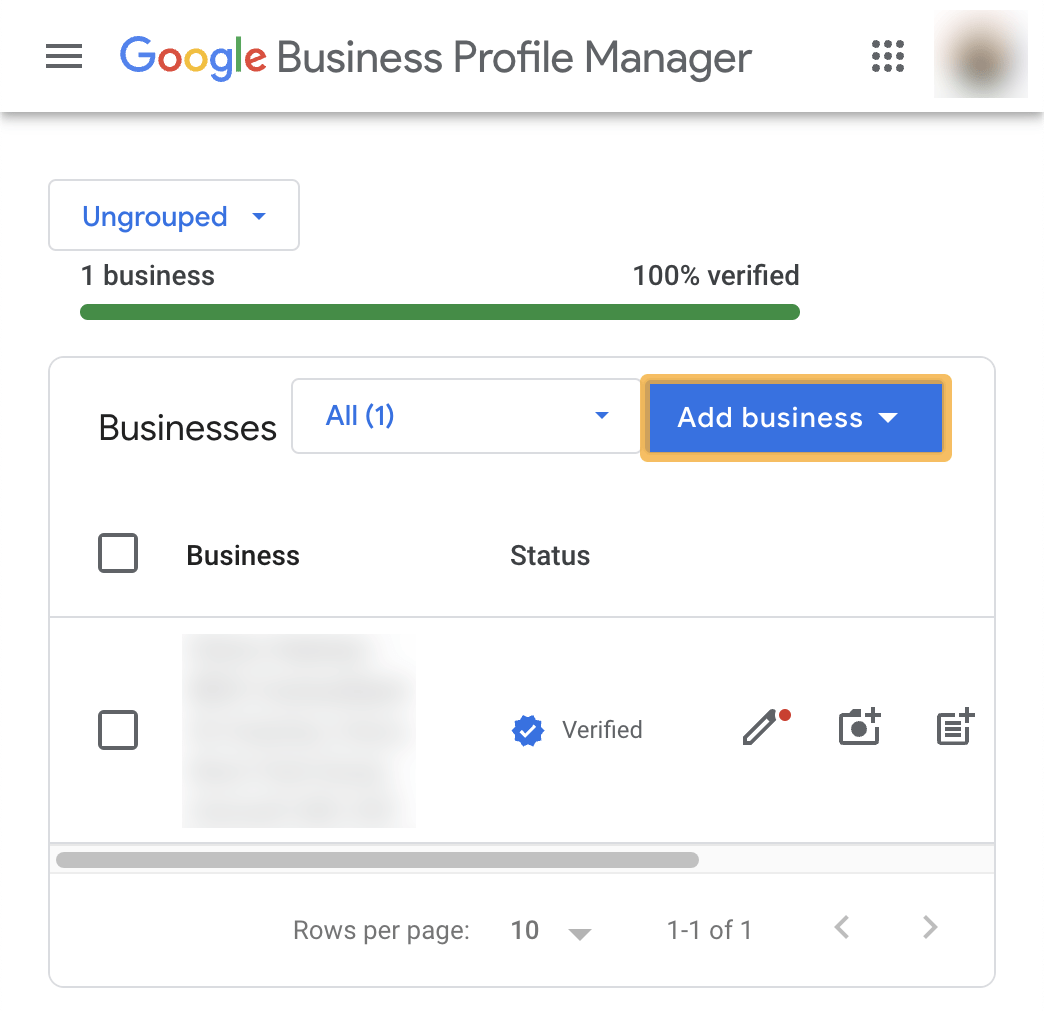
Once you have set up your main location and it’s verified, you’ll need to set up your other locations.
To do this, click on Add business in your Google Business Profile:
Then click on Add single business.
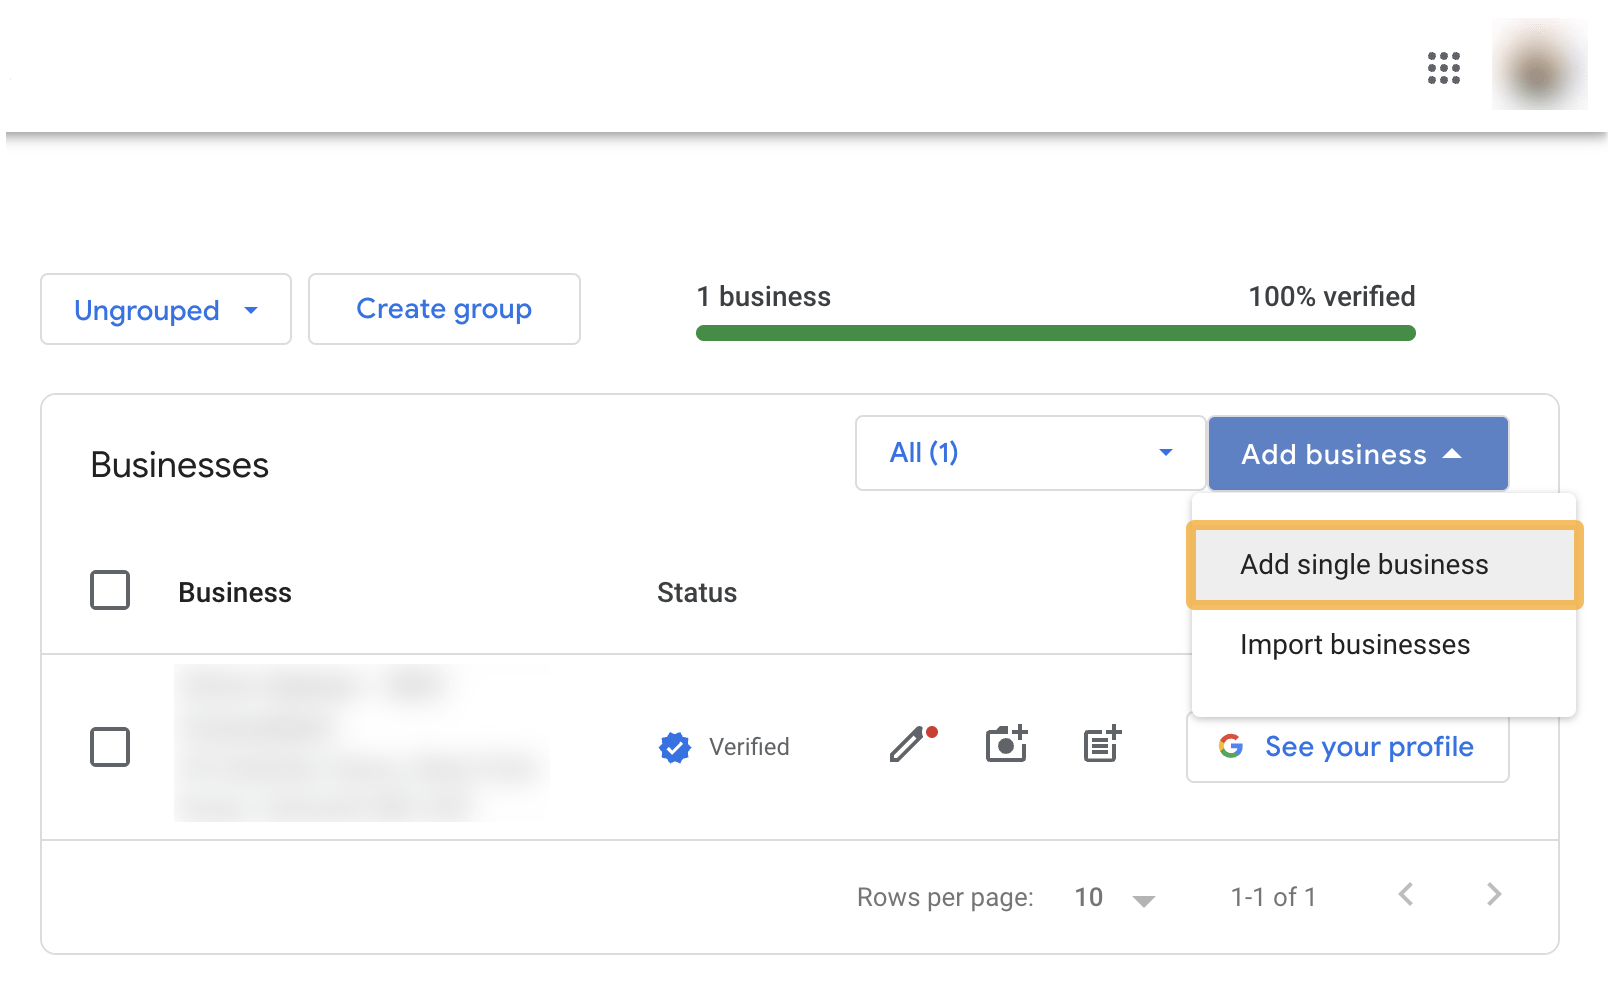
When you have filled out all of the relevant information for your different locations, you will have created your Google Business Profile. The business locations should start to show in the local pack once Google has verified your profile and the other locations.
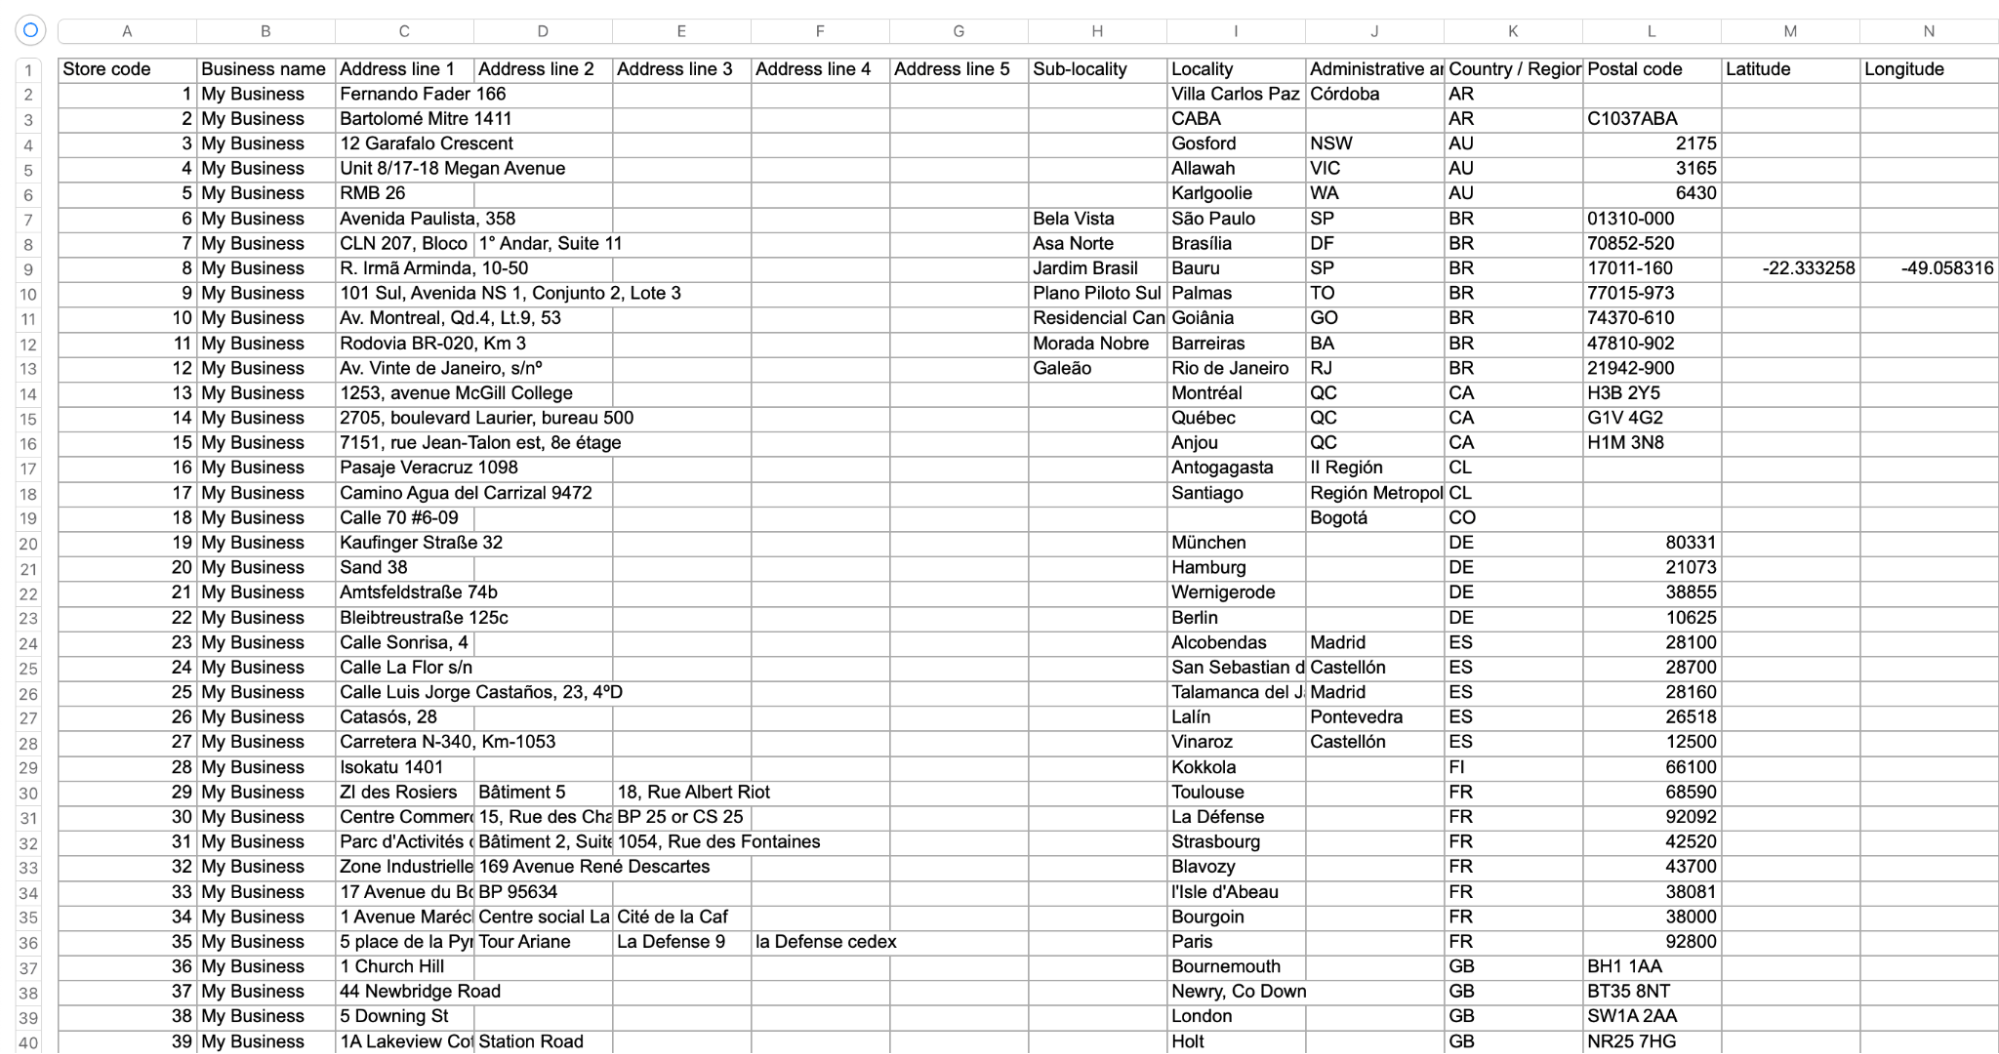
If you have more than 10 locations to add, you can bulk import them by clicking on the Import businesses button instead.
You’ll then be prompted to download a template. Once you have downloaded and filled in the information, it will look something like this:
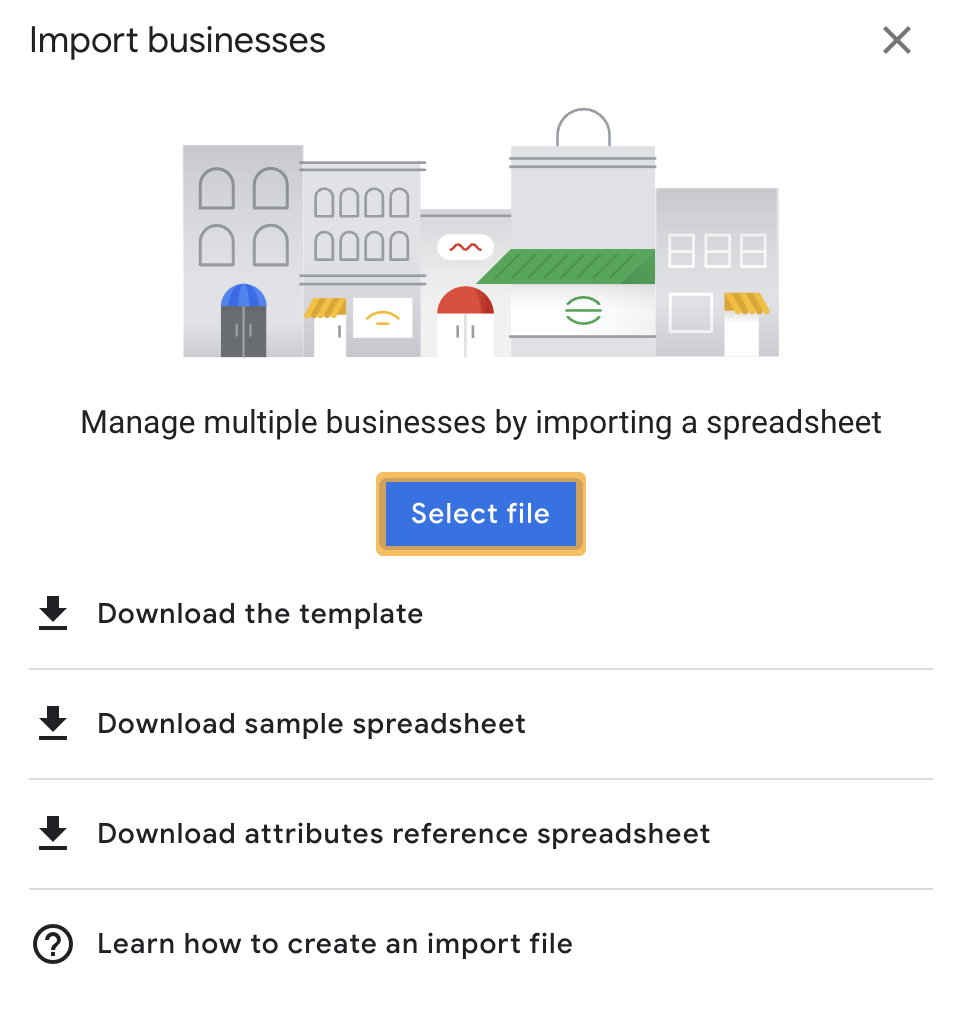
After you’ve filled everything out, it’s just a question of uploading the file by selecting Select file and then requesting bulk verification.
Once you have completed these steps, you can manage your multiple businesses through your Google Business Profile.
The optimization doesn’t stop once the above is done—in fact, you have only just started.
It’s an ongoing process of maintaining and optimizing your profile similarly to how you would optimize your website.
If you have fewer than 10 locations and didn’t do the bulk upload, you’ll first need to double-check that you have filled out all of the Google Business Profile information for your locations.
This means you should have checked the following:
The more information you give Google, the better your chances of ranking higher in the local pack.
If you haven’t already, you will need to add high-quality photos of your business. You can do this by logging into Google Business Profile and then returning to the search results.
At the top of the SERP, Google will show a mini dashboard where you can update and manage your business profile. To update your photos, click on Add photo.
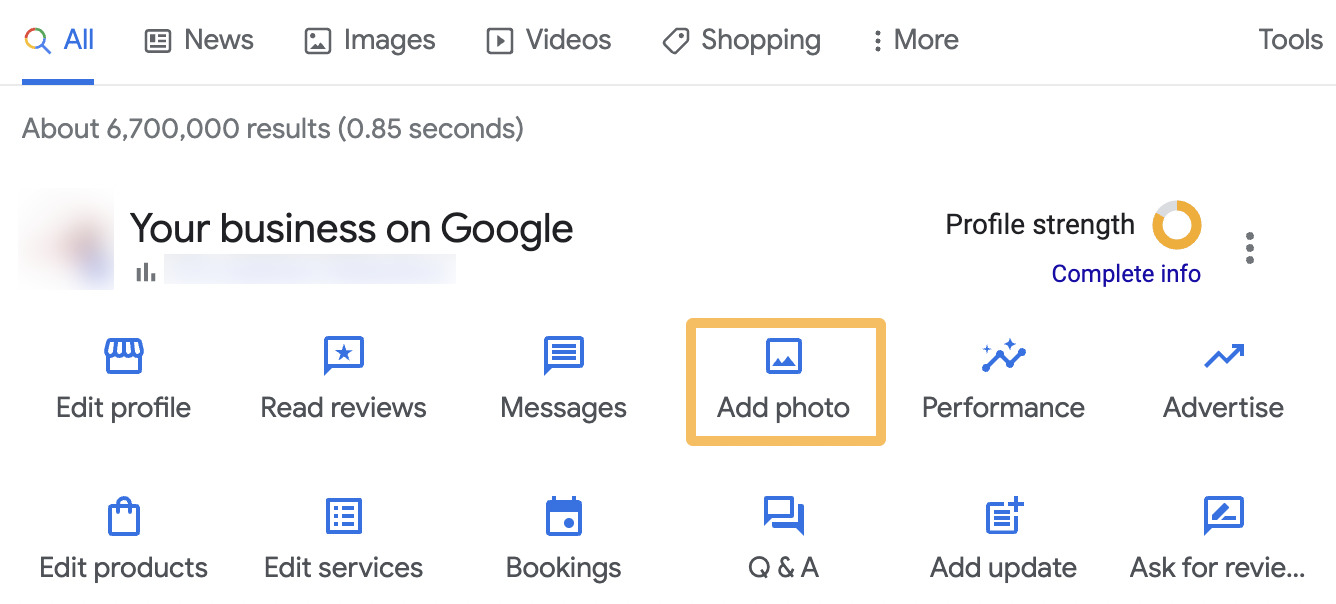
You can add three types of photos: Logos, Cover Photos, or Business Photos. These are the requirements for the photos:
- Format: JPG or PNG
- Suggested size: Between 10 KB and 5 MB
- Recommended resolution: 720 px tall, 720 px wide
- Minimum resolution: 250 px tall, 250 px wide
- Quality: Photo should be in focus, well-lit, and have no significant alterations or excessive use of filters
Tip
Include interior shots of your business. And if you are a restaurant owner, it’s a good idea to include photos of your menu.
Updating your Google Business Profile is crucial for customers around holiday dates.
Google is so concerned with the accuracy of its results it will occasionally phone you to confirm your business opening hours during these periods.
I contacted Google to confirm whether this is still part of its checks, and it confirmed that it was.
Now that you have successfully added your locations, you can start to measure your performance.
You can do this by returning to the search results and clicking the Performance icon.
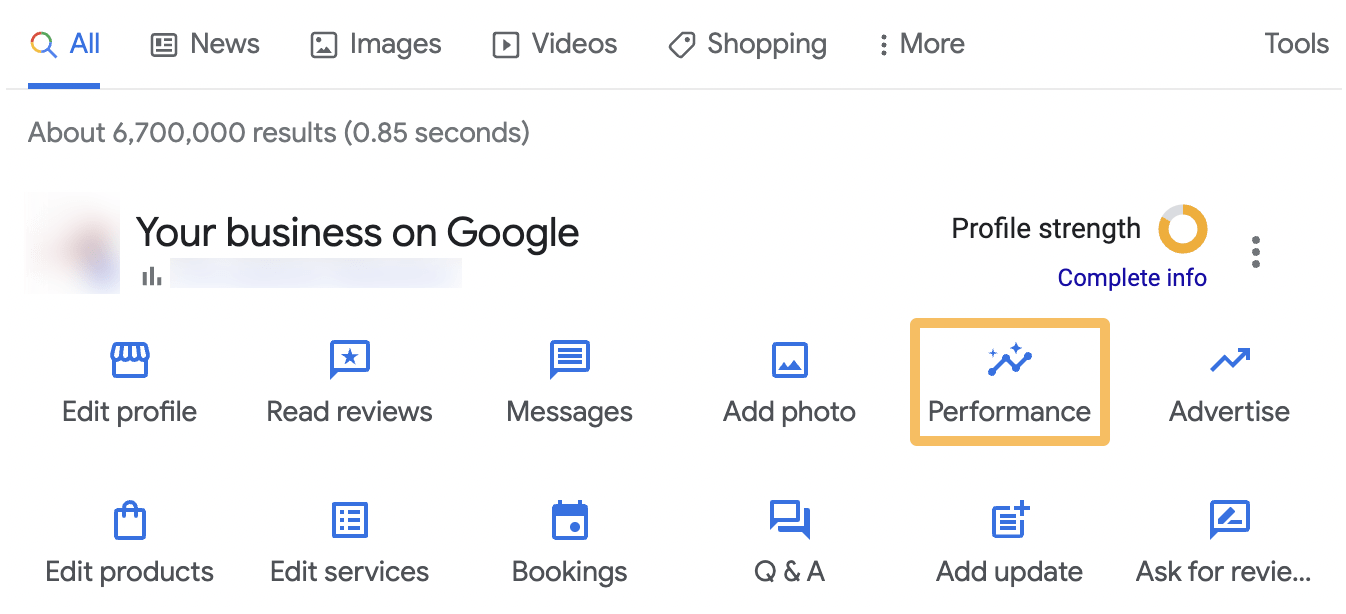
Once you have done this, it will take you to an overview screen.
You can click through the tabs to look at:
- Calls
- Messages
- Bookings
- Directions
- Website clicks
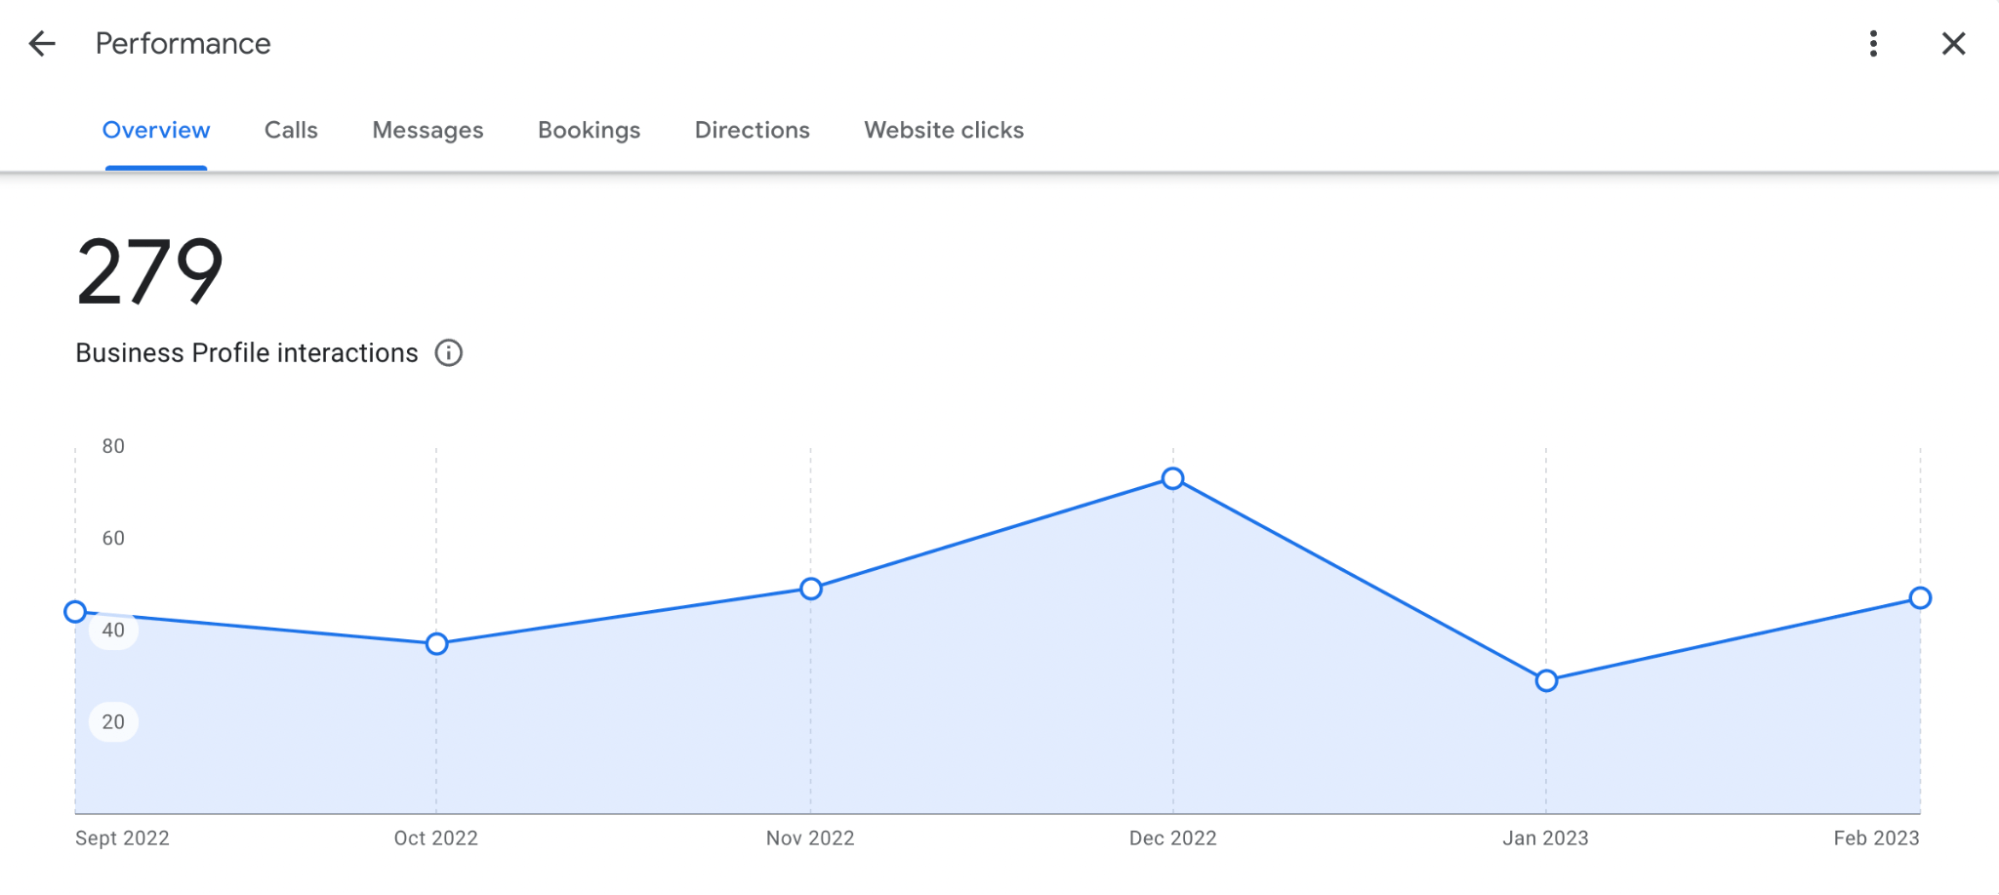
From this screen, you can get an understanding of how your business is performing locally.
If you want to monitor the performance of your local landing pages, you can do this in Ahrefs’ Site Explorer.
Let’s go back to the BrewDog example and imagine that we wanted to know the traffic performance of its top bars in the U.S.
To do this, we can plug BrewDog’s website in the Top pages report and then add a URL filter that contains “/bars/usa/” like so:

This will enable us to filter the top-performing landing pages by Traffic.
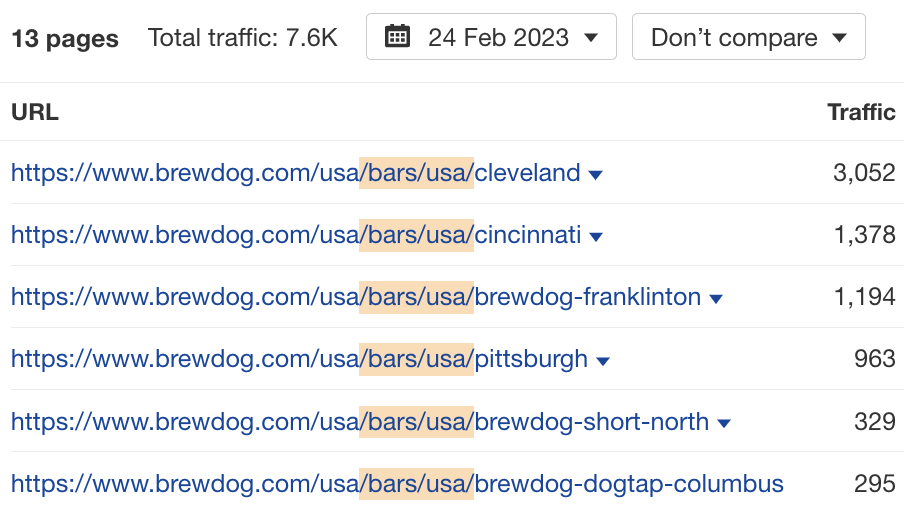
From this, we can see that Cleveland is the top location in terms of organic traffic.
Using Site Explorer, we can look at all the key metrics for our location pages, such as:
- Traffic.
- Position.
- Top keyword.
- Number of ranking keywords the page has.
- Estimate the value of the location page’s organic traffic.
Lastly, if you want to track positions, you can use a keyword tracking tool like Ahrefs’ Rank Tracker.
Here’s an example of me entering a ZIP code to track in the U.S.:
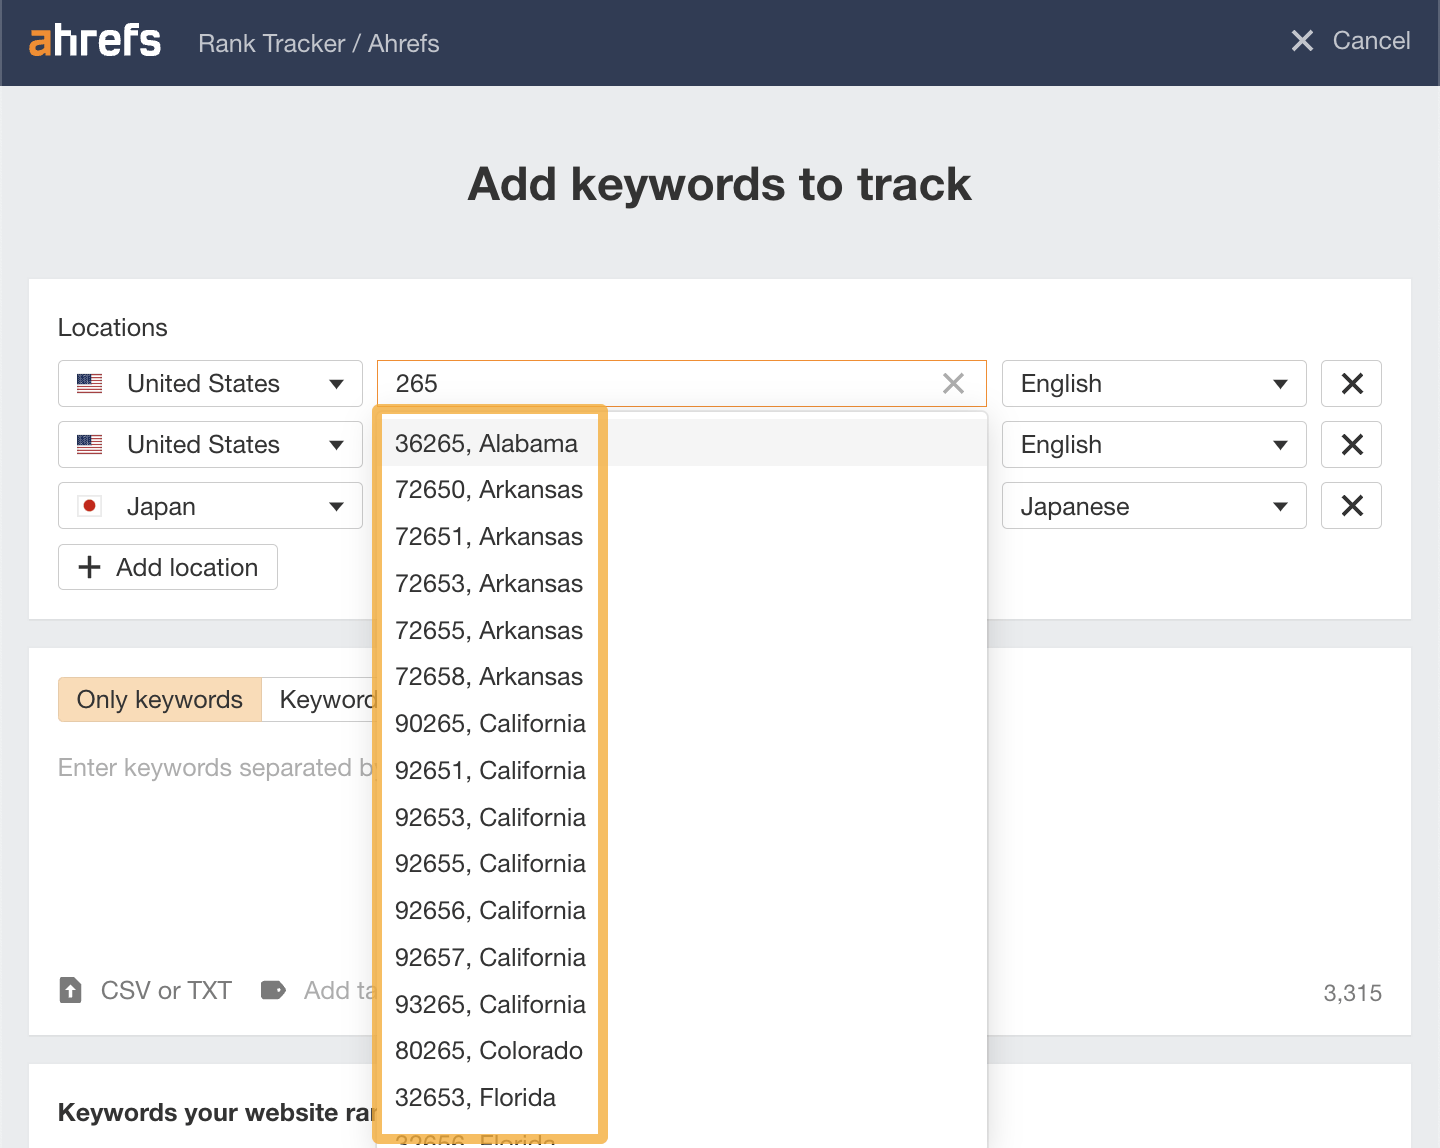
Rank Tracker can track keyword rankings on a country, state, city, or ZIP code basis.
Final thoughts
Having an online presence for multiple locations is essential if your business relies on customers from specific areas.
Maintaining the profiles and landing pages can be a challenge, though. Optimizing for multiple locations takes time. But if you put in the effort now, you’ll benefit from it in the long run.
Got more questions? Ping me on Twitter. 🙂

![How AEO Will Impact Your Business's Google Visibility in 2026 Why Your Small Business’s Google Visibility in 2026 Depends on AEO [Webinar]](https://articles.entireweb.com/wp-content/uploads/2026/01/How-AEO-Will-Impact-Your-Businesss-Google-Visibility-in-2026-400x240.png)
![How AEO Will Impact Your Business's Google Visibility in 2026 Why Your Small Business’s Google Visibility in 2026 Depends on AEO [Webinar]](https://articles.entireweb.com/wp-content/uploads/2026/01/How-AEO-Will-Impact-Your-Businesss-Google-Visibility-in-2026-80x80.png)


