MARKETING
Optimizing Facebook Ads for Content Engagement: 4 Custom Conversion Ideas
We all know Facebook Pixel. The little snippet of code that is tasked with sending interaction and conversion data back to Facebook Ads algorithm for delivery optimization and tracking. With its set of standard events and the ability to track Custom Conversions, Facebook Pixel is a key element of the Facebook Ads platform.
While the standard events cover different scenarios for a variety of common conversions such as purchases or downloads, but what if we need to track and optimize for something that’s not “standard”? In this post, we will take a look at some unconventional use-cases for implementing Facebook Pixel custom conversion with a focus on optimizing for content engagement.
In order to follow the instructions provided in this post, you will need basic Google Tag Manager knowledge. If you’re not familiar with GTM or need to refresh your mind about it, make sure to check out Google Tag Manager Basics.
Base Facebook Pixel installation using Google Tag Manager
Before diving into our use cases, let’s quickly go through installing Facebook Pixel through GTM. All of the custom event codes that we will add later will rely on this base code. It’s not necessary to install the Pixel using GTM, you might as well do a manual installation.
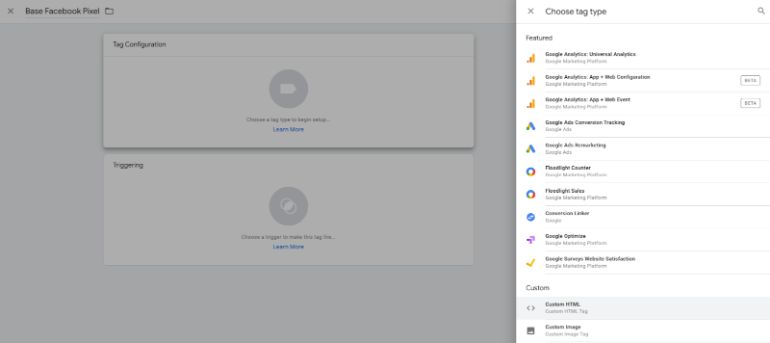
Google Tag Manager has native integrations for a wide range of platforms but Facebook Pixel needs to be installed as a Custom HTML tag.
- Login to Google Tag Manager and create a New Tag.
- Name your Tag, something like Base Facebook Pixel.
- Select Tag Configuration and then pick Custom HTML as the tag type.

- Copy your Facebook Pixel code, paste it here and save the tag.

- Now it’s time to define a trigger and set the conditions for firing the tag we just defined. We want the Facebook Pixel to be fired on every page of our website. Set the Trigger to Page View on All Pages. Don’t forget to save your tag.

- Make sure to test your new tag using Preview mode and also through Facebook Pixel Helper plugin for Chrome.
Now that we have our base Pixel set up, let’s look into use cases for Custom Conversions.
1- Delayed Pixel fire
A while back we were asked by a client about optimizing Facebook campaigns towards content consumption. Optimizing for Landing Page View seems to be a good way for achieving that goal if you see the engagement you expect but in this case, we needed to make sure the visitor spends a minimum amount of time on the landing page. That’s why we started to look for ways to define that as a custom conversion and optimize for it.
- The first thing we need is to fire a conversion pixel for the desired web page engagement. Here we want to create a custom conversion if a visitor spends 7 seconds or more on our page In Tag Manager, create another Custom HTML tag and type the code below.
<script>

fbq("trackCustom", "Content Engagement");

</script>
As you see we’re taking advantage of Facebook Pixel’s fbq function to define a custom event called Content Engagement.

- The script we just wrote is dependent on the base Facebook Pixel code and for this reason, we need to make sure it fires up after the base code is loaded. We will be using the Tag Sequencing feature under Advanced Settings to load the custom event code after the base Pixel tag.
Expand the Advanced Settings section and check the box next to “Fire a tag before [your tag name] fires”. Select the base Facebook Pixel tag from the dropdown menu.
- Now it’s time to define the trigger. Click on Triggering panel and then on the (+) sign on the top right of the page. Select Trigger Configuration so you can see the list of all triggers. Select Timer trigger type. As you see, we’ve named our trigger “7 Seconds”.
- Enter the amount of time that you like to delay your pixel fire (aka when your custom event fires) under Interval. As you see this is in milliseconds so we have entered 7000 for 7 seconds.Another important setting here is Limit, we want the custom event to only fire once, so we have entered 1. If you leave this blank the custom conversion will fire every 7 seconds (or whatever interval duration you have defined).
Finally, we need to define the conditions for firing the tag. We would like to record our Content Engagement custom event on every page of your website and have used the RegEx (regular expression) operator to include all pages. Save your work!

- Publish your Tag Manager workspace with all new changes. It’s time to test now. You can use GTM’s preview and debug mode or Facebook Pixel Helper like us. In addition to the PageView event which shows the base Pixel is fired we should also see our custom event loaded after our defined interval. This is how it loads in our example: it takes a couple (7 seconds to be exact) for the conversion action to load:

Voila! We got our Custom Event fired, all we need to do next in order to be able to optimize our campaigns for this conversion is to define a Custom Conversion.
Navigate to Custom Conversions in Events Manager and create a new conversion. Select the Custom Event you created in previous steps under Website Event dropdown. You can add rules to your custom conversion if you wish to track it only on certain pages of your website. Assign a name, a category, and a value. The last two are optional but very helpful when it comes to reporting and measuring the RoAS (Return on Ad Spend).
That’s it! You have successfully created your Custom Event and also Custom Conversion for a delayed Facebook Pixel. In the following sections, we apply the same process to other use cases of deploying Facebook Custom Events using Google Tag Manager.
2- Page Scroll Depth
Defining page scroll depth as a Custom Conversion can work as a proxy for how well the audience is engaged with the landing page. Examples are more complex products or services with content-heavy and long landing pages or simply on blogs, news websites and other content distribution businesses.
The process for defining our Custom Event and Conversion is the same as what we just went through for the Delayed Pixel fire example. The only thing that changes Step 4 from the previous section and that is the Trigger Type that we need to select in GTM. This time we will be using the Scroll Depth trigger.
![]()
You have options for making our Custom Event tag fired for vertical, horizontal or a hybrid of both depending on the user experience on your website or app. And the measurement of the scroll depth can be based on the percentage or pixels. So for example, you can define your Custom Event tag to fire only when the user has scrolled down 75% of your landing page.
3- YouTube Video Views
This will be a great fit for those who use videos embedded from YouTube on their pages. It can be a recorded webinar, a video course website or a vlog. You can tie your Facebook Custom Conversion to YouTube Video trigger in GTM and optimize towards different sorts of video content engagement.
![]()
Again, the main process stays the same as our first example of Delayed Pixel fire. The only different step is the Trigger Type and this time we are using YouTube Video.
You can track video start, completion, pause, seeking and most importantly video watch progress. Make sure you’re creating separate tags in case you’re interested in testing different optimization actions as it can muddy up your results. You can define either percentage or time-based event captures depending on your video length and user experience.
4- Element Visibility
There can be cases where you are interested in tracking and optimizing for actions like the visibility of a certain element on your landing page. Examples can be firing a Custom Conversion when a user stays on a certain image for more than 2 seconds. Or, if they made it to at least the 3rd photo in your product photo gallery. The Trigger Type that allows us to define such engagements to fire a Custom Conversion tag is Element Visibility.
![]()
Follow the same process that is explained in the first section of this post. Element Visibility tag gives us options to identify the desired page element(s) with their element ID or CSS Selector. You can define a minimum time for the on-screen duration (in milliseconds) and also there are other settings that you can tweak to get the right combination of conditions that you like to be considered as a conversion.
As you see the options for firing your Custom Conversion code using Google Tag Manager are almost endless. You can track and optimize your Facebook conversion campaigns for different types of user interactions depending on your use case and user experience.
I hope this blog has given you some great ideas for optimizing your Facebook campaigns with creative Custom Events that are representative of high-quality content engagement. If you’re interested in learning more about Google Tag Manager and tracking important interactions on your website or apps, this Google Analytics Academy course is a great place to start.
MARKETING
YouTube Ad Specs, Sizes, and Examples [2024 Update]
![YouTube Ad Specs, Sizes, and Examples [2024 Update] YouTube Ad Specs, Sizes, and Examples](https://articles.entireweb.com/wp-content/uploads/2024/06/YouTube-Ad-Specs-Sizes-and-Examples.jpg)
Introduction
With billions of users each month, YouTube is the world’s second largest search engine and top website for video content. This makes it a great place for advertising. To succeed, advertisers need to follow the correct YouTube ad specifications. These rules help your ad reach more viewers, increasing the chance of gaining new customers and boosting brand awareness.
Types of YouTube Ads
Video Ads
- Description: These play before, during, or after a YouTube video on computers or mobile devices.
- Types:
- In-stream ads: Can be skippable or non-skippable.
- Bumper ads: Non-skippable, short ads that play before, during, or after a video.
Display Ads
- Description: These appear in different spots on YouTube and usually use text or static images.
- Note: YouTube does not support display image ads directly on its app, but these can be targeted to YouTube.com through Google Display Network (GDN).
Companion Banners
- Description: Appears to the right of the YouTube player on desktop.
- Requirement: Must be purchased alongside In-stream ads, Bumper ads, or In-feed ads.
In-feed Ads
- Description: Resemble videos with images, headlines, and text. They link to a public or unlisted YouTube video.
Outstream Ads
- Description: Mobile-only video ads that play outside of YouTube, on websites and apps within the Google video partner network.
Masthead Ads
- Description: Premium, high-visibility banner ads displayed at the top of the YouTube homepage for both desktop and mobile users.
YouTube Ad Specs by Type
Skippable In-stream Video Ads
- Placement: Before, during, or after a YouTube video.
- Resolution:
- Horizontal: 1920 x 1080px
- Vertical: 1080 x 1920px
- Square: 1080 x 1080px
- Aspect Ratio:
- Horizontal: 16:9
- Vertical: 9:16
- Square: 1:1
- Length:
- Awareness: 15-20 seconds
- Consideration: 2-3 minutes
- Action: 15-20 seconds
Non-skippable In-stream Video Ads
- Description: Must be watched completely before the main video.
- Length: 15 seconds (or 20 seconds in certain markets).
- Resolution:
- Horizontal: 1920 x 1080px
- Vertical: 1080 x 1920px
- Square: 1080 x 1080px
- Aspect Ratio:
- Horizontal: 16:9
- Vertical: 9:16
- Square: 1:1
Bumper Ads
- Length: Maximum 6 seconds.
- File Format: MP4, Quicktime, AVI, ASF, Windows Media, or MPEG.
- Resolution:
- Horizontal: 640 x 360px
- Vertical: 480 x 360px
In-feed Ads
- Description: Show alongside YouTube content, like search results or the Home feed.
- Resolution:
- Horizontal: 1920 x 1080px
- Vertical: 1080 x 1920px
- Square: 1080 x 1080px
- Aspect Ratio:
- Horizontal: 16:9
- Square: 1:1
- Length:
- Awareness: 15-20 seconds
- Consideration: 2-3 minutes
- Headline/Description:
- Headline: Up to 2 lines, 40 characters per line
- Description: Up to 2 lines, 35 characters per line
Display Ads
- Description: Static images or animated media that appear on YouTube next to video suggestions, in search results, or on the homepage.
- Image Size: 300×60 pixels.
- File Type: GIF, JPG, PNG.
- File Size: Max 150KB.
- Max Animation Length: 30 seconds.
Outstream Ads
- Description: Mobile-only video ads that appear on websites and apps within the Google video partner network, not on YouTube itself.
- Logo Specs:
- Square: 1:1 (200 x 200px).
- File Type: JPG, GIF, PNG.
- Max Size: 200KB.
Masthead Ads
- Description: High-visibility ads at the top of the YouTube homepage.
- Resolution: 1920 x 1080 or higher.
- File Type: JPG or PNG (without transparency).
Conclusion
YouTube offers a variety of ad formats to reach audiences effectively in 2024. Whether you want to build brand awareness, drive conversions, or target specific demographics, YouTube provides a dynamic platform for your advertising needs. Always follow Google’s advertising policies and the technical ad specs to ensure your ads perform their best. Ready to start using YouTube ads? Contact us today to get started!
MARKETING
Why We Are Always ‘Clicking to Buy’, According to Psychologists

Amazon pillows.
MARKETING
A deeper dive into data, personalization and Copilots
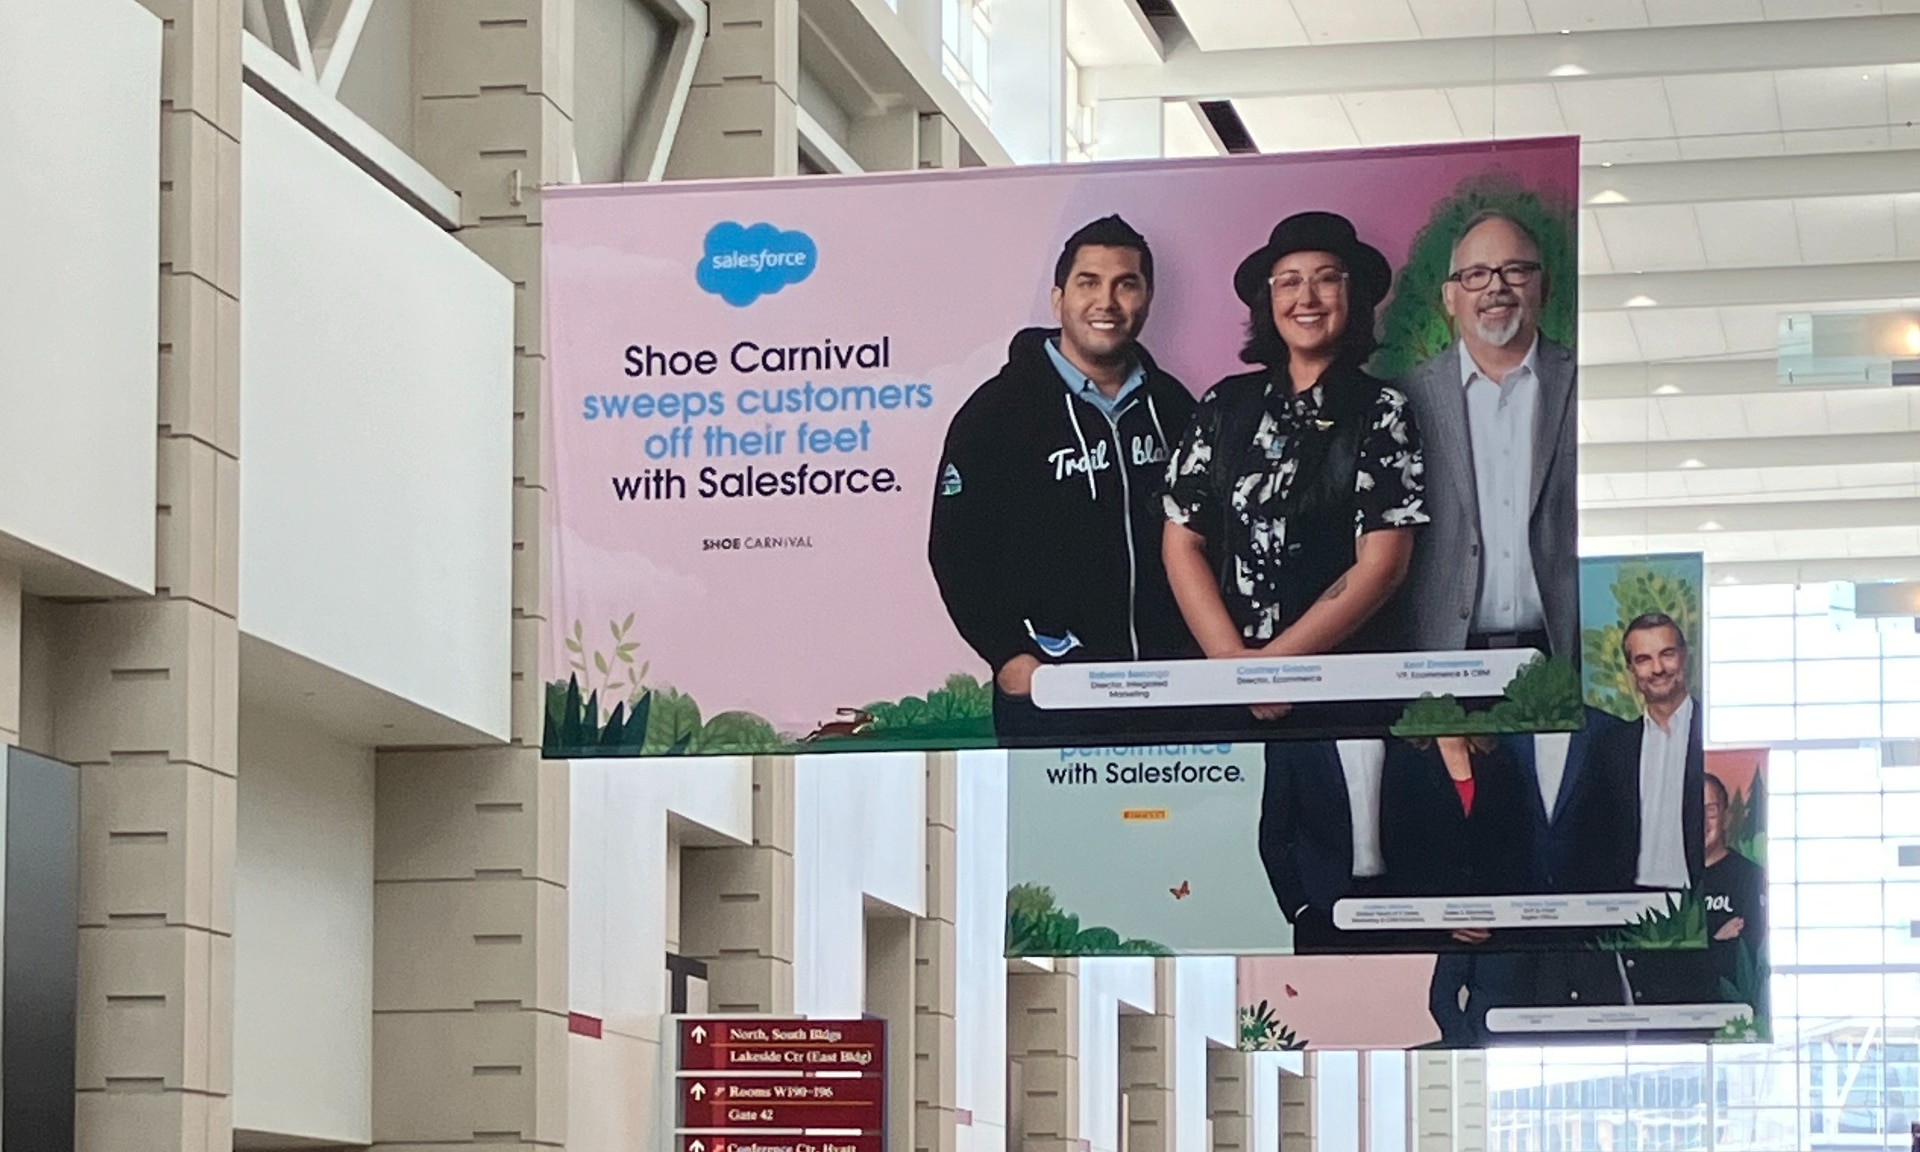
Salesforce launched a collection of new, generative AI-related products at Connections in Chicago this week. They included new Einstein Copilots for marketers and merchants and Einstein Personalization.
To better understand, not only the potential impact of the new products, but the evolving Salesforce architecture, we sat down with Bobby Jania, CMO, Marketing Cloud.
Dig deeper: Salesforce piles on the Einstein Copilots
Salesforce’s evolving architecture
It’s hard to deny that Salesforce likes coming up with new names for platforms and products (what happened to Customer 360?) and this can sometimes make the observer wonder if something is brand new, or old but with a brand new name. In particular, what exactly is Einstein 1 and how is it related to Salesforce Data Cloud?
“Data Cloud is built on the Einstein 1 platform,” Jania explained. “The Einstein 1 platform is our entire Salesforce platform and that includes products like Sales Cloud, Service Cloud — that it includes the original idea of Salesforce not just being in the cloud, but being multi-tenancy.”
Data Cloud — not an acquisition, of course — was built natively on that platform. It was the first product built on Hyperforce, Salesforce’s new cloud infrastructure architecture. “Since Data Cloud was on what we now call the Einstein 1 platform from Day One, it has always natively connected to, and been able to read anything in Sales Cloud, Service Cloud [and so on]. On top of that, we can now bring in, not only structured but unstructured data.”
That’s a significant progression from the position, several years ago, when Salesforce had stitched together a platform around various acquisitions (ExactTarget, for example) that didn’t necessarily talk to each other.
“At times, what we would do is have a kind of behind-the-scenes flow where data from one product could be moved into another product,” said Jania, “but in many of those cases the data would then be in both, whereas now the data is in Data Cloud. Tableau will run natively off Data Cloud; Commerce Cloud, Service Cloud, Marketing Cloud — they’re all going to the same operational customer profile.” They’re not copying the data from Data Cloud, Jania confirmed.
Another thing to know is tit’s possible for Salesforce customers to import their own datasets into Data Cloud. “We wanted to create a federated data model,” said Jania. “If you’re using Snowflake, for example, we more or less virtually sit on your data lake. The value we add is that we will look at all your data and help you form these operational customer profiles.”
Let’s learn more about Einstein Copilot
“Copilot means that I have an assistant with me in the tool where I need to be working that contextually knows what I am trying to do and helps me at every step of the process,” Jania said.
For marketers, this might begin with a campaign brief developed with Copilot’s assistance, the identification of an audience based on the brief, and then the development of email or other content. “What’s really cool is the idea of Einstein Studio where our customers will create actions [for Copilot] that we hadn’t even thought about.”
Here’s a key insight (back to nomenclature). We reported on Copilot for markets, Copilot for merchants, Copilot for shoppers. It turns out, however, that there is just one Copilot, Einstein Copilot, and these are use cases. “There’s just one Copilot, we just add these for a little clarity; we’re going to talk about marketing use cases, about shoppers’ use cases. These are actions for the marketing use cases we built out of the box; you can build your own.”
It’s surely going to take a little time for marketers to learn to work easily with Copilot. “There’s always time for adoption,” Jania agreed. “What is directly connected with this is, this is my ninth Connections and this one has the most hands-on training that I’ve seen since 2014 — and a lot of that is getting people using Data Cloud, using these tools rather than just being given a demo.”
What’s new about Einstein Personalization
Salesforce Einstein has been around since 2016 and many of the use cases seem to have involved personalization in various forms. What’s new?
“Einstein Personalization is a real-time decision engine and it’s going to choose next-best-action, next-best-offer. What is new is that it’s a service now that runs natively on top of Data Cloud.” A lot of real-time decision engines need their own set of data that might actually be a subset of data. “Einstein Personalization is going to look holistically at a customer and recommend a next-best-action that could be natively surfaced in Service Cloud, Sales Cloud or Marketing Cloud.”
Finally, trust
One feature of the presentations at Connections was the reassurance that, although public LLMs like ChatGPT could be selected for application to customer data, none of that data would be retained by the LLMs. Is this just a matter of written agreements? No, not just that, said Jania.
“In the Einstein Trust Layer, all of the data, when it connects to an LLM, runs through our gateway. If there was a prompt that had personally identifiable information — a credit card number, an email address — at a mimum, all that is stripped out. The LLMs do not store the output; we store the output for auditing back in Salesforce. Any output that comes back through our gateway is logged in our system; it runs through a toxicity model; and only at the end do we put PII data back into the answer. There are real pieces beyond a handshake that this data is safe.”
-

 WORDPRESS3 days ago
WordPress biz Automattic details WP Engine deal demands • The Register
-
SEARCHENGINES5 days ago
Daily Search Forum Recap: September 30, 2024
-
 SEARCHENGINES6 days ago
Google Volatility With Gains & Losses, Updated Web Spam Policies, Cache Gone & More Search News
-

 SEO7 days ago
6 Things You Can Do to Compete With Big Sites
-
SEARCHENGINES4 days ago
Daily Search Forum Recap: October 1, 2024
-

 SEO6 days ago
An In-Depth Guide For Businesses
-

 AFFILIATE MARKETING6 days ago
Nvidia CEO Jensen Huang Praises Nuclear Energy to Power AI
-
 AFFILIATE MARKETING6 days ago
This Minimalist Lamp Lets You Pick From 16 Million+ Lighting Colors for Maximum Productivity


