MARKETING
Crucial Steps to Converting Browsers into Buyers

There’s something comforting and enjoyable about creating a routine where people know you, whether that’s a favorite coffee shop or place to walk or a local beer store where they call your dog by name.
Many businesses can create this personalized shopping experience to convert more browsers into buyers. But, it can be tough to do that online where you can’t look into a customer’s eyes or easily ask what they need as they browse digital shelves. Still, we regularly hear about the need for eCommerce personalization.
To tackle that opportunity, let’s define personalization, the best way to start implementing it, and methods to optimize your efforts.
Defining “personalization” in eCommerce
Personalization and customization can feel like the same thing, but some important distinctions exist. Breaking these out makes it easier to understand personalization and how it can apply in eCommerce operations.
For your website and sales efforts, personalization uses data and customer insights to craft a specific shopping experience for every customer. These efforts may include showing relevant products, serving recommendations, and adjusting content based on the customer’s past behavior.
Companies may also try personalizing service levels or selecting specific pop-ups and overlays based on customer status.

Customization, on the other hand, generally refers to customer-driven choices. These range from the obvious (selection or sorting by size, color, price, etc.) to detailed efforts specific to the individual (a customer chooses not to see certain types of products). When you think of customization as something helmed by the customer, you’ll start identifying ways to use their selections to craft personalized experiences.
How personalization creates a better shopping experience
To create a personalized shopping experience, eCommerce businesses need to invest in audience research. By understanding your customers and what they want, you can create an individualized experience that will convert browsers into buyers.
You’ll want to create as complete a picture of the shopper as possible. Ask core experience questions, including:
- What are their needs that you can and can’t address?
- What are their wants or things that tip them over the edge to make a purchase?
- What motivates them to make this purchase at this time?
- Why should they choose you to meet their specific needs and wants?
Once you understand your customers well, you can start creating a shopping experience tailored to them. Take learning about their immediate needs and wants. I
t’s easier to suggest the right products when you know what they’ve recently viewed or what ad they clicked on to get to your site. You’re building based on their tastes and refining suggestions based on what gets that second purchase.
Understanding why someone values your brand can also help you create personalized discounts or special deals that gain shoppers. If you’re known for customer service, you might leverage this for an ad tagline: “World-class customer service meets free shipping on every order over $20.”
It’s more than just a deal; it’s one couched in the language you know they appreciate. Tying it back to shipping and order support also reinforces your brand as one that cares about the customer.

Finally, it is important to ensure the customer feels valued and appreciated. Thank them for their business and promptly take care of any issues they may have. Creating a positive relationship with your customers ensures they keep returning for more.
3 steps to take to get started with personalization
To get started with personalization, businesses need to take three steps: collecting data, analyzing data, and implementing personalization.
1. Collect data
The first step is to collect data about your customers. This could include information such as their demographics, location, what devices they use, what pages they visit on your site, and what products they are interested in. There are a number of ways businesses can collect this data, such as through website cookies, surveys, and customer loyalty programs.
2. Analyze data
Once you have collected data about your customers, it is important to analyze it to understand their needs and preferences. This will help you determine how to best personalize their shopping experience. Several tools are available to help with this analysis, such as analytics software and customer segmentation tools.
3. Implement personalization
The final step is to implement personalization into your eCommerce store. This could include creating a personalized homepage, recommending similar products, using data to segment customers into different groups, or offering discounts. By personalizing the shopping experience, businesses can increase conversion rates and average order value.

The top 5 ways to personalize the shopping experience
Personalization can be an incredibly complex experience or a simpler operation based on your tech stack and the amount of data you use. To get started, there are some core efforts to implement that can start with minimal, current-session data and then move to longer-term tracking and utilization.
1. Use data to recommend products
One of the most effective ways to personalize the shopping experience is to use data to recommend products. This could include data from past purchases, browsing history, and social media activity.
By understanding what customers have bought in the past, businesses can make recommendations for similar or complementary products. This helps customers find what they’re looking for more easily and allows businesses to upsell and cross-sell effectively.
2. Create a personalized homepage
Another way to personalize the shopping experience is to create a personalized homepage. This could include features such as recommended products, recently viewed items, and even a custom welcome message.
By creating a personalized homepage, businesses can make sure that each customer feels valued and that they can easily find what they’re looking for — reinforcing your brand identity as helpful and in-the-know.
Consider tying homepages to traffic and referral sources so that someone looking at your Instagram account hits a page filled with both products and the videos you create. It’s an easy way to start the fruitful process of understanding customer behavior across channels.
3. Use data to create targeted marketing campaigns
Another effective way to personalize the shopping experience is to use data to create targeted marketing campaigns. This involves using customer data to segment customers into different groups and then creating marketing messages that are tailored to each group. This could include offering discounts or special promotions to specific groups of customers.

Are You Ready to Master Social Media?
Become a Certified Social Media Specialist and learn the newest strategies (by social platform) to draw organic traffic to your social media sites.
Don’t neglect small lifts here. Greet customers directly by name. Adjust messages based on user region. Adapt to local events and other broader experiences that keep your content from feeling too general, even if it isn’t hyper-personalized.
4. Use data to segment your email list
You can also personalize the shopping experience by segmenting your email list. This involves grouping customers together based on their interests, demographics, or purchase history. Most email marketing tools track detailed customer information you can leverage.
For example, monitoring when customers last visited allows you to email people about how “it’s been a while”.
By segmenting your email list, you can send more targeted and relevant messages to each group of customers. This can lead to higher open and click-through rates, as well as increased sales and revenue.
5. Personalized product pages by creating variants
The final way to personalize the shopping experience is to use data to create a personalized product page. Or, at least create a page that feels catered to the individual based on broader context and information.
When you can get very detailed, this involves using customer data such as purchase history and browsing behavior to recommend similar or complementary products. You’ll need a dynamic site that can adapt to their history and habits in real-time.
If you don’t have a robust site, consider building blocks for each section of your landing pages or product pages for each SKU. Then, you can create groupings that feel customized because the pre-existing blocks you use match what people see in broader marketing campaigns. As you get more sophisticated, these blocks can then be what you dynamically insert into different elements as the customer shops around your site.

By creating a personalized product page, businesses can enhance conversion rates and have a better chance for higher order values because of the relevance of up-sell and cross-sell promotions.
The benefits of personalization for businesses
There are many benefits of personalization for businesses. By creating a personalized shopping experience, businesses can increase conversion rates, average order value, and customer loyalty.
Conversion rates improve because customers are more likely to buy from a store that recognizes them and offers products they are interested in. If you’re marketing to the same people, small efforts like using someone’s first name in an email can increase conversion rates.
Companies that personalize offers also tend to see average order values increase in multiple ways. These incentives help push people to make more impulse purchases and reach higher overall orders — a benefit you can compound when making traditional online offers like free shipping on orders of a certain value.
Finally, studies also show that personalization can improve customer loyalty. Studies have found that more than half of people are open to receiving personalized experiences, and 72% who get these end up spending more or buying more often. This is because customers feel appreciated and valued when they are recognized and offered products they look at or follow.

Overall, personalization is a powerful tool that can help businesses improve conversion rates, average order value, and customer loyalty. When used correctly, it can be a key driver of success for eCommerce businesses.
Create an experience you’d enjoy
When it comes to personalizing the shopping experience, businesses must take a few steps to ensure they are doing it correctly.
First and foremost, they need to collect data about their customers so they can understand their needs and preferences. Once they have this data, they need to analyze it to determine how best to personalize the shopping experience for each customer.
Then, they need to implement personalization into their eCommerce store, which could include creating a personalized homepage, recommending similar products, using data to segment customers into different groups, or offering discounts.
The final piece, however, is reviewing the effort and ensuring that it adds value to the shopping experience. Ask if it is something you’d enjoy or if the elements and personalization get in the way. You don’t want to be overly burdensome or overly creepy. The aim is to show people what they want to see without them feeling like you’re crunching a lot of data behind the scenes.
MARKETING
Generative Engine Optimization Framework Introduced in New Research

There are several AI chatbot-like features available in the current search engines, including Bing Copilot, Google, Bard, and Gemini. They help to optimize the content visibility in the search results with the help of an AI-powered Search engine known as a Generative engine or AI Search.
A traditional search engine like Bing, Google, or Yahoo ranks and displays information in the SERPs based on the search terms a user inputs. 🔎
The generative engine, on the other hand, generates comprehensive, accurate, and relevant results and information with the help of Generative AI or Large Language Models (LLMs) such as chatGPT, Gemini, and Claude. They understand and integrate information from various sources for the user’s queries.
In this blog, We will discuss the GEO that is introduced in the new research, its framework, and how it can change traditional Search engine optimization (SEO) practices and optimize content for visibility.
The Key Components of the GEO Framework and How They Transform Traditional SEO Practices
GEO is described in the research paper as: “A novel paradigm to aid content creators in improving the visibility of their content in Generative Engine responses through a black-box optimization framework for optimizing and defining visibility metrics. We facilitate systematic evaluation in this new paradigm by introducing GEO-bench, a benchmark of diverse user queries across multiple domains, coupled with sources required to answer these queries.”
Traditional SEO depends upon the keyword volume, difficulty, and optimization for the specific search terms, which focus less on an interpretation relationship between the concepts of keywords or user queries. SEO practices prioritize text-based source content over other sources of content format where regular updating of fresh content is not a primary focus. Also, metrics like impression and click rates affect ranking system results in traditional methods.
GEO encourages detailed information over just the keyword, addressing the related main queries by creating depth content and potential subtopics with the understanding of concept and relationship, encouraging the other formats, such as visual, audio, and images, not just text-based. Moreover, it emphasizes the latest updated content information with continuous accuracy and relevance to provide the most accurate and up-to-date details.
The Impact of Introducing GEO on Website Ranking and Content Relevancy
A generative engine relies on traditional SEO practices like user intent and algorithms for ranking to a degree, such as keyword stuffing. Although it focuses on keywords, it tries to find connections and meanings beyond the keywords in order to create high-quality content.
GEO doesn’t directly indicate the web visibility or page ranking in the Search Engine Result Page. However, it can optimize the overall website visibility and indirectly drive user traffic to your websites through generated responsive data and information.
GEO-optimized content provides the AI Search or a Large Language Model (LLM) with reliable and completely detailed information, enabling them to generate the most accurate and relevant information for responses to user questions or inputs.
These AI-powered engines can deliver a vibrant user experience using optimized content for user engagement and interactive experiences. Furthermore, It also builds trust with a user as it relies on renowned and credible sources, which enhances the effectiveness and reliability of the generated response data and provides synthesizing information.
Comparison with Existing SEO Models: Why GEO Stands Out in Enhancing Search Engine Performance
GEO utilizes auto-generative algorithms for content generation based on predetermined objectives and standards where generated content can cover a broader range of keywords and related topics in various formats like image and visual.
A generative search engine uses modern optimization techniques that involve cognitive SEO, NLP (natural language processing), and structured data markup to maintain and improve content leverage, relevancy, and search engine visibility. In addition, it introduces new methods for determining citations’ importance and website visibility, as well as improving user-centric content by using impression metrics.
Traditional SEO models rely upon and use specific keywords to optimize and rank manually in search results. It uses traditional optimization techniques like link building, meta tags, and URLs.
In traditional search optimization, content creation and optimization can be slow and have low content scalability compared to AI-powered, requiring manual effort for generation and optimization. Constant monitoring and adaptation to platform algorithms are needed to produce the latest and updated information for dynamic user behavior.
Both are equally responsible for improving the brand or website’s online visibility; traditional SEO models require the manual touch for content creation and optimization. GEO tends to use generative responses automatically for content generation as per user queries, making it more effective for user-centric content creation, optimization, and stability in related topics or keywords.
9 Test research findings to improve the website content in GEO
The researchers from Princeton University, Georgia Tech, Allen Institute for AI, and IIT Delhi tested nine various GEO approaches to improve site content for generative engines. Techniques that have been tried and tested over 10,000 search queries, nine optimization strategies were tested on something that “closely resembles the design of BingChat”:
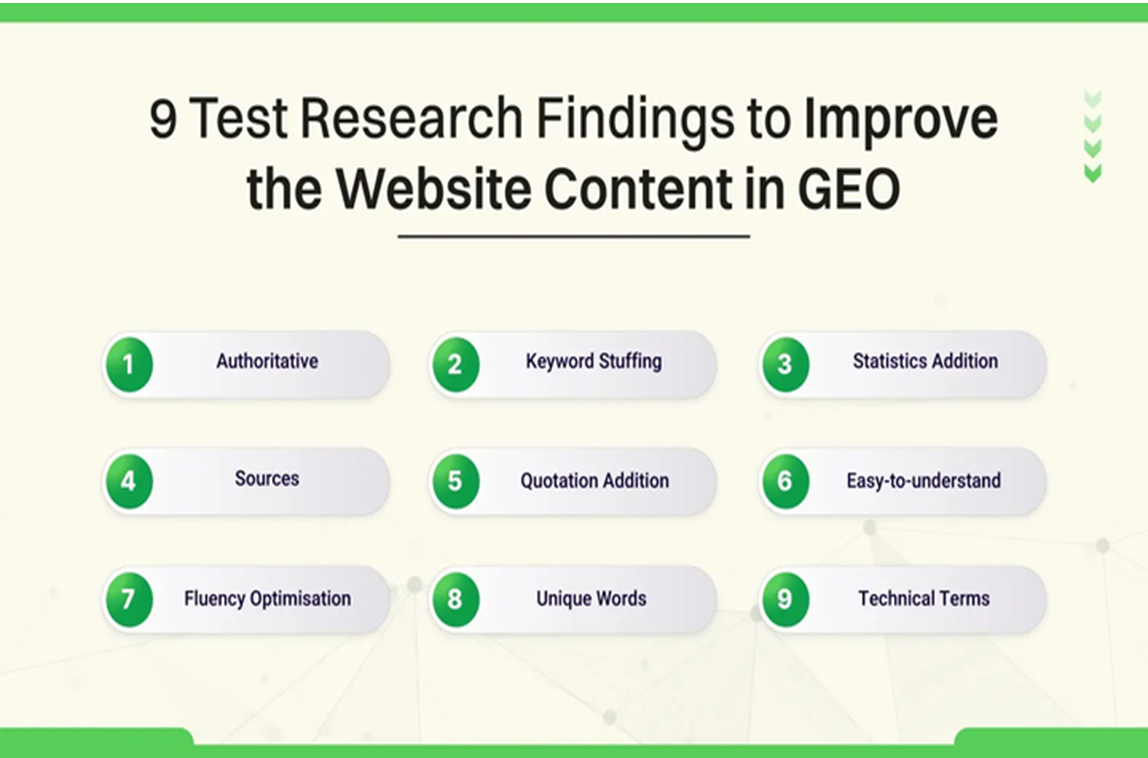
- Authoritative: The content was altered to be more compelling while conveying definitive claims.
- Keyword Stuffing: More keywords were added to match the query.
- Statistics Addition: Instead of a qualitative conversation, quantitative statistics were included.
- Sources: Relevant citations have been added. Like quotes statistics
- Quotation Addition: Quotations from reliable sources have been included.
- Easy-to-understand: Simplified the language.
- Fluency Optimisation: Improved fluency.
- Unique Words: Used in the text whenever possible.
- Technical terms: Technical terms have been incorporated into the content.
The data set for search queries was obtained from Google, Microsoft Bing, and Perplexity. Sources include AI Discover, GPT-4, and others.
So, focus on creating detailed and comprehensive blogs or articles by defining the relation and highlighting the context for deeper meaning. Utilize the various formats for content creation to enrich information and diversify the learning perspective.
Also, update your content with the latest information and trends to maintain regular effectiveness and relevancy in the generative engines.
Conclusion:
In the end, Generative Engine Optimization (GEO) provides a more automated, scalable, and adaptive method of content creation and optimization than traditional Search Engine Optimization (SEO) approaches, which need manual and constant work for the optimization and ranking. Compared to traditional search engines, generative engines give instant and detailed personalized information to users’ queries for improved engagement.
Conventional SEO uses metrics like impression, session duration, and click-through rate (CTR), whereas GEO proposes new metrics to measure the relevance and visibility of citations within generative engine responses, making users eliminate the need to visit individual websites for information as it generates the responses on users queries from the reliable, relevant, and various sources.
AI-powered search optimization is still developing and becoming popular since most users and business owners are using generative AI as their source of information and improved visibility with universally applicable diverse content formats.
MARKETING
How To Develop a Great Creative Brief and Get On-Target Content

Every editor knows what it feels like to sit exasperated in front of the computer, screaming internally, “It would have been easier if I’d done it myself.”
If your role involves commissioning and approving content, you know that sinking feeling: Ten seconds into reviewing a piece, it’s obvious the creator hasn’t understood (or never bothered to listen to) a damn thing you told them. As you go deeper, your fingertips switch gears from polite tapping to a digital Riverdance as your annoyance spews onto the keyboard. We’ve all been there. It’s why we drink. Or do yoga. Or practice voodoo.
In truth, even your best writer, designer, or audiovisual content creator can turn in a bad job. Maybe they had an off day. Perhaps they rushed to meet a deadline. Or maybe they just didn’t understand the brief.
The first two excuses go to the content creator’s professionalism. You’re allowed to get grumpy about that. But if your content creator didn’t understand the brief, then you, as the editor, are at least partly to blame.
Taking the time to create a thorough but concise brief is the single greatest investment you can make in your work efficiency and sanity. The contrast in emotions when a perfectly constructed piece of content lands in your inbox could not be starker. It’s like the sun has burst through the clouds, someone has released a dozen white doves, and that orchestra that follows you around has started playing the lovely bit from Madame Butterfly — all at once.
Here’s what a good brief does:
- It clearly and concisely sets out your expectations (so be specific).
- It focuses the content creator’s mind on the areas of most importance.
- It encourages the content creator to do a thorough job rather than an “it’ll-do” job.
- It results in more accurate and more effective content (content that hits the mark).
- It saves hours of unnecessary labor and stress in the editing process.
- It can make all the difference between profit and loss.
Arming content creators with a thorough brief gives them the best possible chance of at least creating something fit for purpose — even if it’s not quite how you would have done it. Give them too little information, and there’s almost no hope they’ll deliver what you need.
On the flip side, overloading your content creators with more information than they need can be counterproductive. I know a writer who was given a 65-page sales deck to read as background for a 500-word blog post. Do that, and you risk several things happening:
- It’s not worth the content creator’s time reading it, so they don’t.
- Even if they do read it, you risk them missing out on the key points.
- They’ll charge you a fortune because they’re losing money doing that amount of preparation.
- They’re never going to work with you again.
There’s a balance to strike.
There’s a balance to be struck.
Knowing how to give useful and concise briefs is something I’ve learned the hard way over 20 years as a journalist and editor. What follows is some of what I’ve found works well. Some of this might read like I’m teaching grandma to suck eggs, but I’m surprised how many of these points often get forgotten.
Who is the client?
Provide your content creator with a half- or one-page summary of the business:
- Who it is
- What it does
- Whom it services
- What its story is
- Details about any relevant products and services
Include the elevator pitch and other key messaging so your content creator understands how the company positions itself and what kind of language to weave into the piece.
Who is the audience?
Include a paragraph or two about the intended audience. If a company has more than one audience (for example, a recruitment company might have job candidates and recruiters), then be specific. Even a sentence will do, but don’t leave your content creator guessing. They need to know who the content is for.
What needs to be known?
This is the bit where you tell your content creator what you want them to create. Be sure to include three things:
- The purpose of the piece
- The angle to lead with
- The message the audience should leave with
I find it helps to provide links to relevant background information if you have it available, particularly if the information inspired or contributed to the content idea, rather than rely on content creators to find their own. It can be frustrating when their research doesn’t match or is inferior to your own.
How does the brand communicate?
Include any information the content creators need to ensure that they’re communicating in an authentic voice of the brand.
- Tone of voice: The easiest way to provide guidance on tone of voice is to provide one or two examples that demonstrate it well. It’s much easier for your content creators to mimic a specific example they’ve seen, read, or heard than it is to interpret vague terms like “formal,” “casual,” or “informative but friendly.”
- Style guide: Giving your content creator a style guide can save you a lot of tinkering. This is essential for visuals but also important for written content if you don’t want to spend a lot of time changing “%” to “percent” or uncapitalizing job titles. Summarize the key points or most common errors.
- Examples: Examples aren’t just good for tone of voice; they’re also handy for layout and design to demonstrate how you expect a piece of content to be submitted. This is especially handy if your template includes social media posts, meta descriptions, and so on.
All the elements in a documented brief
Here are nine basic things every single brief requires:
- Title: What are we calling this thing? (A working title is fine so that everyone knows how to refer to this project.)
- Client: Who is it for, and what do they do?
- Deadline: When is the final content due?
- The brief itself: What is the angle, the message, and the editorial purpose of the content? Include here who the audience is.
- Specifications: What is the word count, format, aspect ratio, or run time?
- Submission: How and where should the content be filed? To whom?
- Contact information: Who is the commissioning editor, the client (if appropriate), and the talent?
- Resources: What blogging template, style guide, key messaging, access to image libraries, and other elements are required to create and deliver the content?
- Fee: What is the agreed price/rate? Not everyone includes this in the brief, but it should be included if appropriate.
Depending on your business or the kind of content involved, you might have other important information to include here, too. Put it all in a template and make it the front page of your brief.
Prepare your briefs early
It’s entirely possible you’re reading this, screaming internally, “By the time I’ve done all that, I could have written the damn thing myself.”
But much of this information doesn’t change. Well in advance, you can document the background about a company, its audience, and how it speaks doesn’t change. You can pull all those resources into a one- or two-page document, add some high-quality previous examples, throw in the templates they’ll need, and bam! You’ve created a short, useful briefing package you can provide to any new content creator whenever it is needed. You can do this well ahead of time.
I expect these tips will save you a lot of internal screaming in the future. Not to mention drink, yoga, and voodoo.
This is an update of a January 2019 CCO article.
HANDPICKED RELATED CONTENT:
Cover image by Joseph Kalinowski/Content Marketing Institute
MARKETING
Quiet Quitting vs. Setting Healthy Boundaries: Where’s The Line?

-

 WORDPRESS6 days ago
9 Best WooCommerce Multi Vendor Plugins (Compared)
-

 SEO6 days ago
Google March 2024 Core Update Officially Completed A Week Ago
-

 SEARCHENGINES6 days ago
Google March 2024 Core Update Finished April 19, 2024
-

 MARKETING5 days ago
Navigating the Video Marketing Maze: Short-Form vs. Long-Form
-
![The Current State of Google’s Search Generative Experience [What It Means for SEO in 2024] person typing on laptop with](https://articles.entireweb.com/wp-content/uploads/2024/04/The-Current-State-of-Googles-Search-Generative-Experience-What-It.webp-400x240.webp)
![The Current State of Google’s Search Generative Experience [What It Means for SEO in 2024] person typing on laptop with](https://articles.entireweb.com/wp-content/uploads/2024/04/The-Current-State-of-Googles-Search-Generative-Experience-What-It.webp-80x80.webp) MARKETING6 days ago
MARKETING6 days agoThe Current State of Google’s Search Generative Experience [What It Means for SEO in 2024]
-

 SEO7 days ago
Google Declares It The “Gemini Era” As Revenue Grows 15%
-
SEARCHENGINES5 days ago
Daily Search Forum Recap: April 26, 2024
-

 WORDPRESS6 days ago
New WordPress.com Themes for April 2024 – WordPress.com News


